
In this gearupwindows guide, we’ll show you how to change the Account Lockout Duration in Windows 11 using both Group Policy and Command Prompt.
Microsoft has added a new account lockout policy in Windows 11 to protect against password brute‑force attacks. This feature is available starting with Insider build version 22H2. Other Windows 11 users will get it with future updates.
When someone tries to access your account—either locally or remotely—after ten failed login attempts, Windows will block the account for 10 minutes. This includes the built‑in Administrator account.
By default, the lockout time is set to 10 minutes, but you can adjust this between 1 and 99,999 minutes. Setting the value to 0 keeps the account locked until an admin manually unlocks it.
How to Change Account Lockout Duration in Windows 11 using Group Policy?
To modify the lockout duration policy using Group Policy, use the following steps:
Step 1. Open Local Group Policy Editor.
Step 2. In the left sidebar, navigate to:
Computer Configuration > Windows Settings > Security Settings > Account Policies > Account Lockout Policy
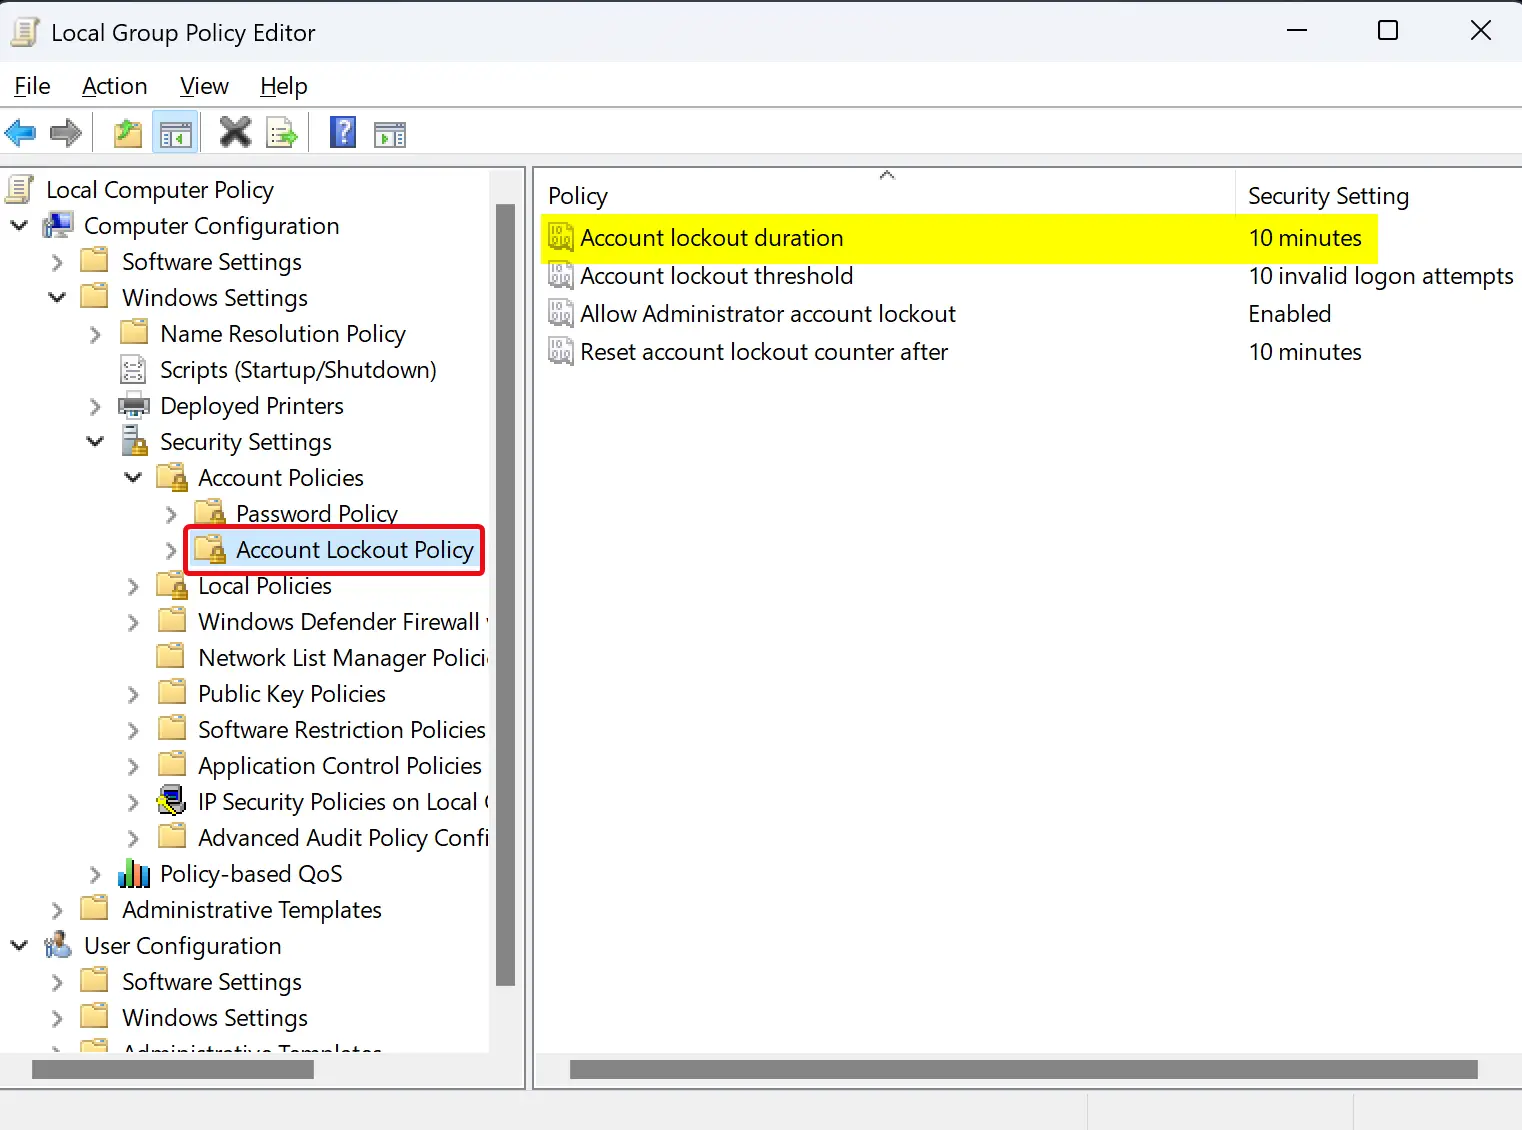
Step 3. On the right side, double‑click Account lockout duration.
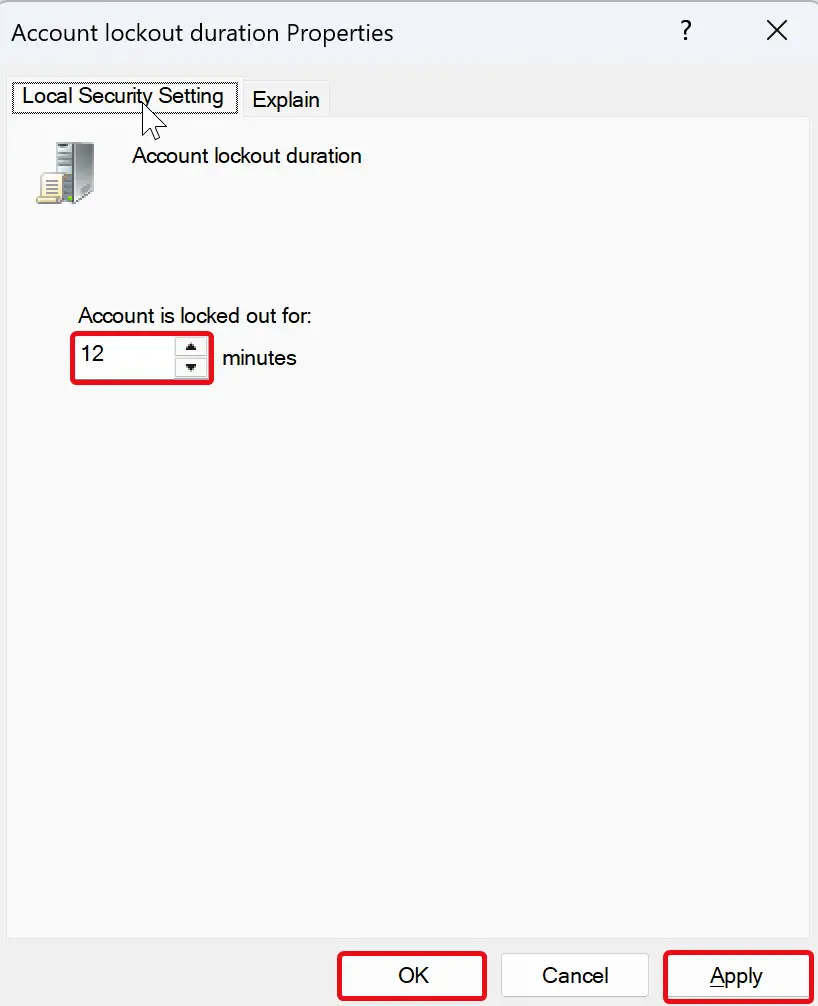
Step 4. Under the Local Security Setting tab, enter the desired lockout duration in minutes for the Account is locked out for option.
Step 5. Click Apply.
Step 6. Click OK.
Step 7. Restart your computer to apply the new settings.
After applying these changes, if someone enters the wrong password 10 times, the account will lock for the duration you’ve set.
How to Change Account Lockout Duration in Windows 11 through Command Prompt?
If you prefer the command‑line method, follow these steps:
Step 1. Open an elevated Command Prompt.
Step 2. To view the current lockout duration, type the following command and press Enter:
net accounts
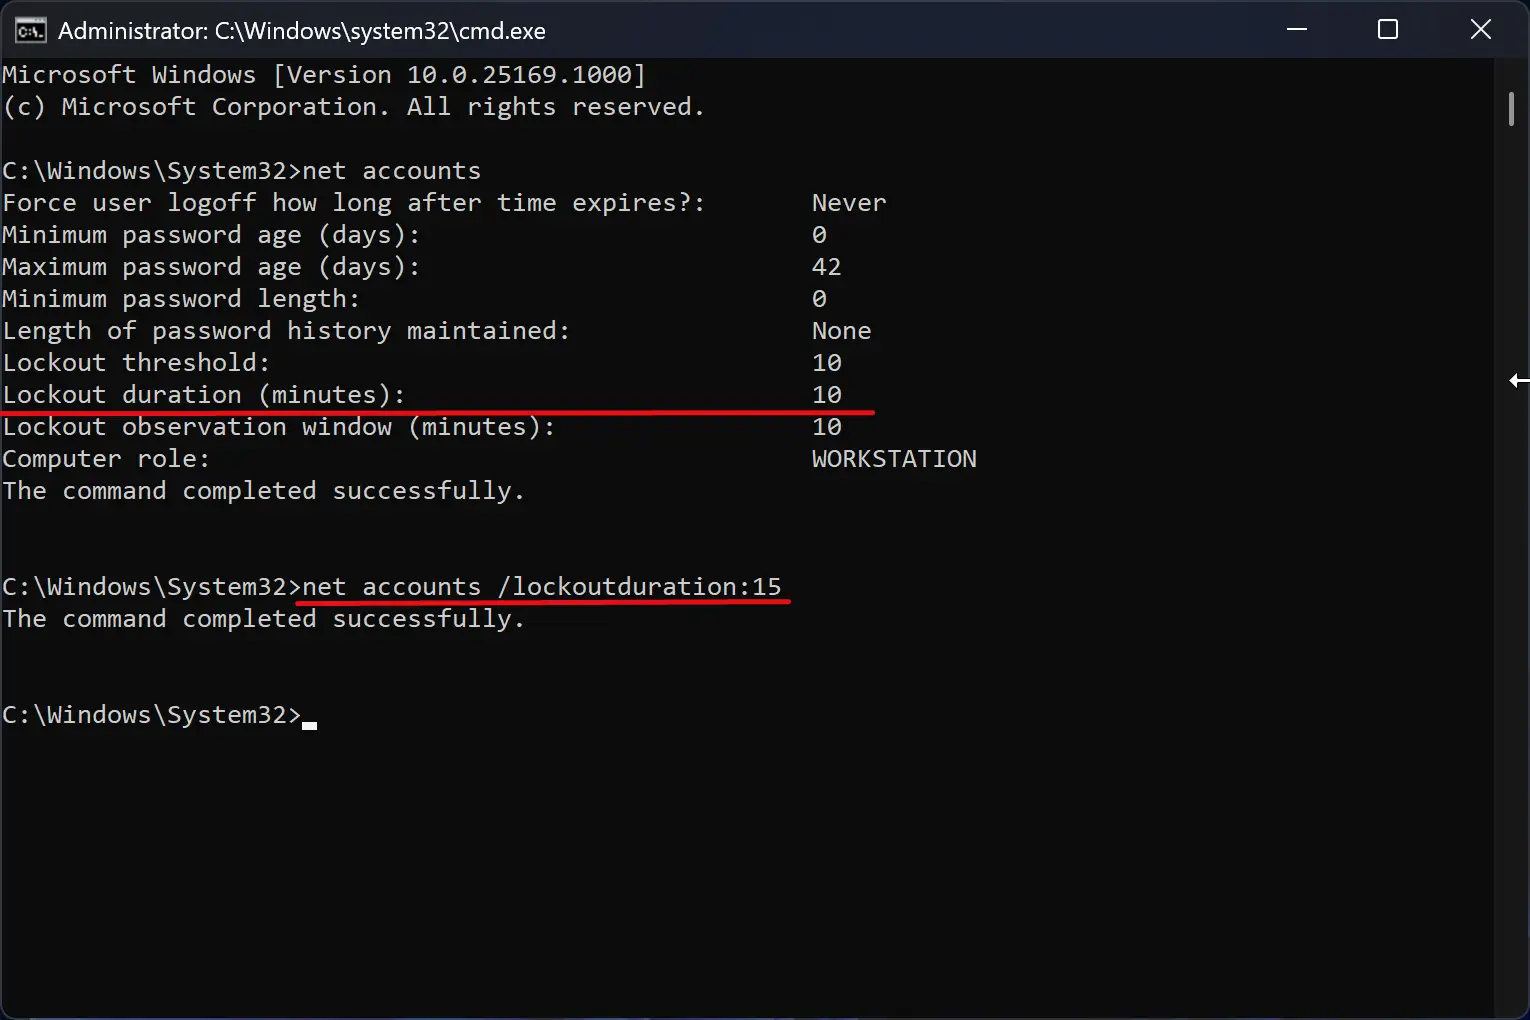
Step 3. To change the lockout duration, use this command:
net accounts /lockoutduration:<number>
Note: Replace <number> with a value from 0 to 99999. For example, to set a 15‑minute lockout, use:
net accounts /lockoutduration:15
Conclusion
Microsoft’s updated account lockout policy in Windows 11 helps protect against unauthorized access by locking user accounts—including the built‑in Administrator—after multiple failed login attempts. You can easily customize the duration using either Group Policy or Command Prompt.
For more account security options, you may also explore how to enable or disable a user account in Windows 11 or learn how to sign into Windows 11 automatically without a password if you’re on a secure device.