
By default, Windows 11/10 includes files and folders in search results. The operating system indexes files and folders and keeps the data updated whenever changes occur. However, it is possible to exclude specific files and folders from appearing in search results.
While this feature is useful, some users may prefer not to have everything searchable—especially if they want to keep certain files or folders private. In such cases, you can hide specific folders from being indexed by Windows Search.
Both Windows 11 and Windows 10 allow you to exclude folders from search indexing, though the steps differ slightly between the two versions. In this guide, we’ll walk you through the process for each.
How to Hide Files and Folders from Search Results in Windows 11?
To hide files and folders from Search results in Windows 11, use these steps:-
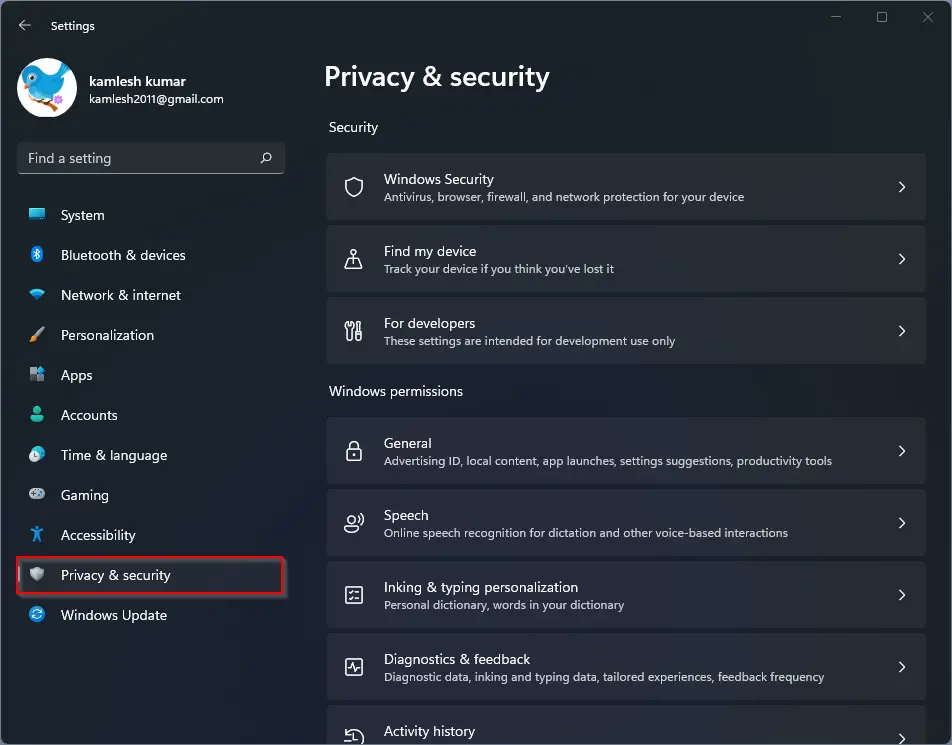
Step 1. Open the Windows Settings by pressing the Windows + I keys on the keyboard.
Step 2. Press the Privacy & Security category from the left sidebar on the Settings page.
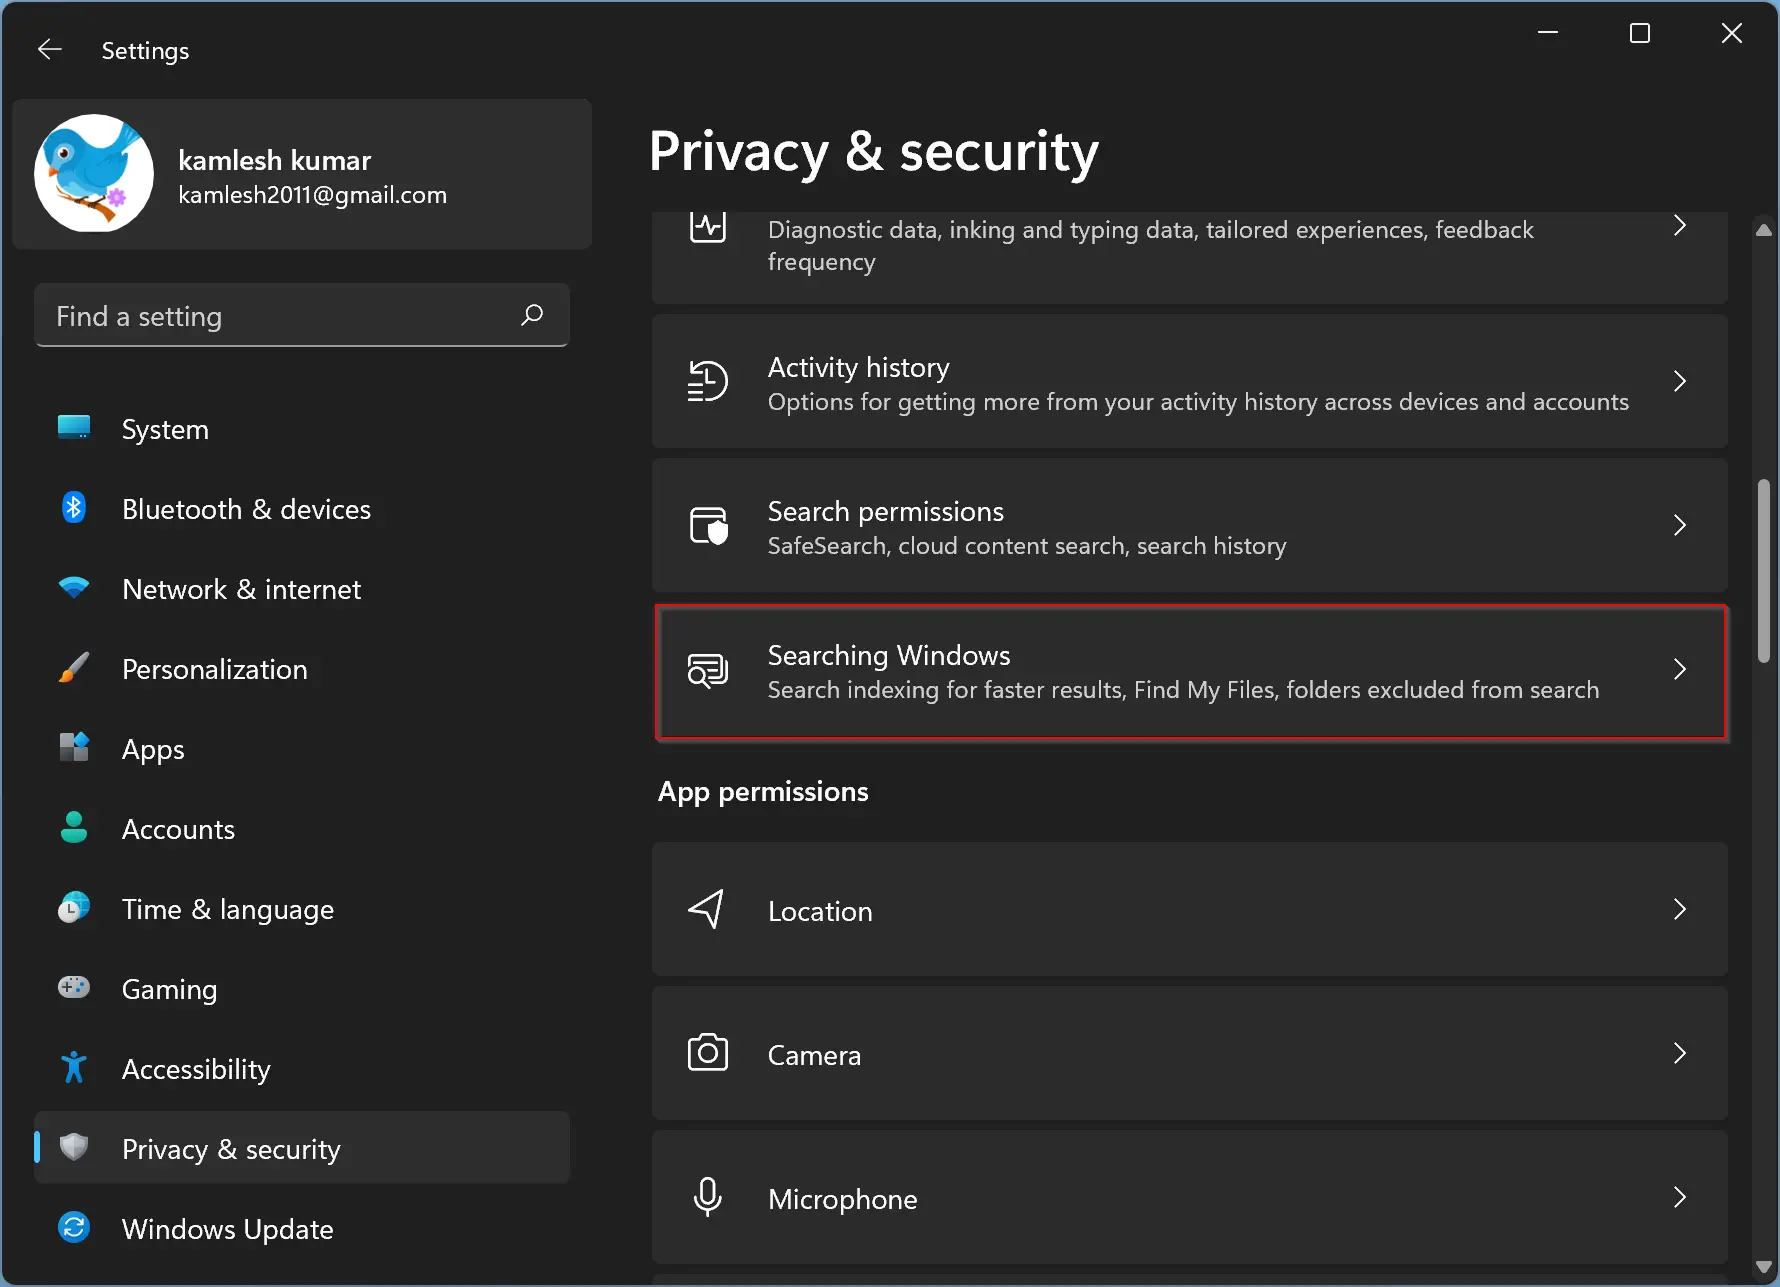
Step 3. Scroll down and click on the Searching Windows tab on the right-side pane.
Step 4. At the top of the page, you can see the indexing status available in search results.
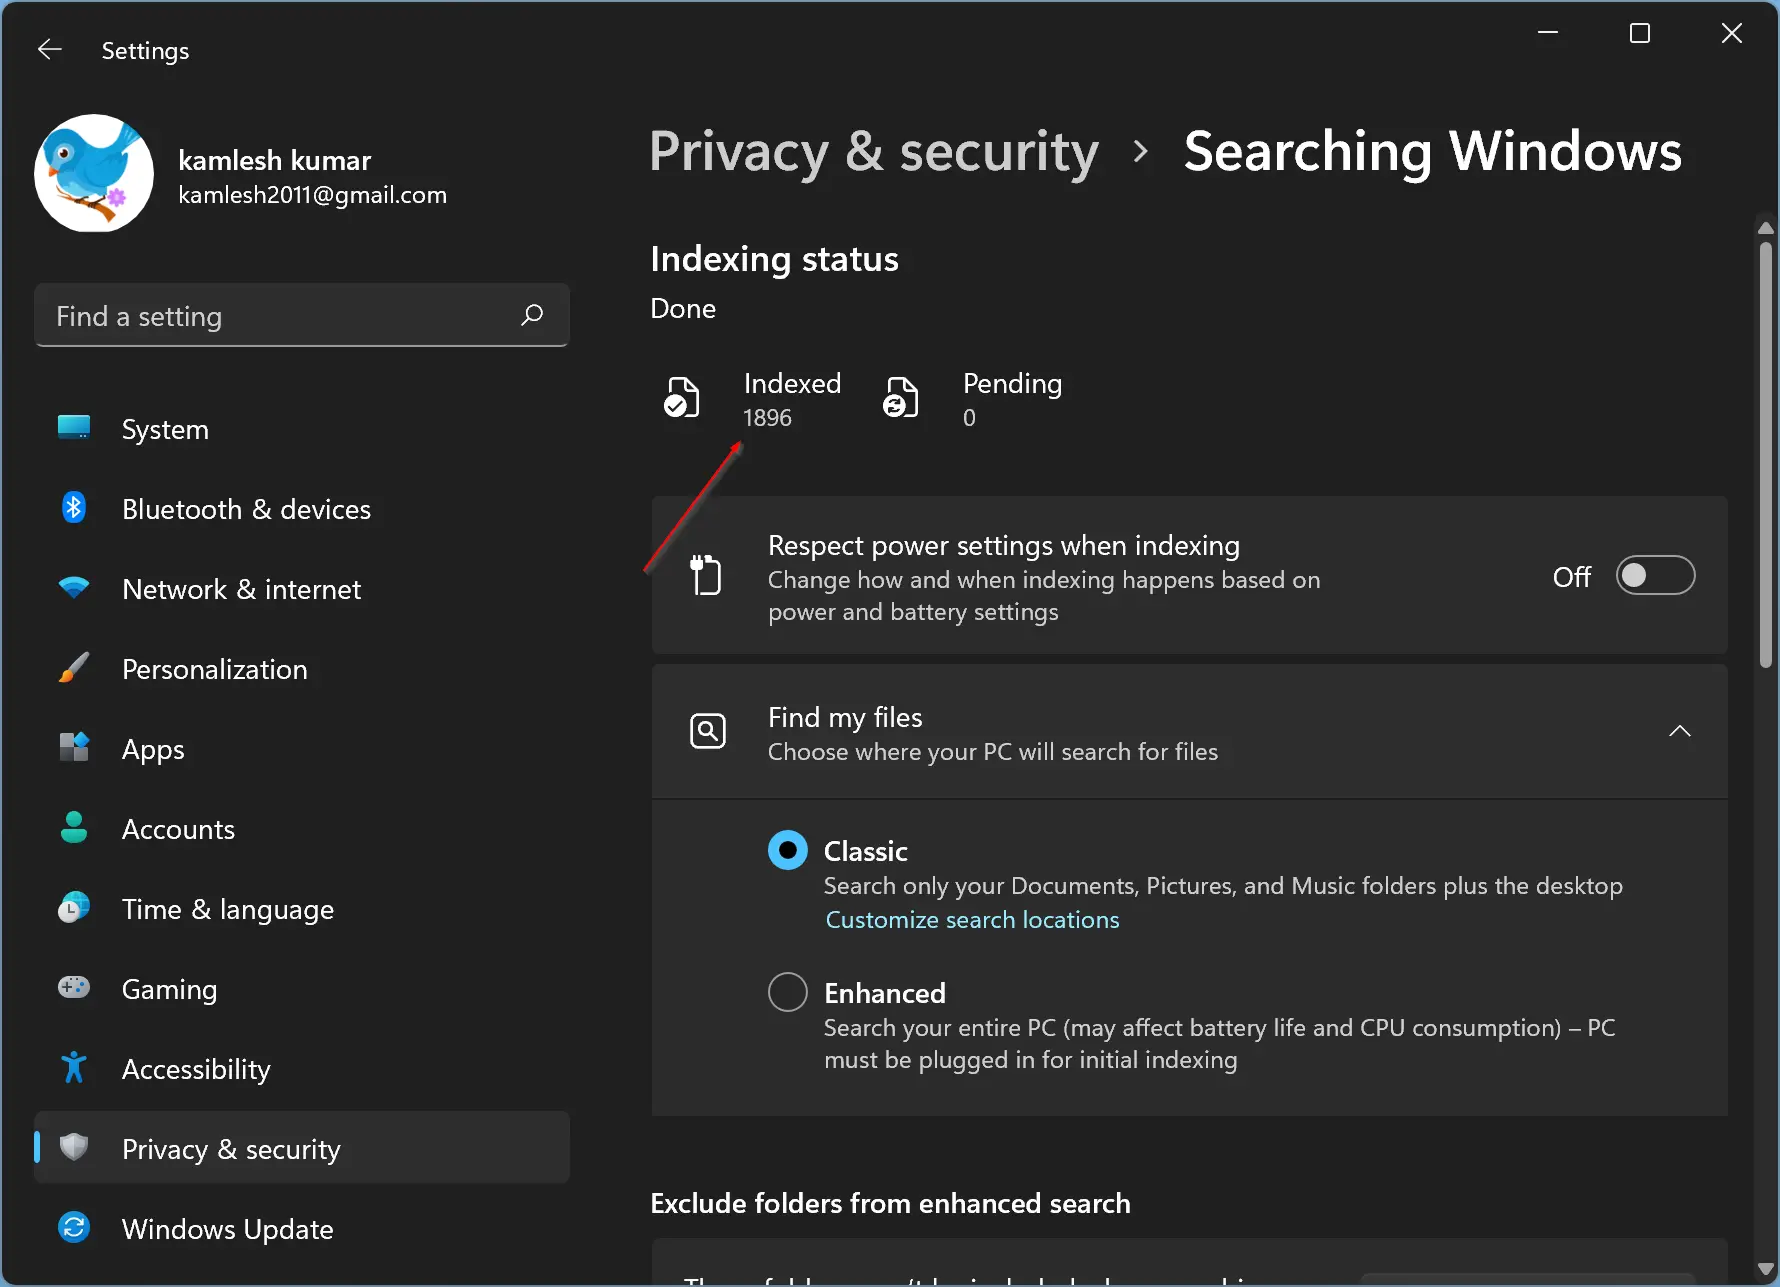
Sep 5. Scroll down to find the Exclude folders from enhanced search section. Here, you will see that a few system folders are already in the excluded list. To add more folders, click on the Add an excluded folder button next to “These folders won’t be included when searching your PC.”
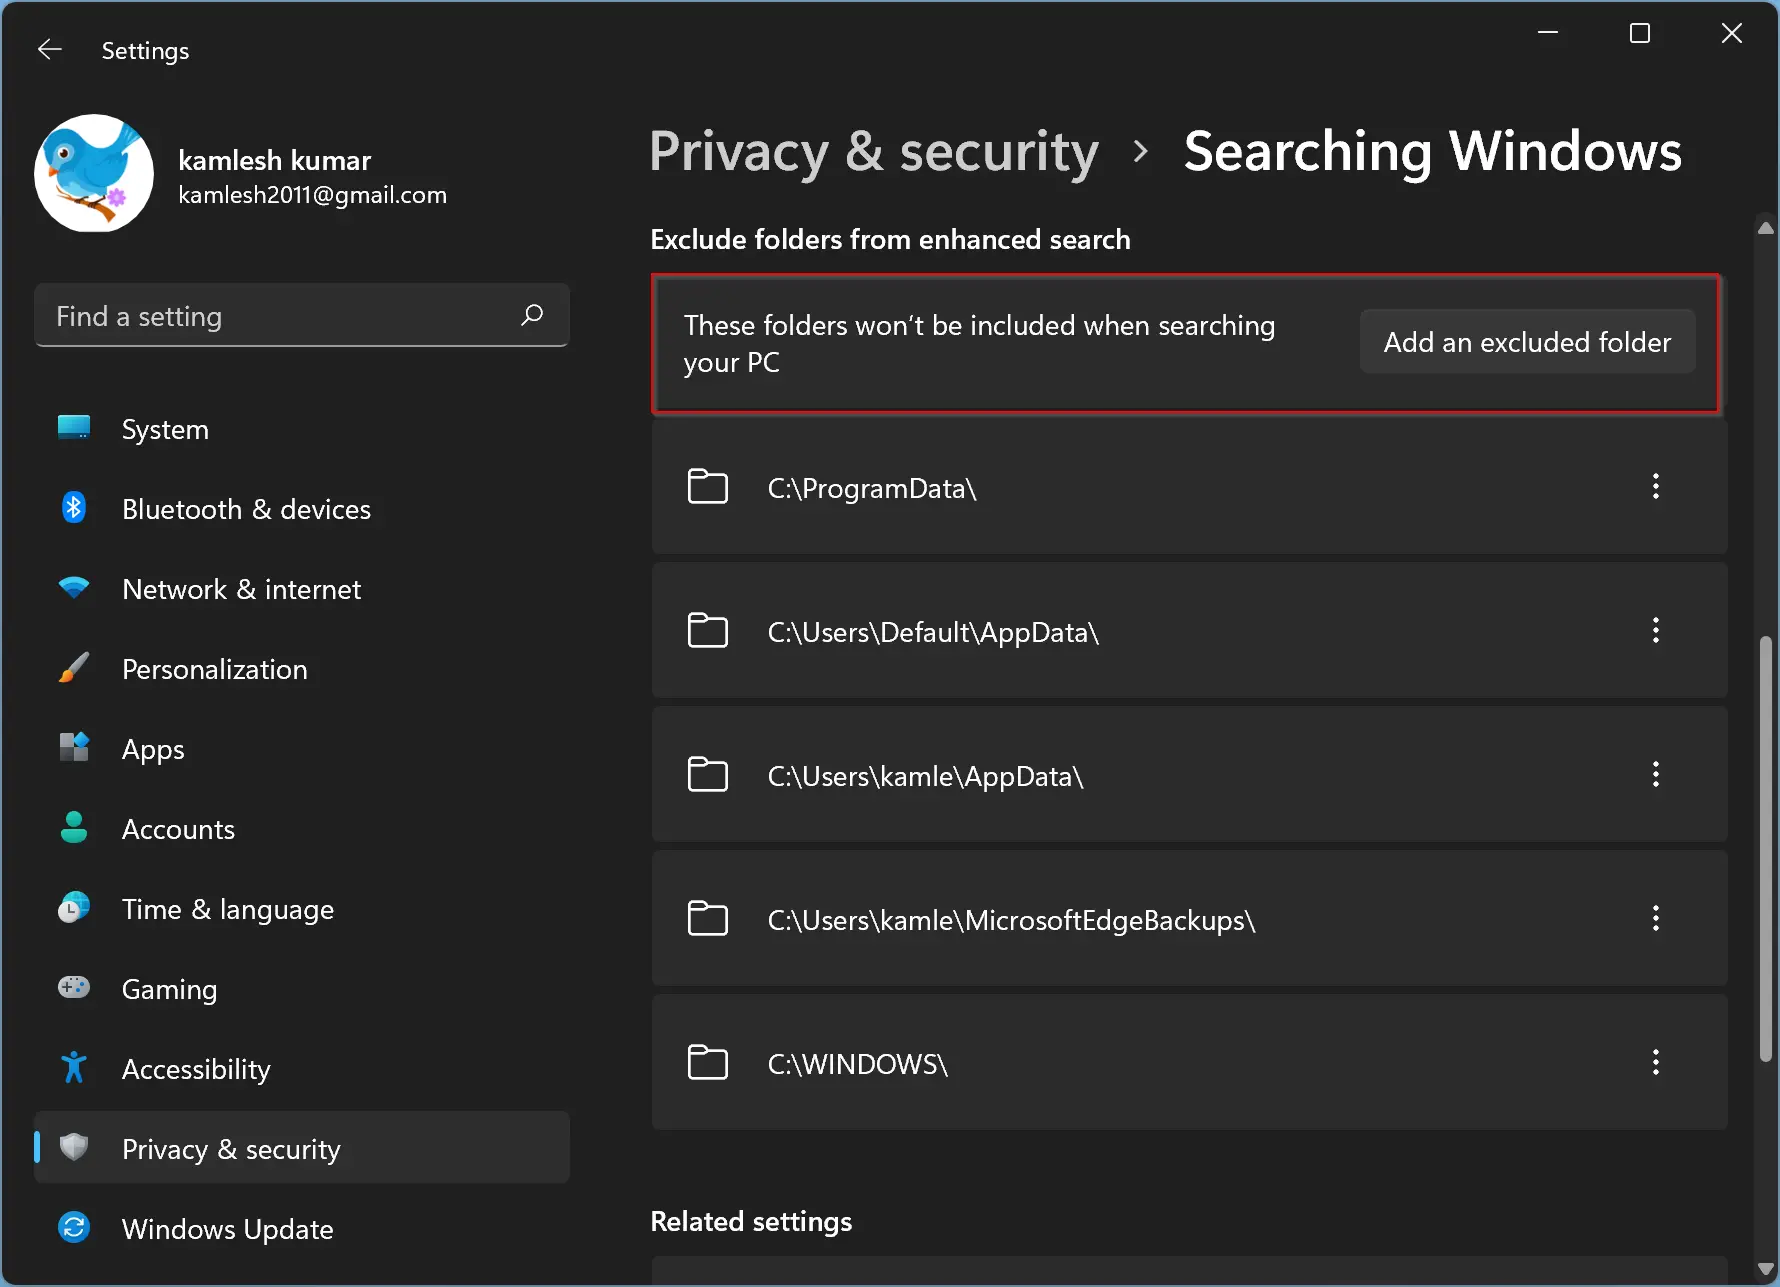
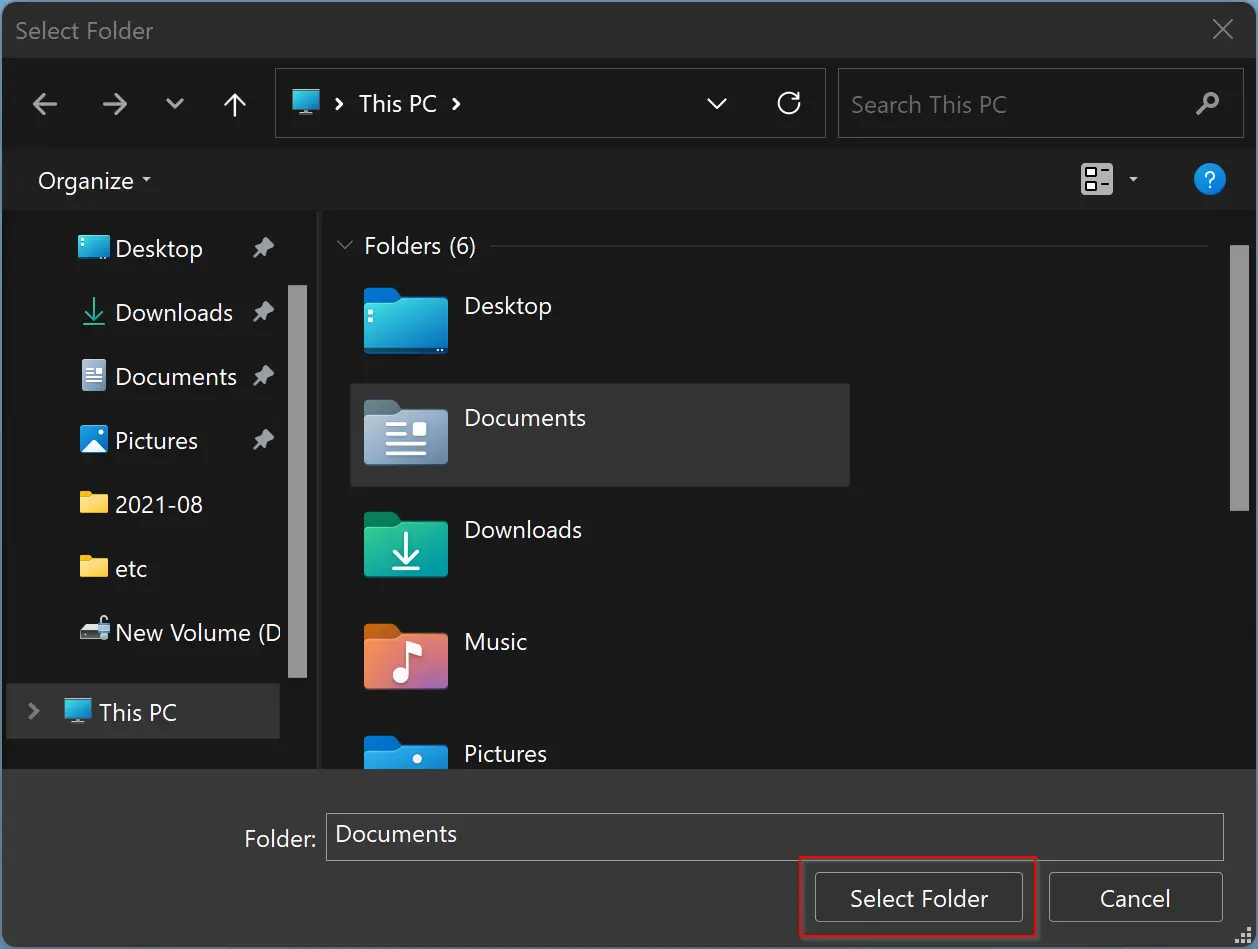
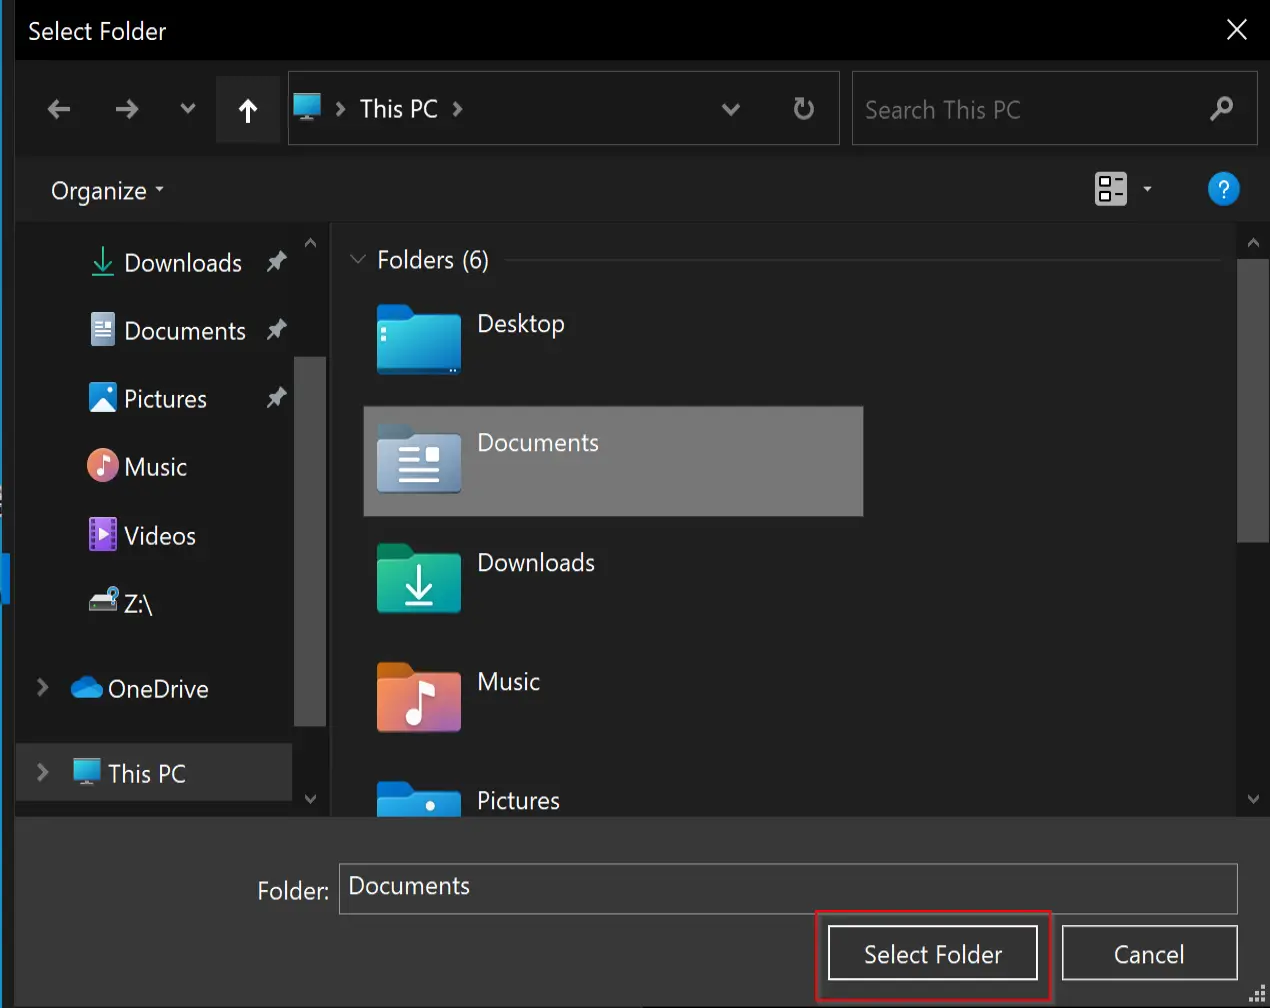
Step 6. Now, File Explorer will open, click on the folder you want to hide from the search results, and then press the Select Folder button.
That’s it. The selected folder is now included in the exclusion list of Windows searches. The folders within the exclusion list and files under that will be invisible from the Windows search.
How to Exclude Files and Folders from Search Results in Windows 10?
Like Windows 11, you can also hide specific folders and files within that folder on Windows 10. For that, do the following:-
Step 1. Open the Settings app.
To do that, click the Start button and then select the Settings icon on the left.
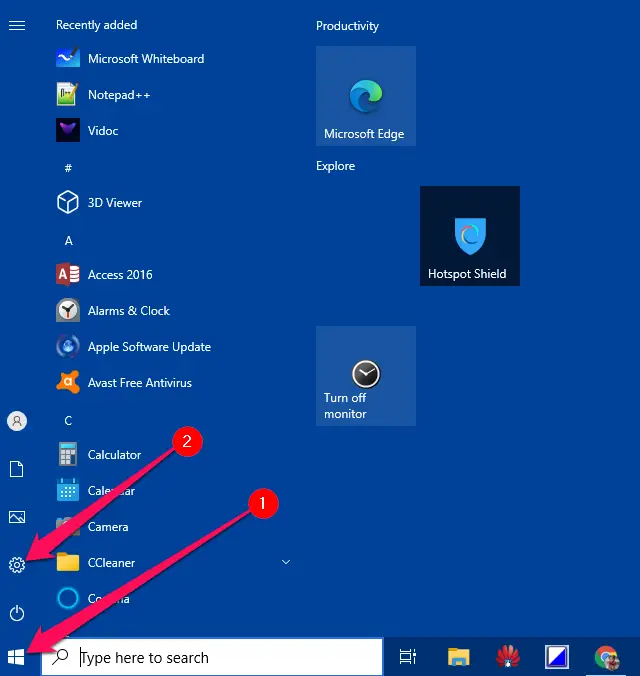
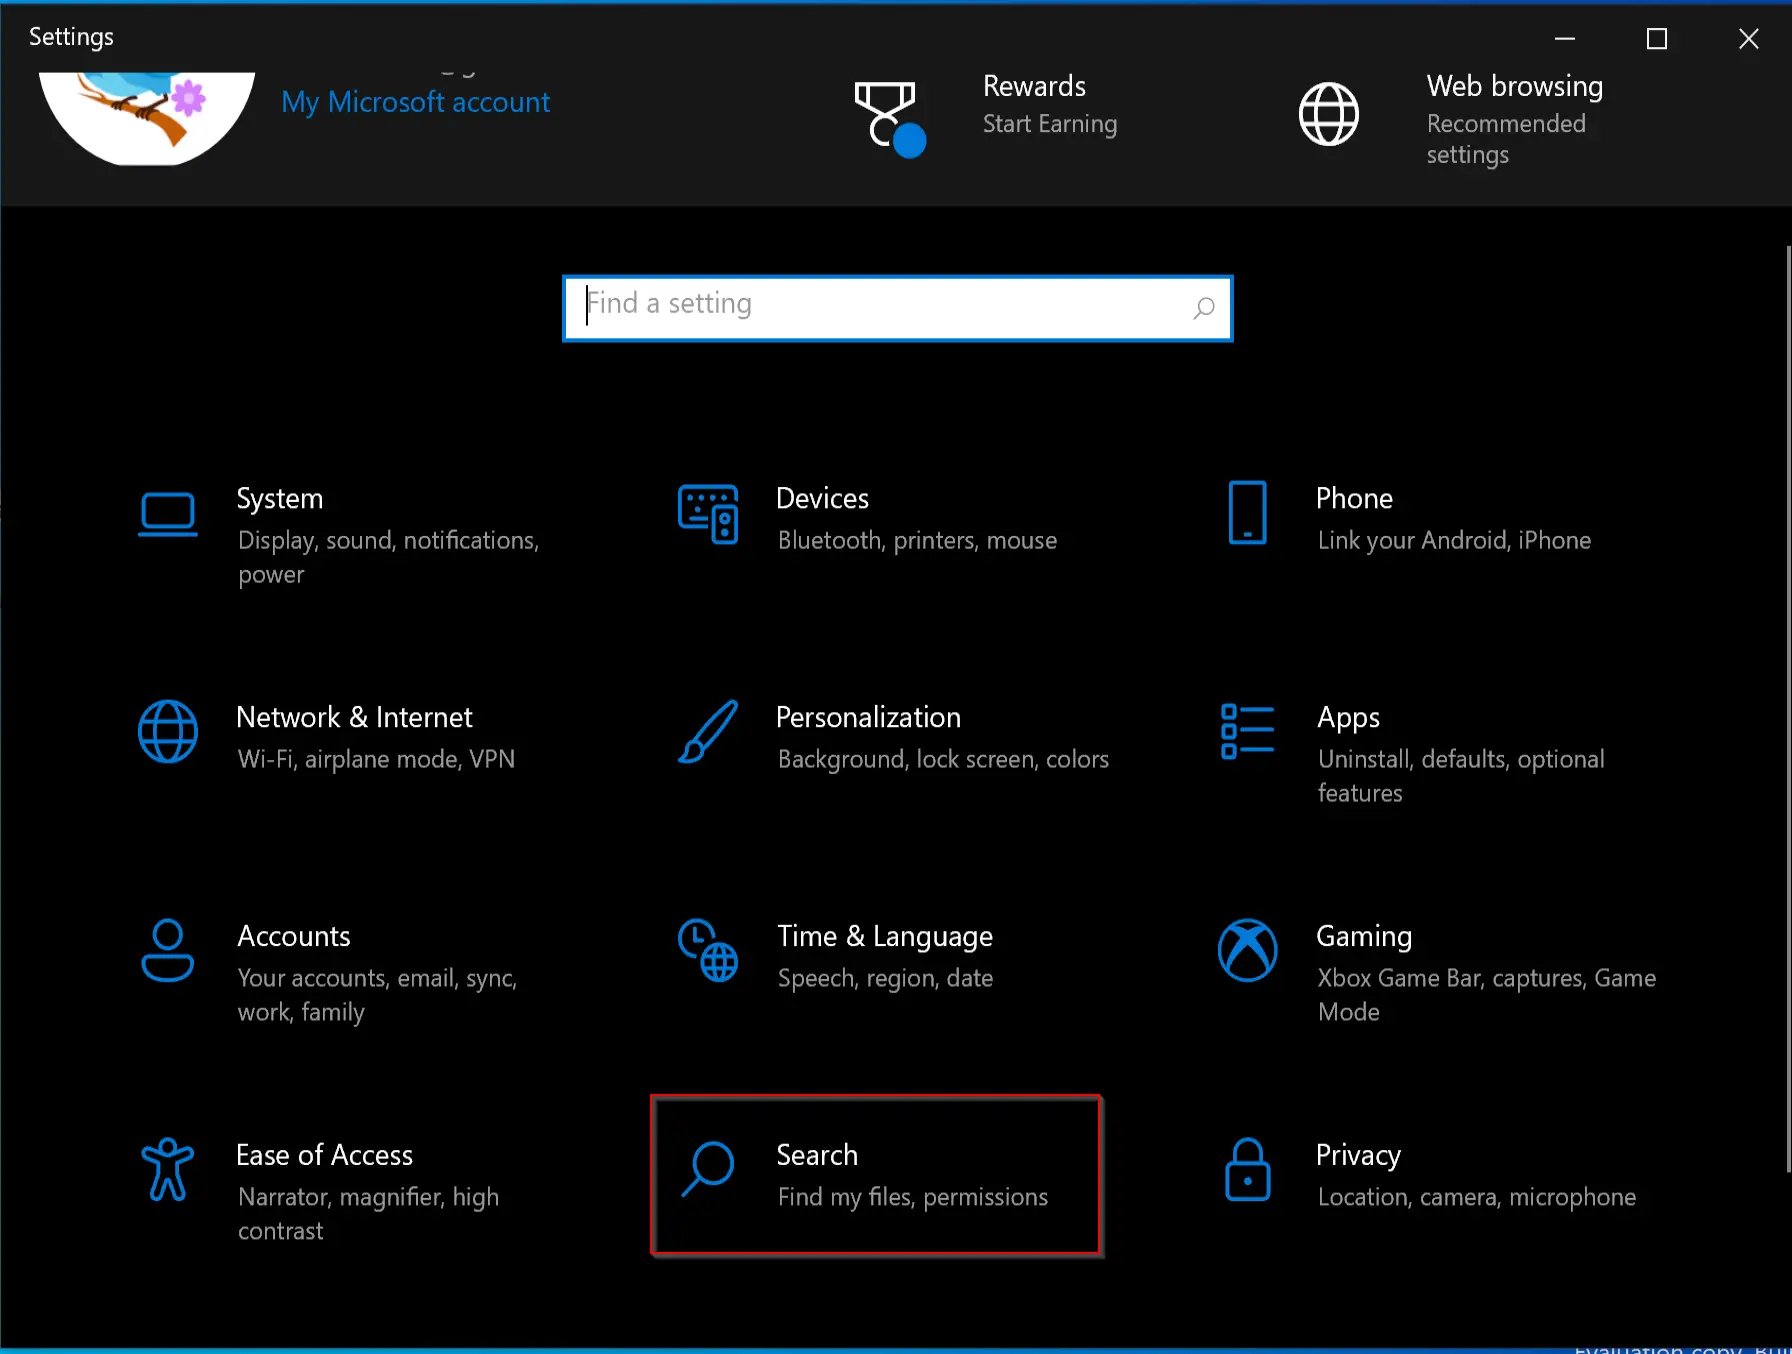
Step 2. Click on the Search category on the Settings app.
Step 3. Next, click on the Searching Windows tab from the left sidebar.
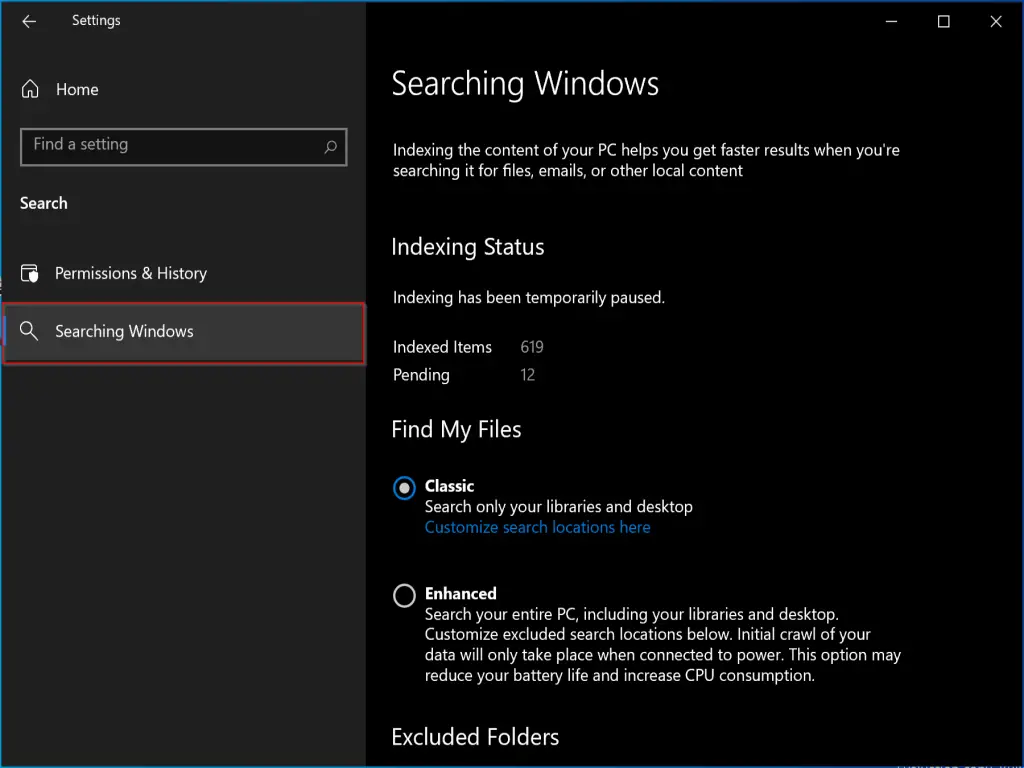
Step 4. On the right-side pane, you can view the indexing status. Scroll down to the “Excluded Folders” section. Click the Add an excluded folder button.
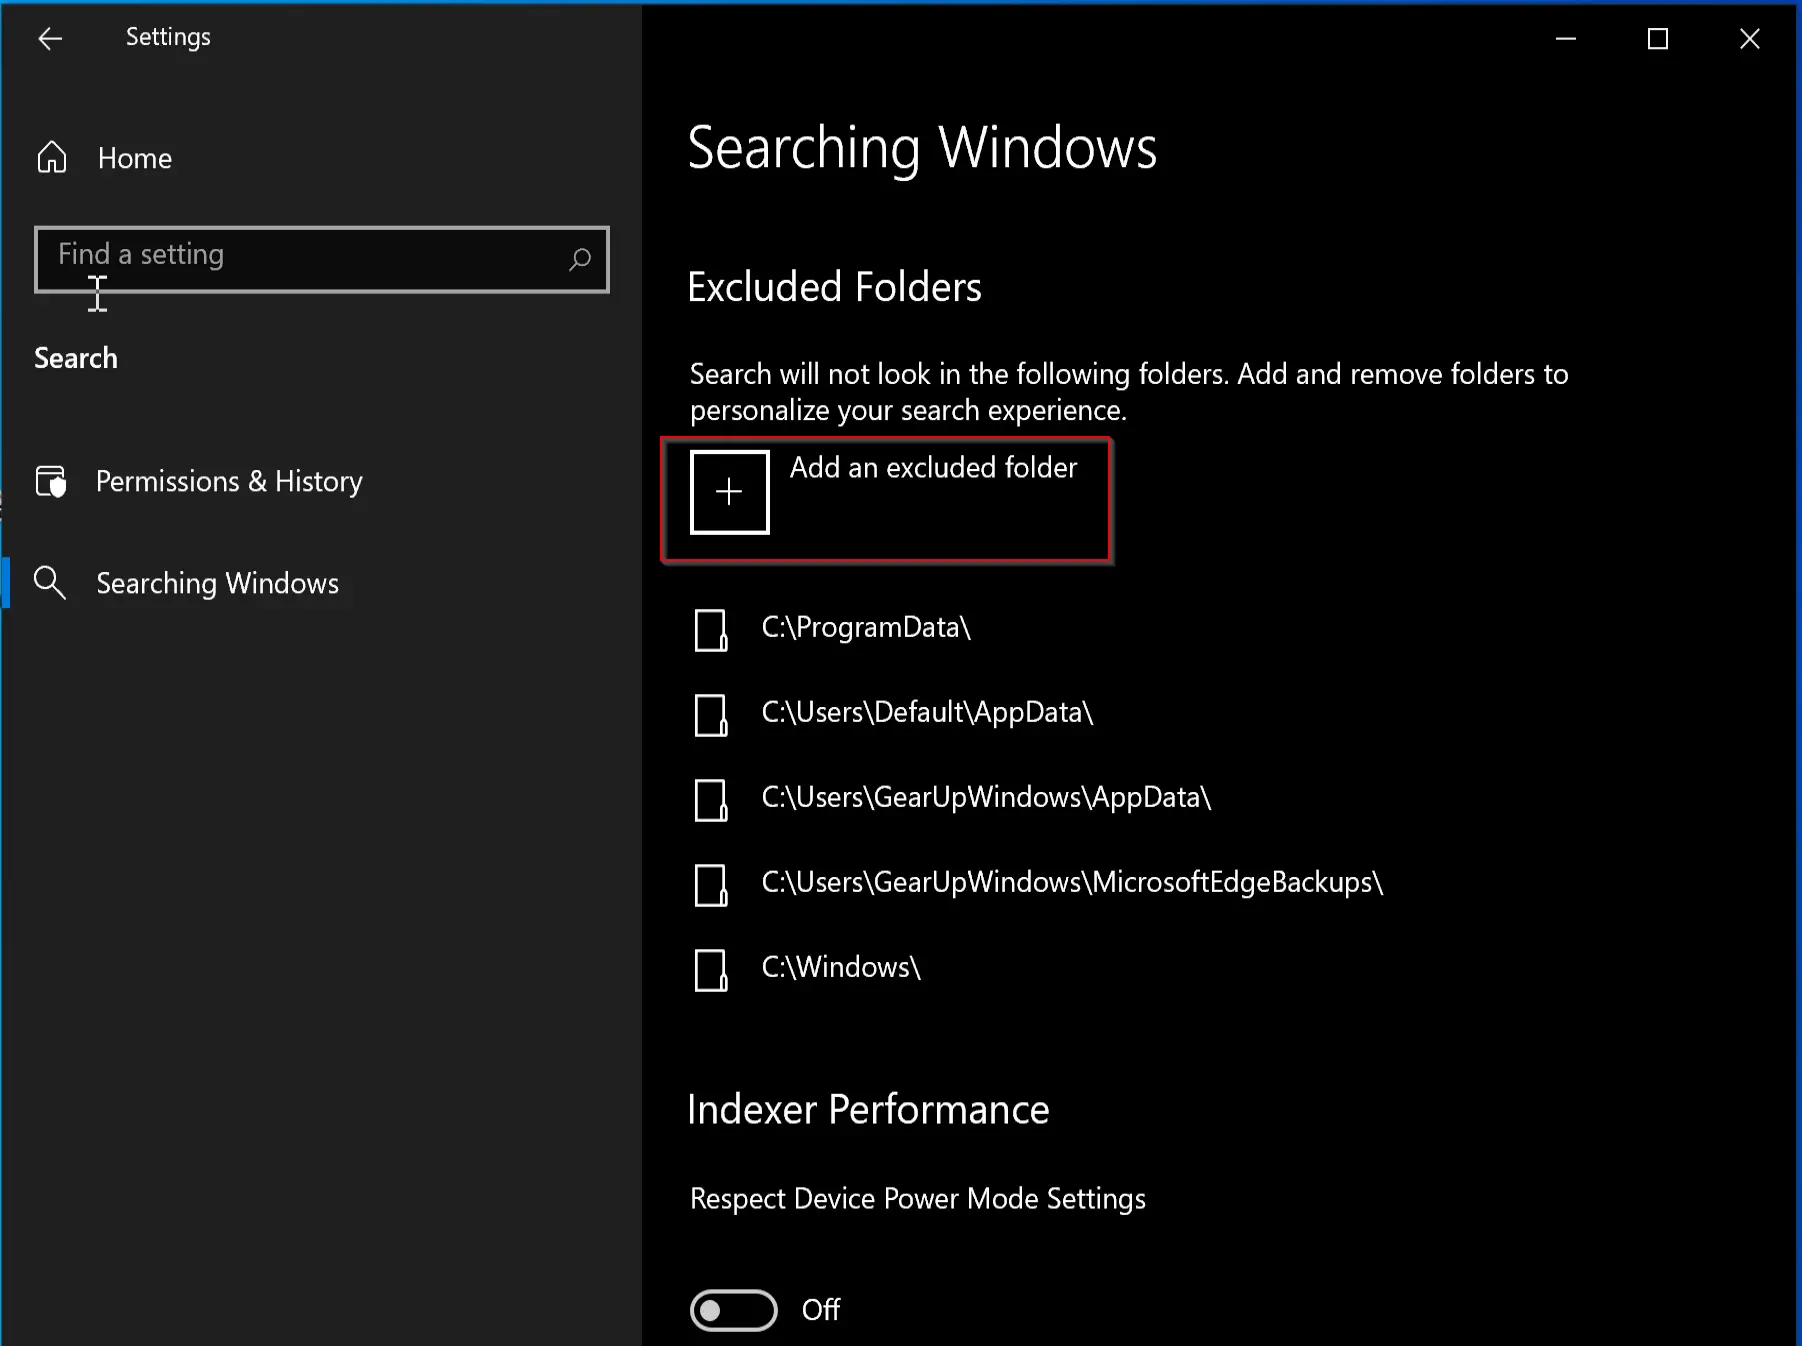
Step 5. Now, the File Explorer window will open. Select a folder that you would like to exclude or hide from Windows Search. Then, click the Select Folder button.
Now, the desired folder is added to the exclusion list. That means this folder and its contents will not be available in Windows search.
Conclusion
In conclusion, excluding files and folders from search results on Windows 11 and Windows 10 is a simple process that can be completed within a few clicks. Although the built-in feature in Windows syncs and indexes all files and folders on the PC, it is possible to hide specific folders from being viewed by someone. By following the steps mentioned above, users can add folders to the exclusion list, and those folders and their contents will be invisible from Windows search. This feature is particularly helpful for users who value their privacy and want to hide certain files or folders from being easily accessible.
Not sure this is complete or even works. Other sites include the instructions to rebuild the index (advanced options), but even that no longer works (Feb 2022)