
Do you want to share your Windows laptop’s internet connection with other devices using Wi-Fi? Starting with Windows 10, Microsoft introduced a built-in tool that allows users to turn their computers into Wi-Fi hotspots. This feature continues in Windows 11, enabling users to easily turn their laptops into Wi-Fi hotspots without the need for third-party tools.
This mobile hotspot feature is extremely useful in situations where users are limited to a single Wi-Fi login or use a wired Ethernet connection. In such cases, smartphones, tablets, or other Wi-Fi-enabled devices may not be able to access the internet without activating additional internet connections—which can be costly. Thankfully, with Windows 10 and 11, you can easily turn your computer or laptop with a Wi-Fi adapter into a hotspot—eliminating the need for a separate router or modem. This allows you to share a single internet connection across all your Wi-Fi devices and save on expenses.
How to Turn a Windows 11 PC into a Mobile Hotspot?
There are both free and paid applications online that can turn a PC into a Wi-Fi hotspot. However, if you’re using Windows 11, you don’t need to install any additional software to activate this feature. To enable the mobile hotspot feature on your Windows 11 PC or laptop, follow these simple steps:
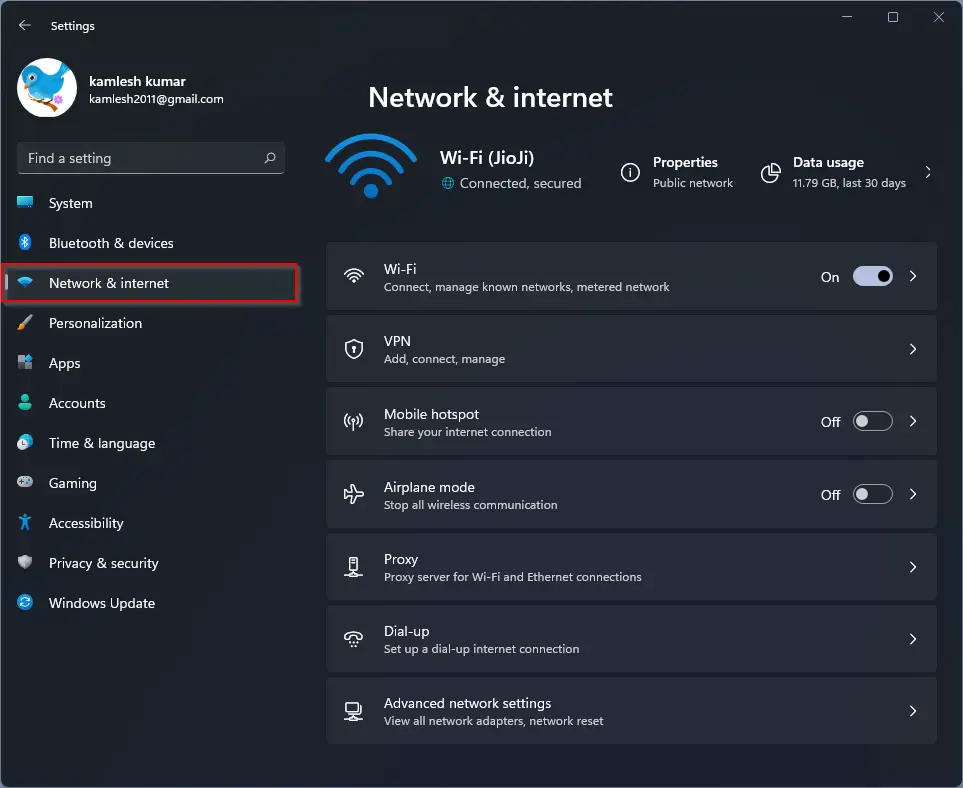
Step 1. Open the Settings app by pressing Windows + I keys, or use any other method. Then, click on the Network & Internet category from the left pane.
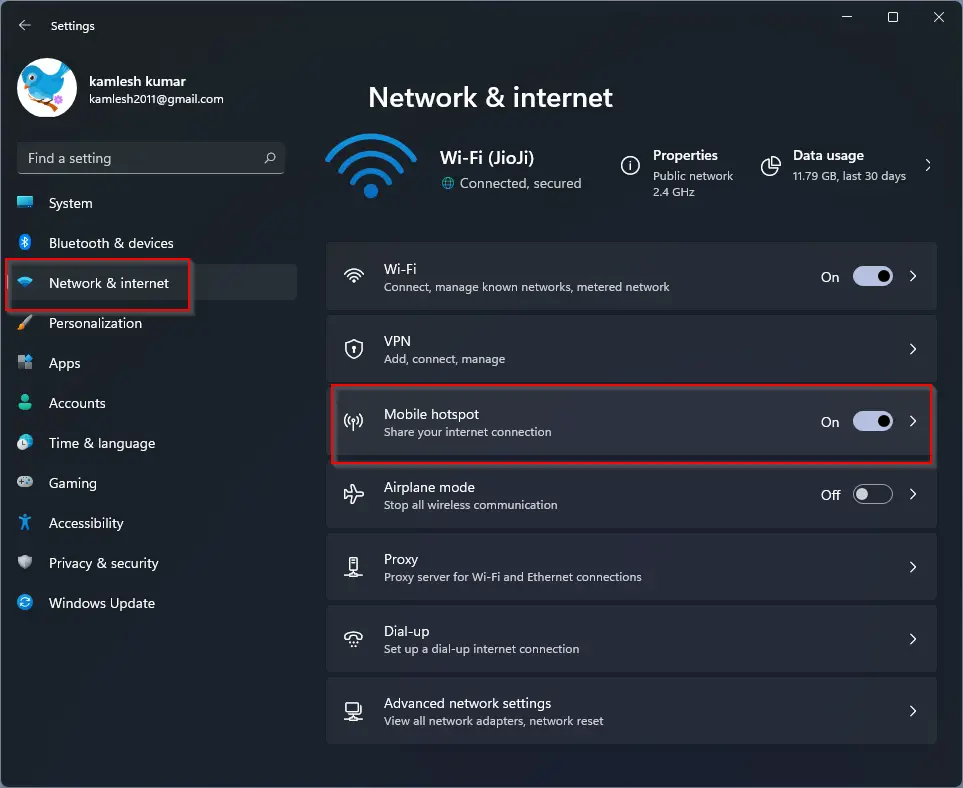
Step 2. On the right-hand side of the Network & Internet settings, toggle the switch next to Mobile hotspot to the On position. This action will start broadcasting the SSID. Then, click anywhere under the Mobile hotspot section to access more settings.
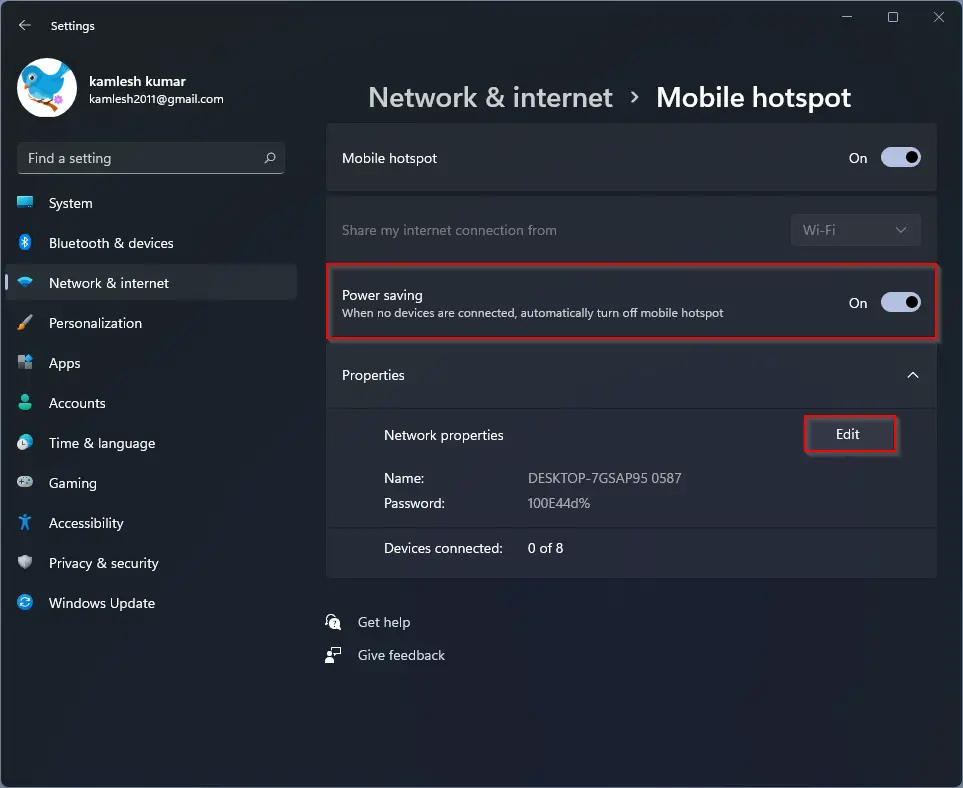
Step 3. Now, toggle on the Power saving option if desired. This feature will automatically turn off the mobile hotspot when no devices are connected. If you prefer to keep your hotspot always active, simply leave this option turned off. This is an optional setting based on your needs.
Next, you’ll want to configure your Network name and Password. Click the Edit button under the Properties section to do this.
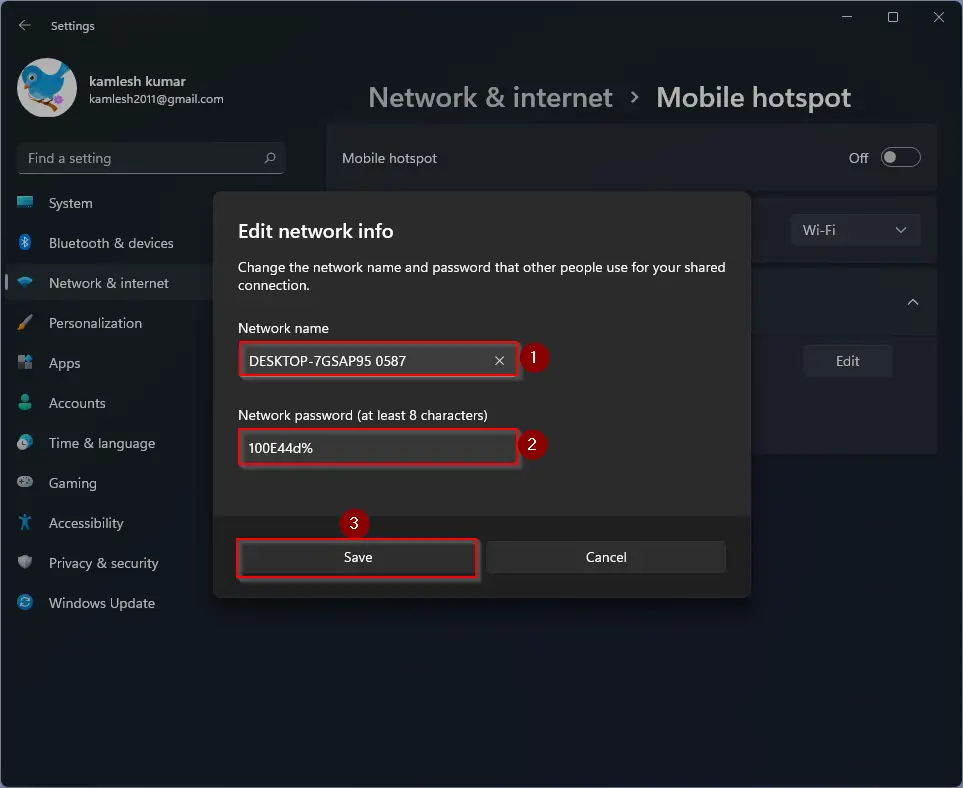
Step 4. In the Edit network info window, set a custom Network name. This will be the SSID visible to other devices. Then, create a strong Network password and click the Save button to apply your settings.
Once you’ve configured all the settings, you’re ready to share your internet connection. On the device you want to connect, turn on Wi-Fi, find your configured SSID from the list, enter the password, and enjoy internet access.
Conclusion
In conclusion, Windows 11 provides a convenient built-in feature that allows users to turn their laptops or PCs into mobile hotspots without any additional tools or apps. This is especially beneficial in scenarios where only one network login is available or the internet is accessed via Ethernet. By following the steps above, you can easily configure your hotspot settings and share your internet with multiple Wi-Fi-enabled devices. It’s a simple, cost-effective solution that removes the need for an extra router or modem.