
Most of us use the built-in hibernation feature to boot into Windows and resume our work quickly. By default, the hibernation feature is turned on in Windows 11/10, but it doesn’t appear in the power menu or power button. You can add the Hibernate option in Windows 10 with a few mouse clicks. Hibernate can also be enabled or disabled using a command-line utility.
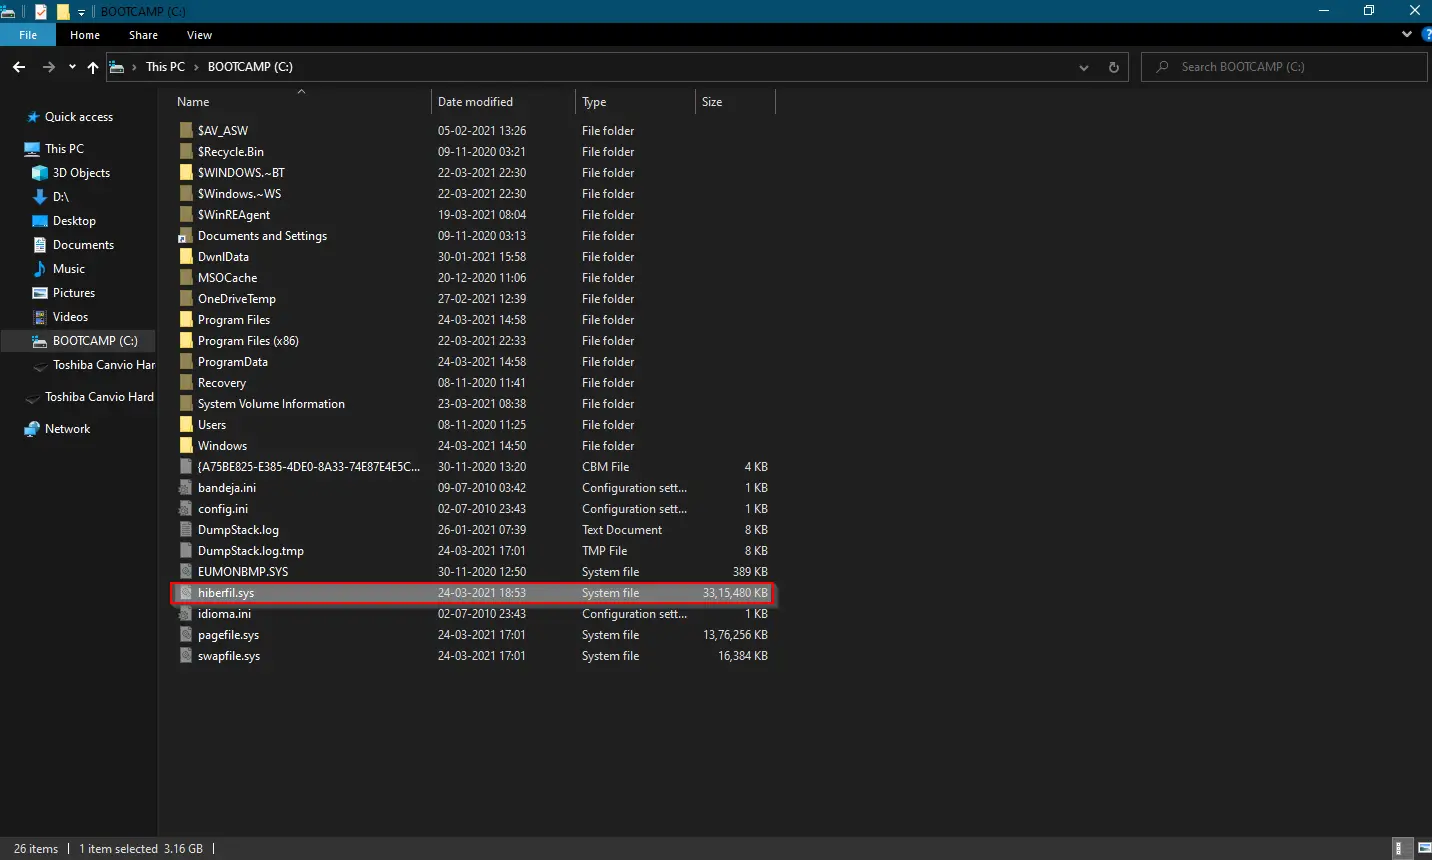
When you enable the hibernation feature in Windows, it creates a new file named hiberfil.sys in the root of your system drive (the drive where Windows is installed) to save the system state. This hidden system file is located in the drive’s root folder, and the Windows Kernel Power Manager reserves it during installation.
The size of this file is approximately 95% of the random access memory (RAM) installed on Windows 7/8 computers. However, in recent versions of Windows 11/10, Microsoft has reduced the hiberfil.sys file size to around 40% of the installed RAM. The system uses this file to store a copy of the system memory on the hard disk when hybrid sleep is enabled. If this file is missing, the computer won’t be able to hibernate.
For example, my PC has 8 GB of RAM, and the hiberfil.sys file is approximately 3.16 GB in size. If you’re running low on storage and don’t want to disable hibernation completely in Windows 10, you can reduce its size to free up some disk space. The default size of hiberfil.sys depends on the RAM installed on your PC.
You can reduce the file size of hiberfil.sys by executing a simple command in an elevated Command Prompt. In Windows 7, you can shrink the file size up to 50% of RAM. However, in Windows 10 and later, if you try to set the file size below 40%, Windows will automatically adjust it back to 40%.
On Windows 7, you can’t reduce the file size below 50% of the installed RAM. Also, in Windows 11/10, if you attempt to set it below 40%, the system will revert to 40% automatically.
How to reduce the Hibernation (hiberfil.sys) file size in Windows 11/10/8/7?
Follow these steps to reduce the Hibernation (hiberfil.sys) file size in Windows 11/10/8/7:-
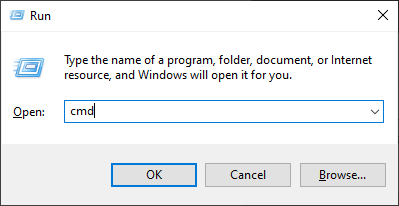
Step 1. Open an elevated Command Prompt window.
To do this, press the Windows logo + R keys to launch the Run dialog box. Type cmd in the Run box and then press Ctrl + Shift + Enter on the keyboard. This will open the Command Prompt with administrator privileges.
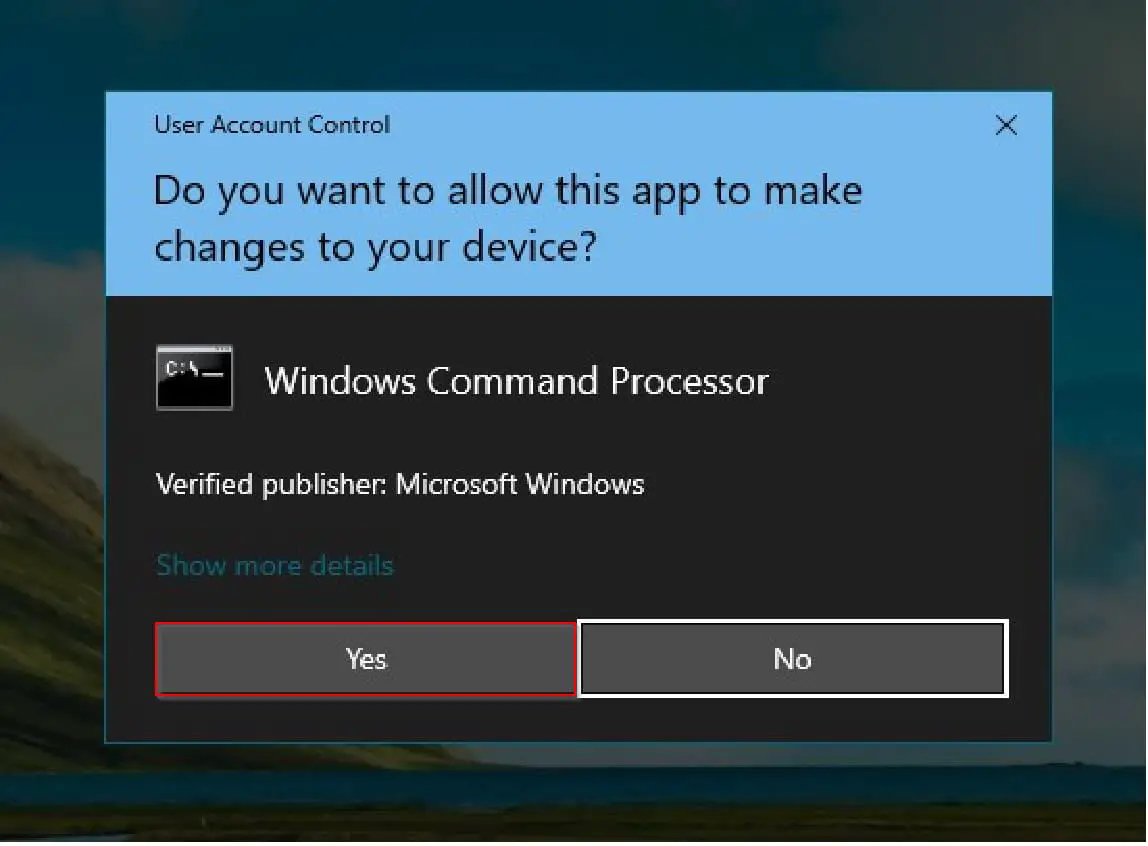
Step 2. If the User Account Control (UAC) window appears, click the Yes button.
For Windows 11/10/8
Step 3. In the elevated Command Prompt, type the following command and press Enter:-
Powercfg.exe /hibernate /size 50
In the above command, replace 50 with any value between 40 and 100. For example, to set the file size to 80%, use the following command:-
Powercfg.exe /hibernate /size 80

After running the command, the updated hiberfil.sys file will appear in the root directory of your system drive.
For Windows 7
For Windows 7, use the following command:-
Powercfg –h –size 50%
You can adjust the 50% value as needed. For example, to set the file size to 60%, run:
Powercfg –h –size 60%

After completing the steps, the new hiberfil.sys file will be available in the system drive’s root directory.
Conclusion
In conclusion, the hibernation feature is a handy tool in Windows 11/10/8/7 that allows you to save the system state and resume work quickly. It creates a hiberfil.sys file in the system drive, which stores a copy of the system memory. The file size depends on your PC’s RAM and can be reduced to save disk space. By using a simple command in the elevated Command Prompt, you can efficiently shrink the hibernation file size. Managing this file helps optimize disk usage and improve overall system performance.