
In this gearupwindows article, we’ll guide you with simple steps to sign in to Windows 11 automatically without a password. If you’re the only one using your PC at home, you don’t need to type your password each time you start or restart your machine. I use my laptop at home, so I never felt the need to secure it with a password. However, if you have valuable data, use a strong password to keep it safe.
Each user’s needs differ. One option is creating a local account without a password. That works, but fails if you have multiple accounts or use a Microsoft account to sync apps and settings.
Also Read: How to enable “Automatically sign in” in Windows 10?
When you use a Microsoft account to sign in to Windows 11, it enforces a password or PIN. To set up automatic login, you must disable Windows Hello and follow extra steps. You can do this via a Control Panel applet or a Registry tweak.
How to “Automatically sign in” in Windows 11/10 using Microsoft AutoLogon?
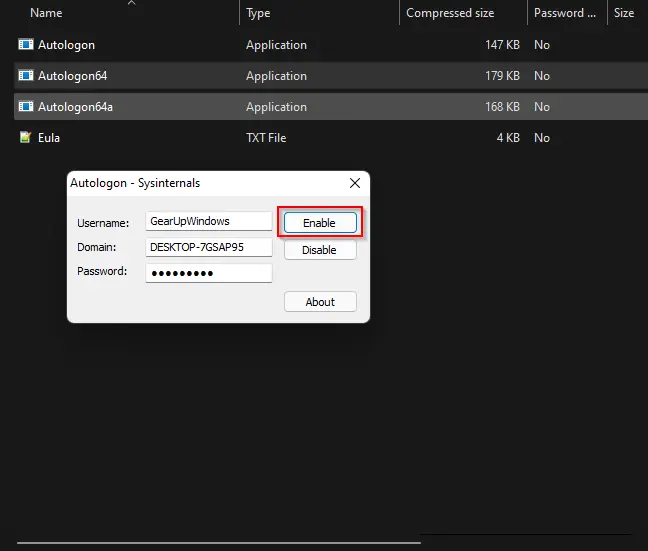
AutoLogon is a lightweight tool from Microsoft that enables auto sign-in. It stores your encrypted credentials in the registry. If you prefer a quick setup without registry work, this is a solid choice. You can enable or disable auto sign-in instantly.
To use AutoLogon on Windows 11:
Step 1. Download AutoLogon from the Microsoft Sysinternals site.
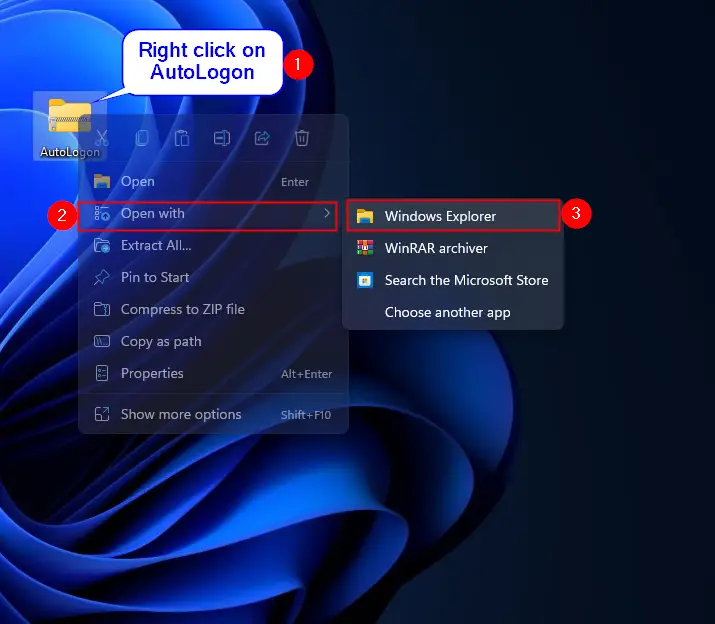
Step 2. Right-click the ZIP file and select Open with > Windows Explorer.
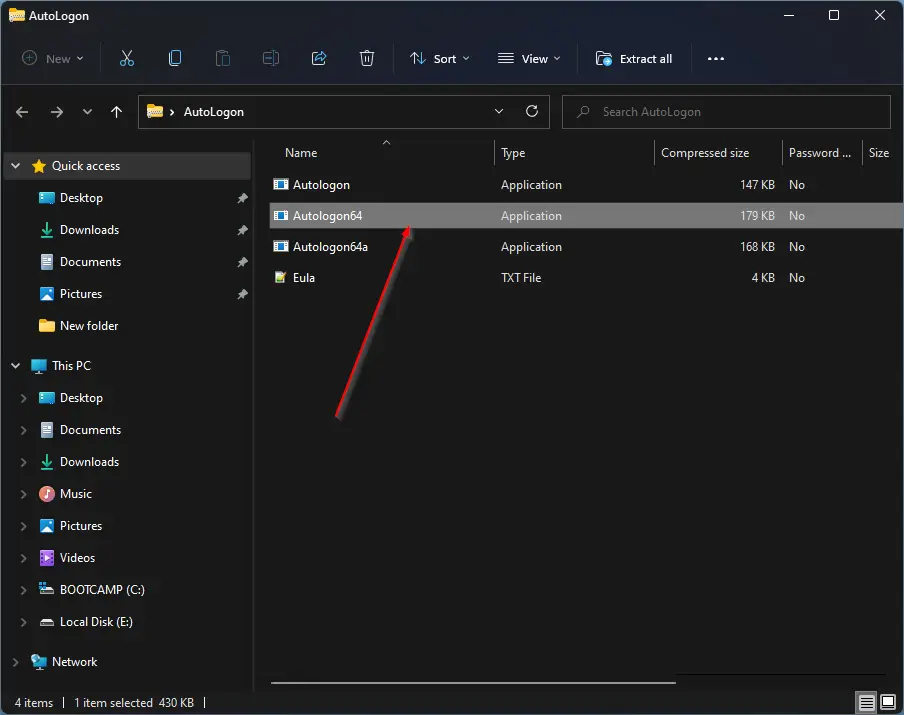
Step 3. Double-click Autologon64.exe.
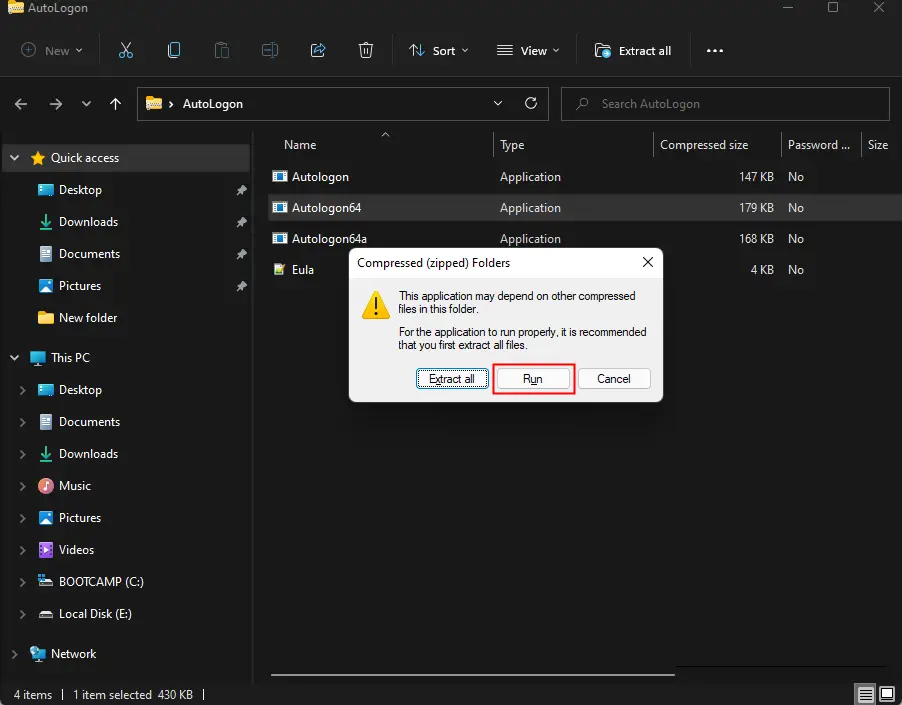
Step 4. Click Run.
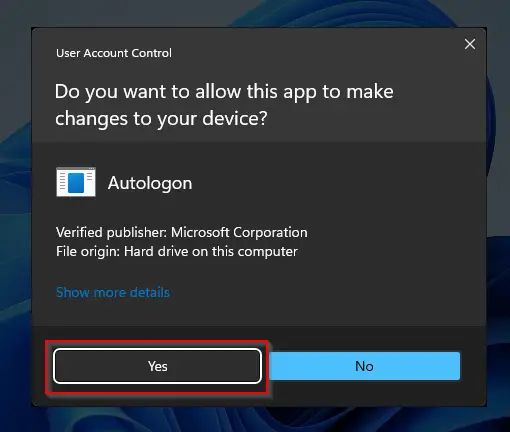
Step 5. In the User Account Control prompt, click Yes.
Step 6. Accept the agreement, then enter your Windows password.

Step 7. Click Enable in the AutoLogon window.
That’s it. Restart your PC. It will now log in automatically without asking for a password.
If you change your mind, repeat the steps and choose Disable. Then restart to restore password prompt.
If you prefer a built‑in method, continue below.
How to Disable Windows Hello on Windows 11?
Before enabling auto-login, you must disable Windows Hello:
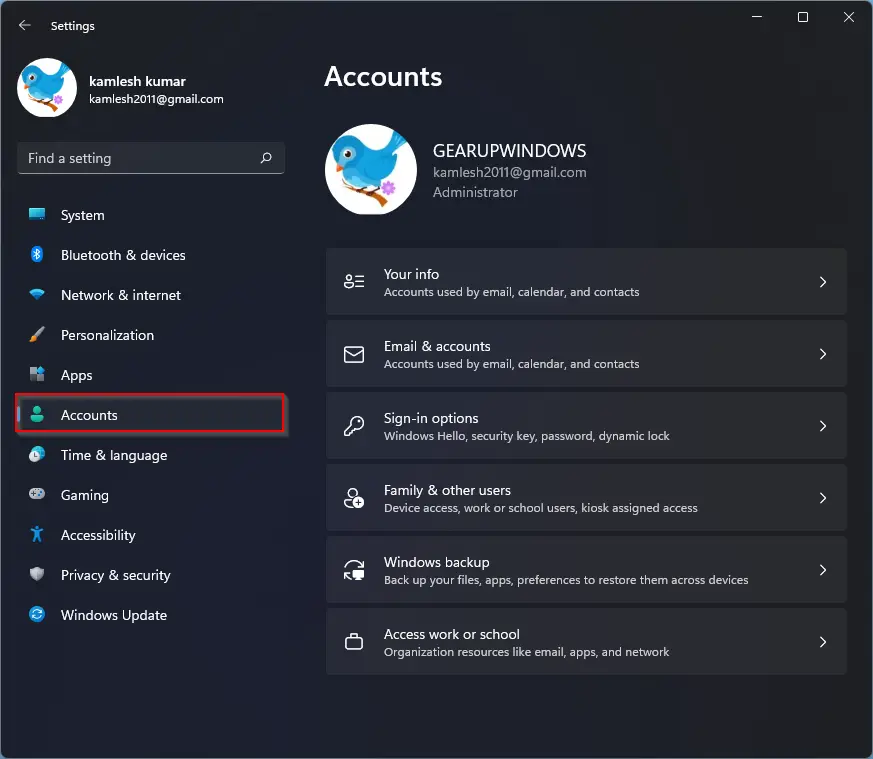
Step 1. Open the Settings app using Windows + I.
Step 2. Click Accounts in the left pane.
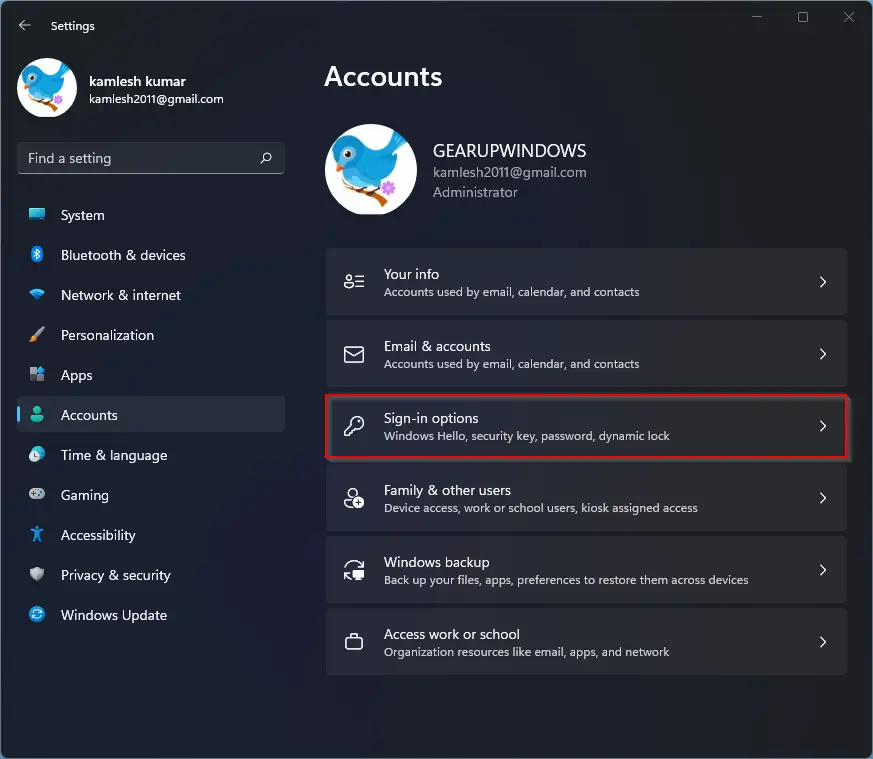
Step 3. Select Sign-in options on the right.
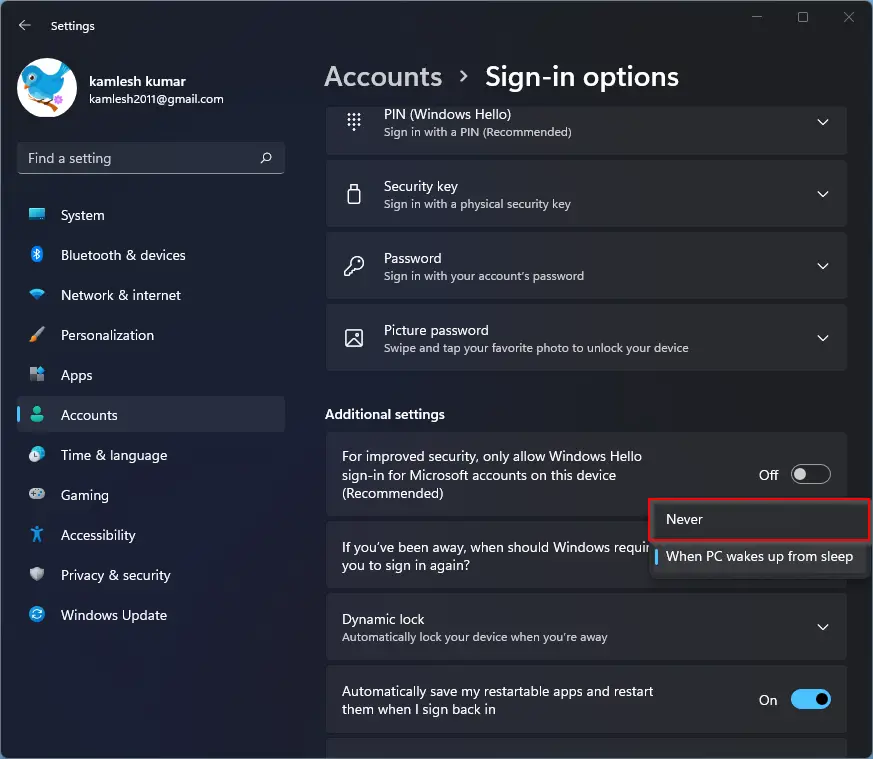
Step 4. Under Additional settings, turn off For improved security, only allow Windows Hello sign-in for Microsoft Accounts on this device (Recommended).

Step 5. Choose Never under “If you’ve been away, when should Windows require you to sign in again?”
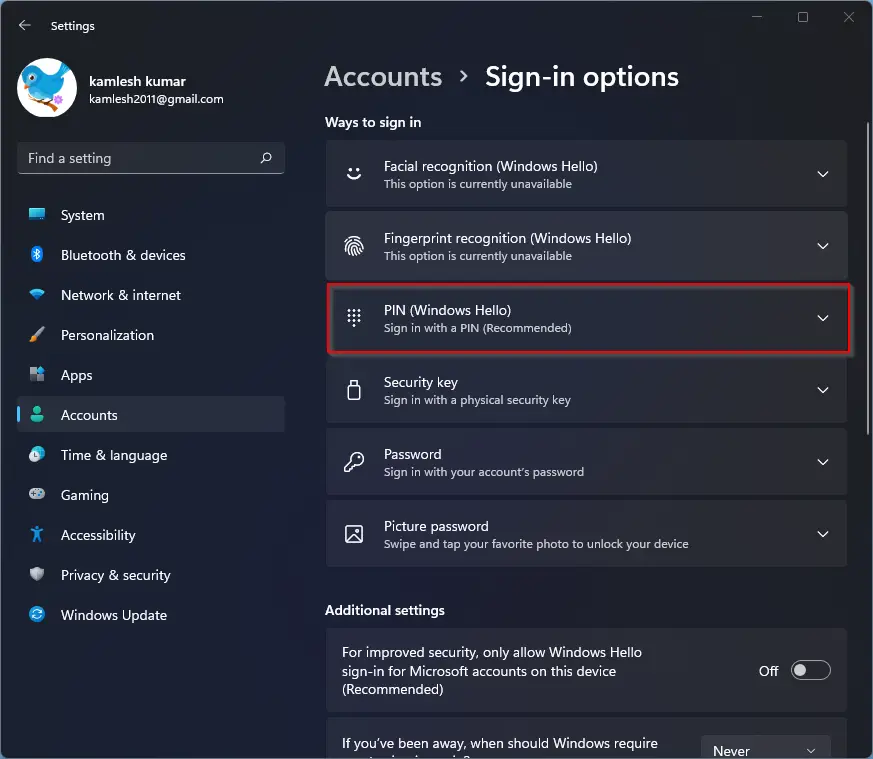
Step 6. Click PIN (Windows Hello).
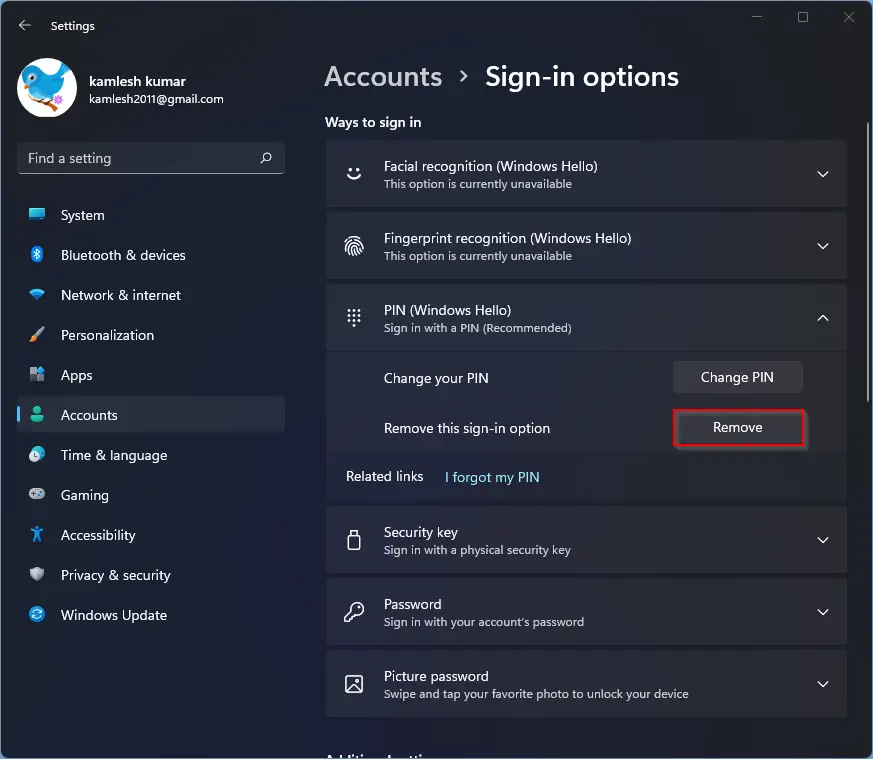
Step 7. Click Remove next to “Remove this sign-in option.”
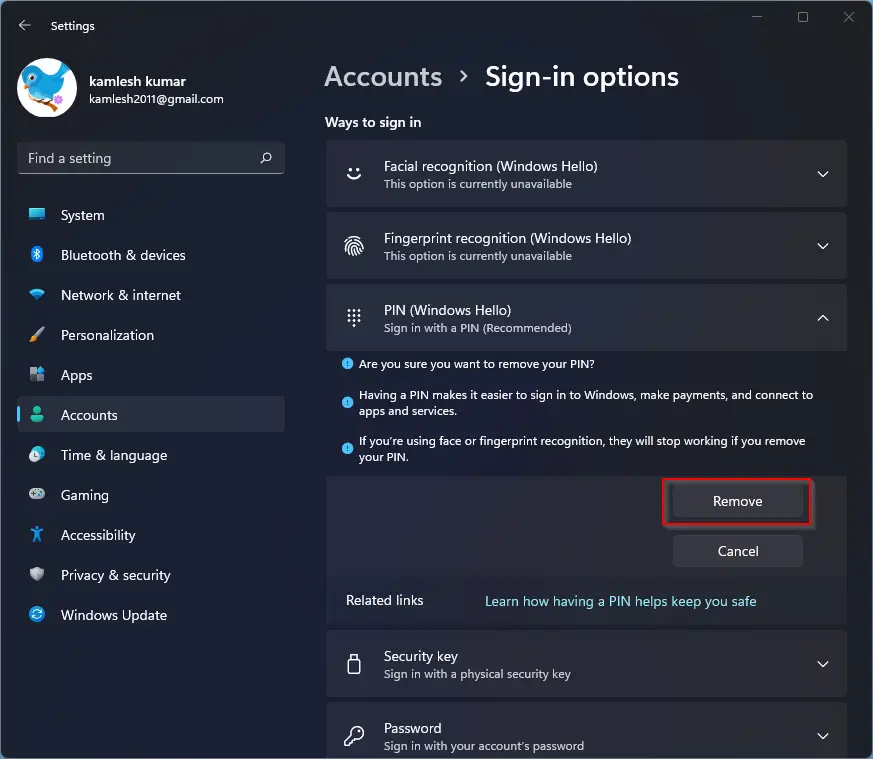
Step 8. Confirm removal if prompted.
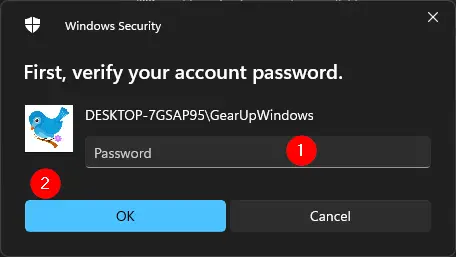
Step 9. In the Windows Security dialog, enter your account password and click OK.
With Windows Hello disabled, you can proceed to set up auto-login.
How to Sign in Automatically in Windows 11?
After disabling Windows Hello, follow these steps:
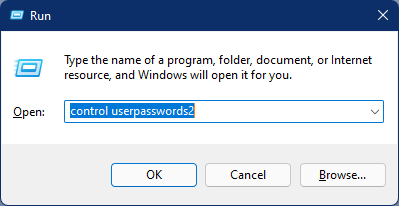
Step 1. Press Windows + R to open the Run dialog.
Step 2. Type one of these commands and press Enter:
control userpasswords2
or
netplwiz
Step 3. Select your user account, then uncheck Users must enter a user name and password to use this PC.
Also Refer: Windows 11: Missing Checkbox “Users must enter a user name and password to use this computer.”
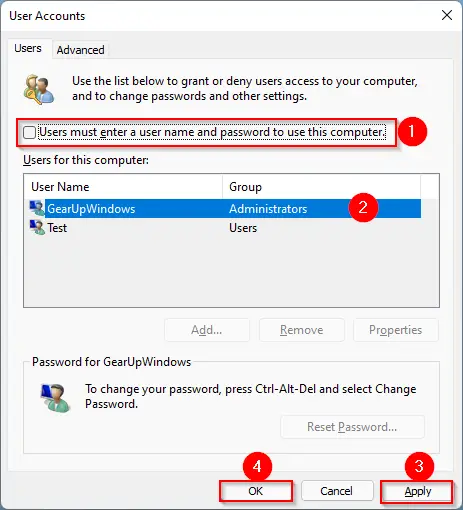
Step 4. Click Apply.
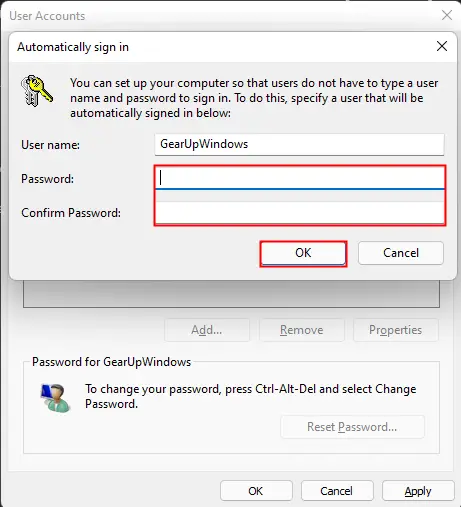
Step 5. When prompted, enter and confirm your password, then click OK.
Step 6. Restart your computer. Windows 11 will now sign in automatically to your account.
How to Disable “Sign-in automatically” or Re-enable Password Sign-in in Windows 11?
If you wish to revert and require a password again:
Step 1. Press Windows + R.
Step 2. Type one of the following commands and hit Enter:
control userpasswords2
or
netplwiz
Step 3. Select your account, then check Users must enter a user name and password to use this PC.
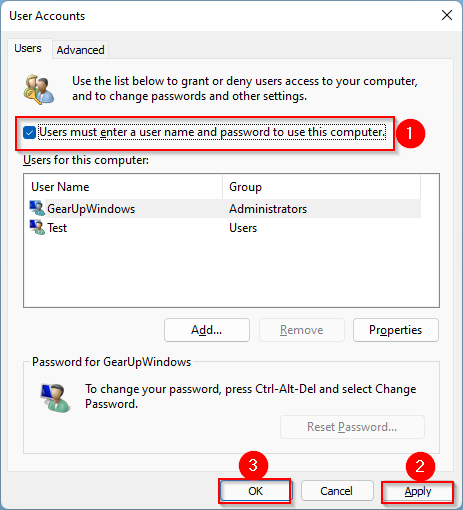
Step 4. Click Apply/OK.
Conclusion
Windows 11 lets you sign in automatically without needing to type a password. This works well for home users who don’t carry their PC or store sensitive files onboard. You can use a password‑free local account, but this method won’t work for Microsoft accounts or multiple users. For Microsoft accounts, first disable Windows Hello, then enable auto-login using AutoLogon or built‑in settings. Always keep a strong password if your PC stores important data.