
If you haven’t changed the default Lock Screen settings on Windows 10, you’ll need to click on the Lock Screen first to access the login screen. If you’re troubleshooting your PC or need to take a screenshot of the Lock Screen for any reason, it’s quite easy. Simply press the Print Screen (PrtScr) key while on the Lock Screen. Then, after logging in, open Microsoft Word, Paint, or any other app, and press Ctrl + V to paste the screenshot.
However, capturing a screenshot of the login screen is not as straightforward. Windows 10 does not offer a direct option to do this. To take a screenshot of the login screen, you’ll need to modify the Windows Registry and use the Snipping Tool or another screen capture utility.
This post will guide you through the steps to take a screenshot of the Windows 10 login screen. Let’s get into the details.
How to take a screenshot of the Windows 10 Login Screen?
Gentle Reminder: Modifying the wrong registry key of Windows may make it unresponsive; hence, we recommend taking full backup of the registry and also creating a system restore point.
To take a screenshot of the Windows 10 Login Screen, perform the following recommended steps:-
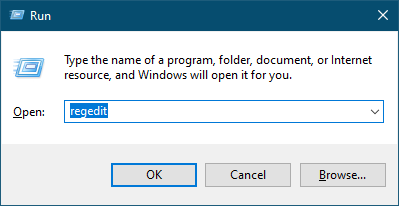
Step 1. Press the Windows logo + R keys simultaneously to open the Run dialog box.
Step 2. In the Run command box, type the following and hit Enter from the keyboard to open the Registry Editor:-
regedit
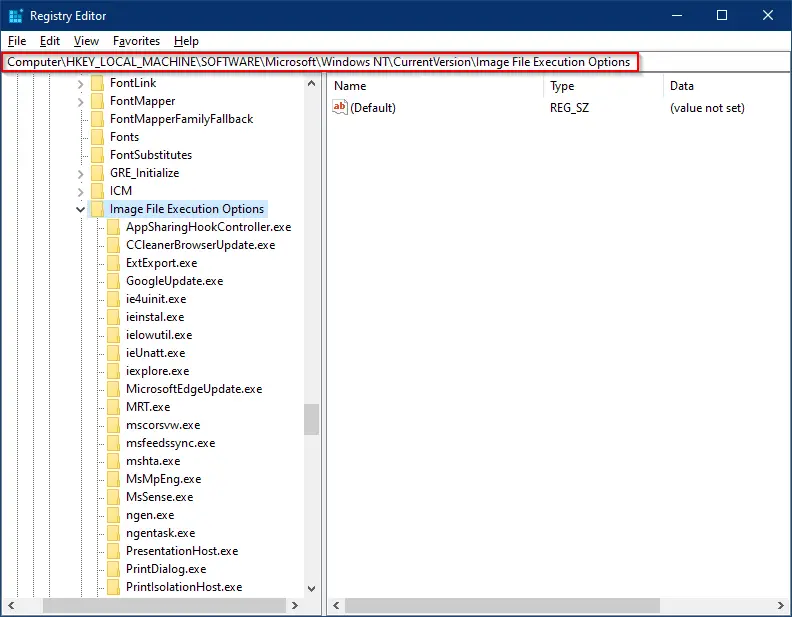
Step 3. In the Registry Editor window, navigate to the following path in the left side pane:-
Computer\HKEY_LOCAL_MACHINE\SOFTWARE\Microsoft\Windows NT\CurrentVersion\Image File Execution Options
Step 4. Right-click on the “Image File Execution Options” key, select New, and then Key.
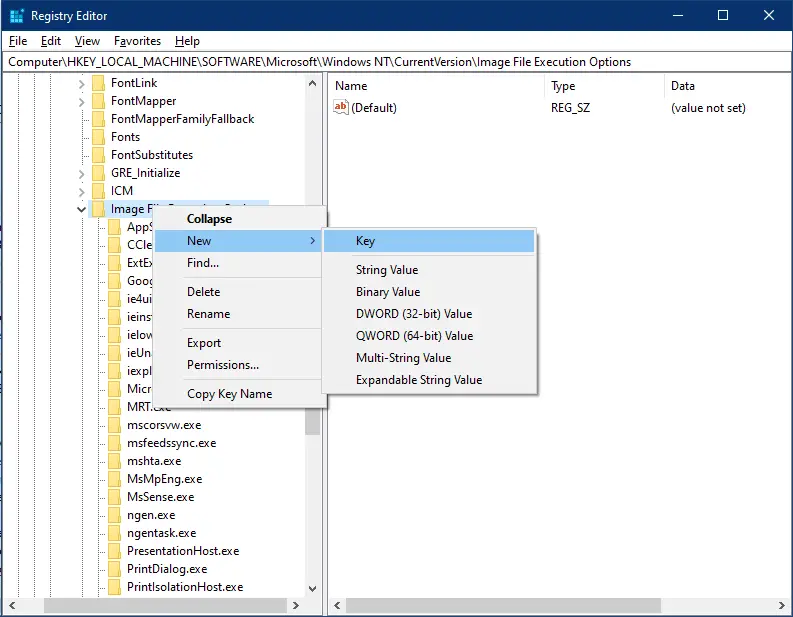
Step 5. Rename the newly created key as utilman.exe.
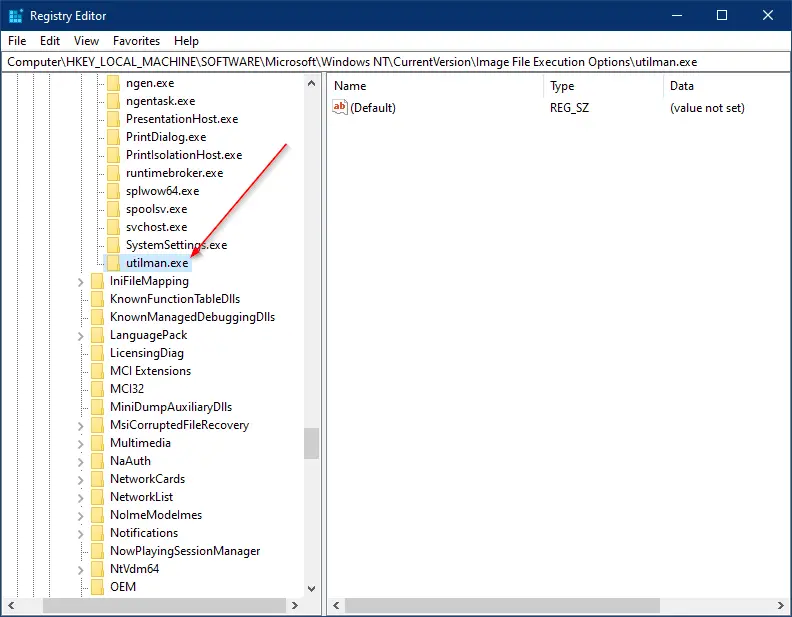
Step 6. Now, right-click on the utilman.exe key, select New, and then String Value.
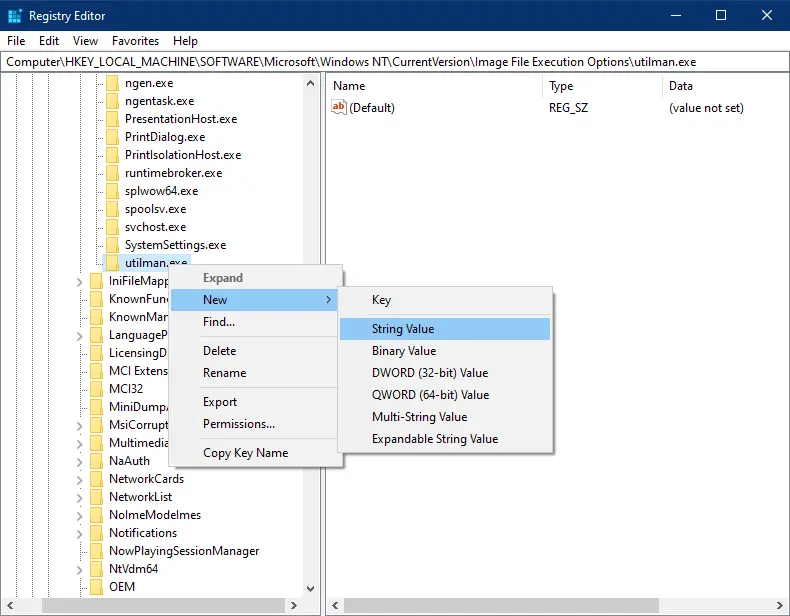
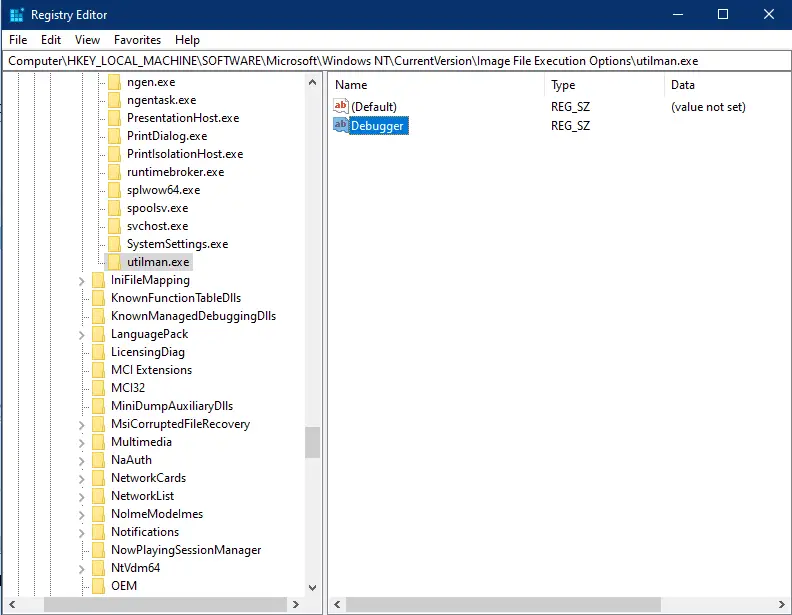
Step 7. On the right side of the utilman.exe key, rename the newly created String Value as Debugger.
Step 8. Double click on the Debugger on the right side pane and set its value to %windir%\System32\SnippingTool.exe.
Note: In some Windows 10 PC, you need to set the absolute path for the Debugger value data. For instance, if your Windows is installed on the “C” drive, then set value data as “C:\Windows\System32\SnippingTool.exe.”
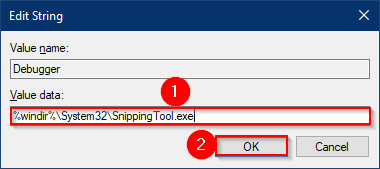
Step 9. Click OK.
Step 10. Once you complete the above registry modifications, press the Windows logo + L keys to lock your PC.
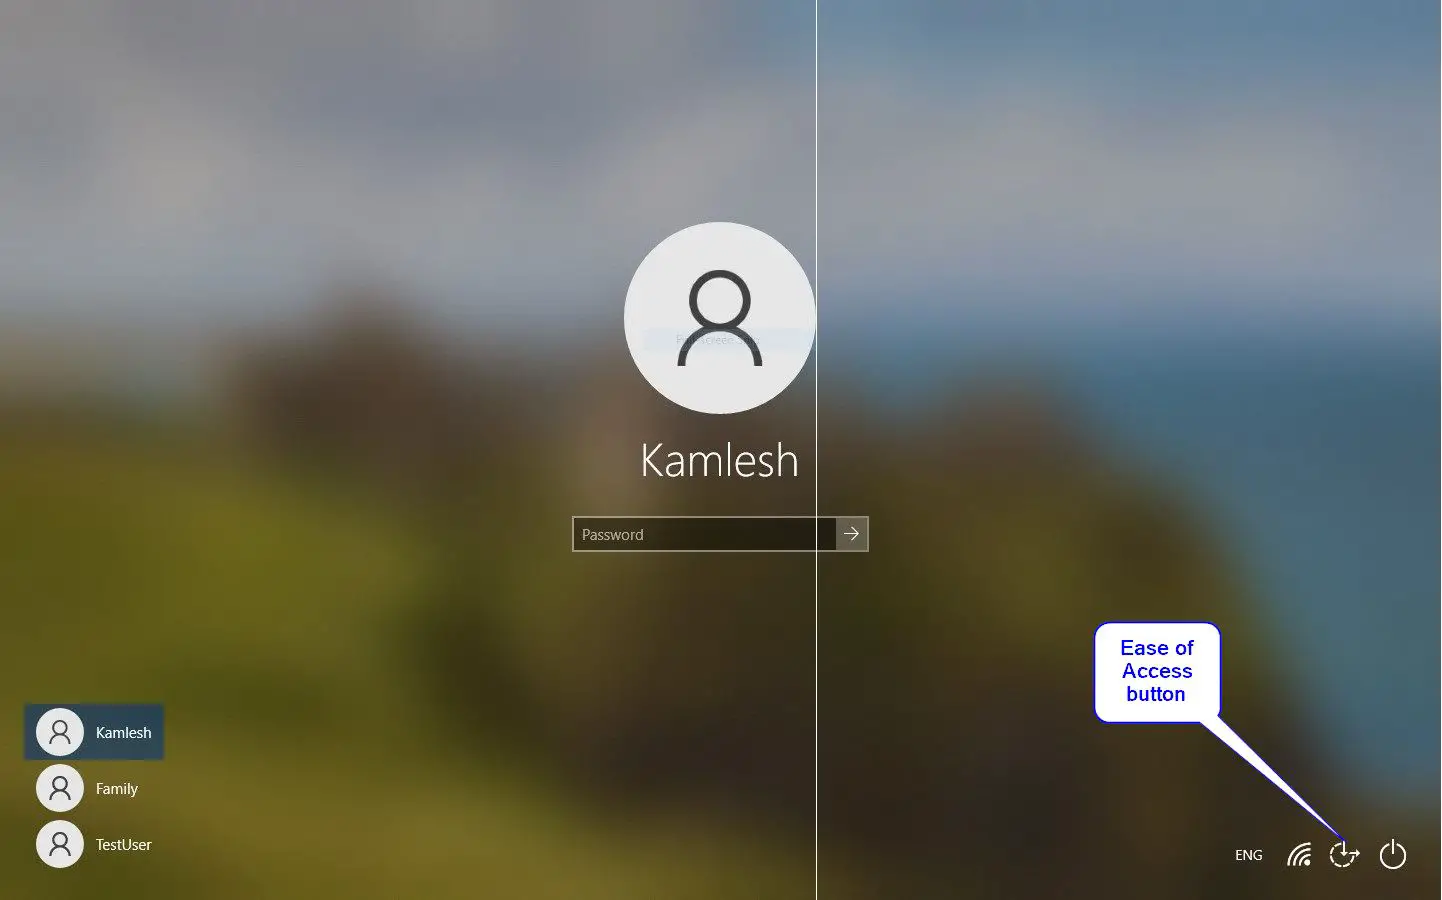
Step 11. Click on the Lock Screen to see the login screen.
Step 12. Then, click the Ease of Access button in the lower-right corner, and the Snipping Tool will launch. Set Snipping Tool mode “Full-screen Snip” to take a full Windows shot. Press Ctrl + C to copy the screenshot to the Clipboard, log in to your PC, and paste Microsoft Word or any other program using the Ctrl + V shortcut.
Step 13. If you cannot copy the screenshot for any reason, you can print the screenshot to a PDF file or XPS document; once you have taken a screenshot of the login screen, press Ctrl + P keys to invoke the Print dialog box. Select “Microsoft Print to PDF” or “Microsoft XPS Document Writer” printer and click the Print button. Please select the location to save your PDF or XPS, name the PDF or XPS file, and you are done with it. There is no need to log in to save the PDF or XPS file.
Conclusion
In conclusion, taking a screenshot of the Windows 10 Login Screen requires modifying the registry and using the Snipping Tool. It is essential to take a full backup of the registry and create a system restore point before modifying it. Following the recommended steps, one can take a full-screen snip of the login screen using the Snipping Tool launched from the Ease of Access button on the Lock Screen. Once the screenshot is taken, it can be copied and pasted into any program using the Ctrl + V shortcut or printed to a PDF or XPS file. It is important to note that modifying the wrong registry key can make Windows unresponsive, so it is necessary to be cautious while performing these steps.
You might also be interested in the following articles:-