
In the world of digital technology, our computers often serve as the central hub for all our activities. Over time, we accumulate a wide variety of programs and applications, each contributing to the clutter on our system drive. If you’re a Windows 11 or Windows 10 user facing this issue, freeing up space on your primary drive can be challenging—especially without going through the tedious process of uninstalling and reinstalling programs. That’s where a handy tool called Steam Mover comes in.
What Is Steam Mover?
Steam Mover is a third-party utility originally designed to relocate Steam games between drives. However, its functionality goes beyond gaming—it also allows you to move almost any program files from one drive to another. This guide will walk you through how to use Steam Mover effectively across different applications.
Why You Should Use Steam Mover?
Before we dive into the how-to, here’s why Steam Mover could be the ideal solution for you:
- Space Optimization: One of the biggest reasons to use Steam Mover is to free up space on your primary drive. As your system drive (usually C:\) fills up, your computer’s performance may degrade. Steam Mover lets you clear space without needing to uninstall or reinstall programs.
- Easy Relocation: Steam Mover simplifies moving program files to another drive—ideal for users with limited technical knowledge or for programs that don’t offer built-in relocation options.
- Versatility: Although initially developed for Steam games, Steam Mover supports moving a wide range of programs—from office tools to multimedia software and games from other platforms.
- Avoiding Reinstallation: Reinstalling software can be time-consuming, especially if you have many programs. Steam Mover eliminates this hassle, saving both time and effort.
How to Use Steam Mover to Move Program Files?
Now, let’s explore how to use Steam Mover step-by-step to relocate your program files:
Step 1. Ensure that both your source drive (where the program is currently installed) and your destination drive (where you want to move it) use the NTFS file system. To check this:
- Press the Windows key + E to open File Explorer.
- Navigate to “This PC“.
- Right-click on the drive and select “Properties“.
- Look for the “File system” field, which should say “NTFS“.
Step 2. Download Steam Mover from its official website.
Step 3. After downloading, unzip the file and run Steam Mover as an administrator. You’ll need administrative privileges to move program files.
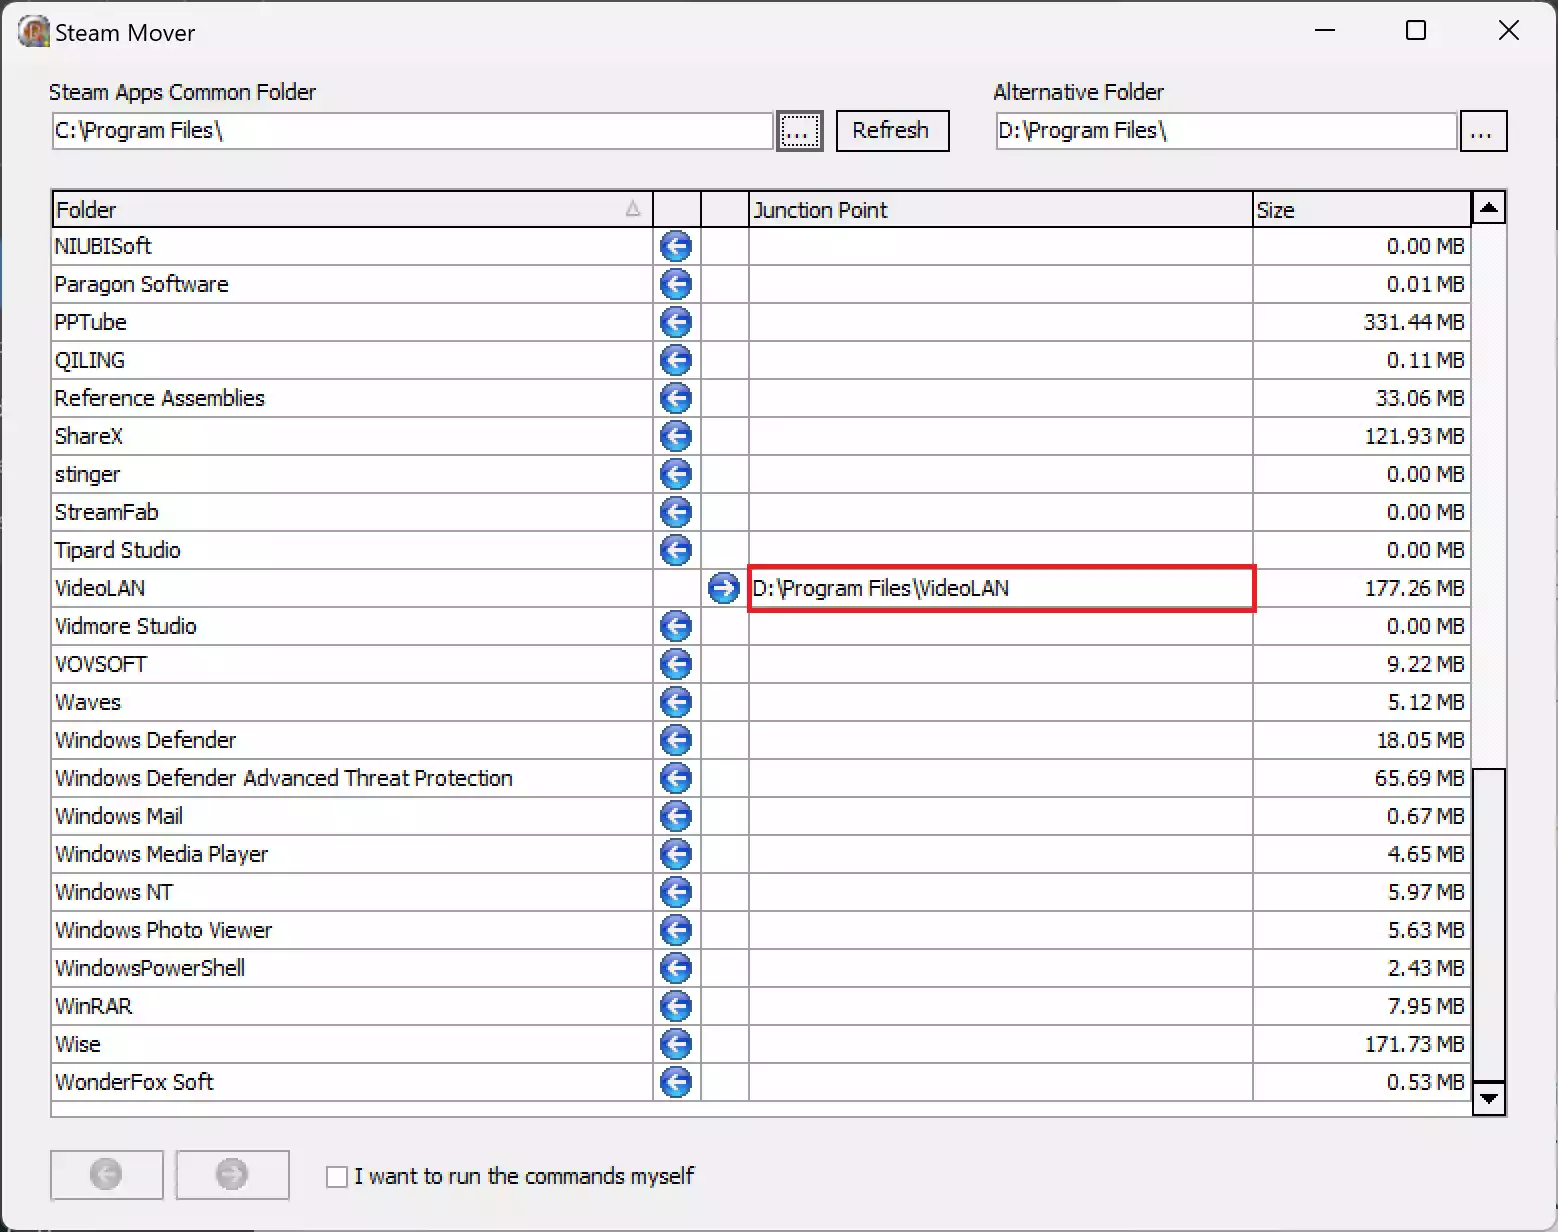
Step 4. Next to “Steam Apps Common Folder“, click the three-dot button to choose the source folder where your programs are currently installed. This is typically the “Program Files” or “Program Files (x86)” folder on the “C:\” drive.

Step 5. Next to “Alternative Folder“, click the three-dot button to select the folder path on the destination drive where you want to move the program.
Step 6. Inside the Steam Mover interface, a list of programs will appear. Select the program(s) you wish to move. To choose multiple programs, hold down the Ctrl key while clicking.
Step 7. Once selected, click the right arrow icon at the bottom of the window. This will open a Command Prompt and begin the transfer process.
Step 8. After the move is complete, the new folder path will appear in the “Junction Point” column, indicating the program has been successfully moved to the destination drive.
Important Considerations
While Steam Mover is convenient, keep these important tips in mind:
- Program Compatibility: Not all programs can be safely moved. Some rely on registry entries or system files that may not function correctly after relocation.
- Backup: Always back up your important data and create a system restore point before using Steam Mover.
- Space Availability: Ensure the destination drive has enough free space to accommodate the program files.
- Administrator Rights: You must have administrative privileges to execute certain actions in Steam Mover.
Download Steam Mover
You can download Steam Mover from its official website.
Conclusion
Steam Mover is a practical tool for Windows 11 and Windows 10 users who want to declutter their system drives without the need to uninstall or reinstall programs. By following the steps above and keeping the essential considerations in mind, you can efficiently transfer program files and improve your computer’s performance. While it’s a powerful utility, always use it cautiously—especially when relocating non-gaming applications.