
Driver Signature Enforcement is a built-in feature in Windows 11/10/8/7 that provides an added layer of security by preventing the installation of unsigned drivers. Driver Signing involves attaching a digital signature to a driver package, which Windows uses to validate the driver and identify the vendor responsible for it.
The digital signature serves as an electronic security mark that confirms the publisher’s identity and other pertinent details for the driver. Windows will refuse to run drivers that have not received approval from Microsoft, a measure commonly referred to as “driver signature enforcement.”
Although drivers can be sourced from various locations—such as Windows Update, Original Equipment Manufacturers (OEMs), or third-party driver software—Microsoft must validate them with a digital signature.
Disabling Driver Signature Enforcement is generally unnecessary. However, it may be required if you’re installing drivers for older hardware that hasn’t been digitally signed by Microsoft.
In this GearUpWindows guide, we’ll show you how to disable Driver Signature Enforcement in Windows 11/10 using different methods.
How to Turn Off Driver Signature Enforcement on Windows 11/10 using Advanced Boot Menu?
To disable Driver Signature Enforcement through the Advanced Boot Menu, use the following steps:
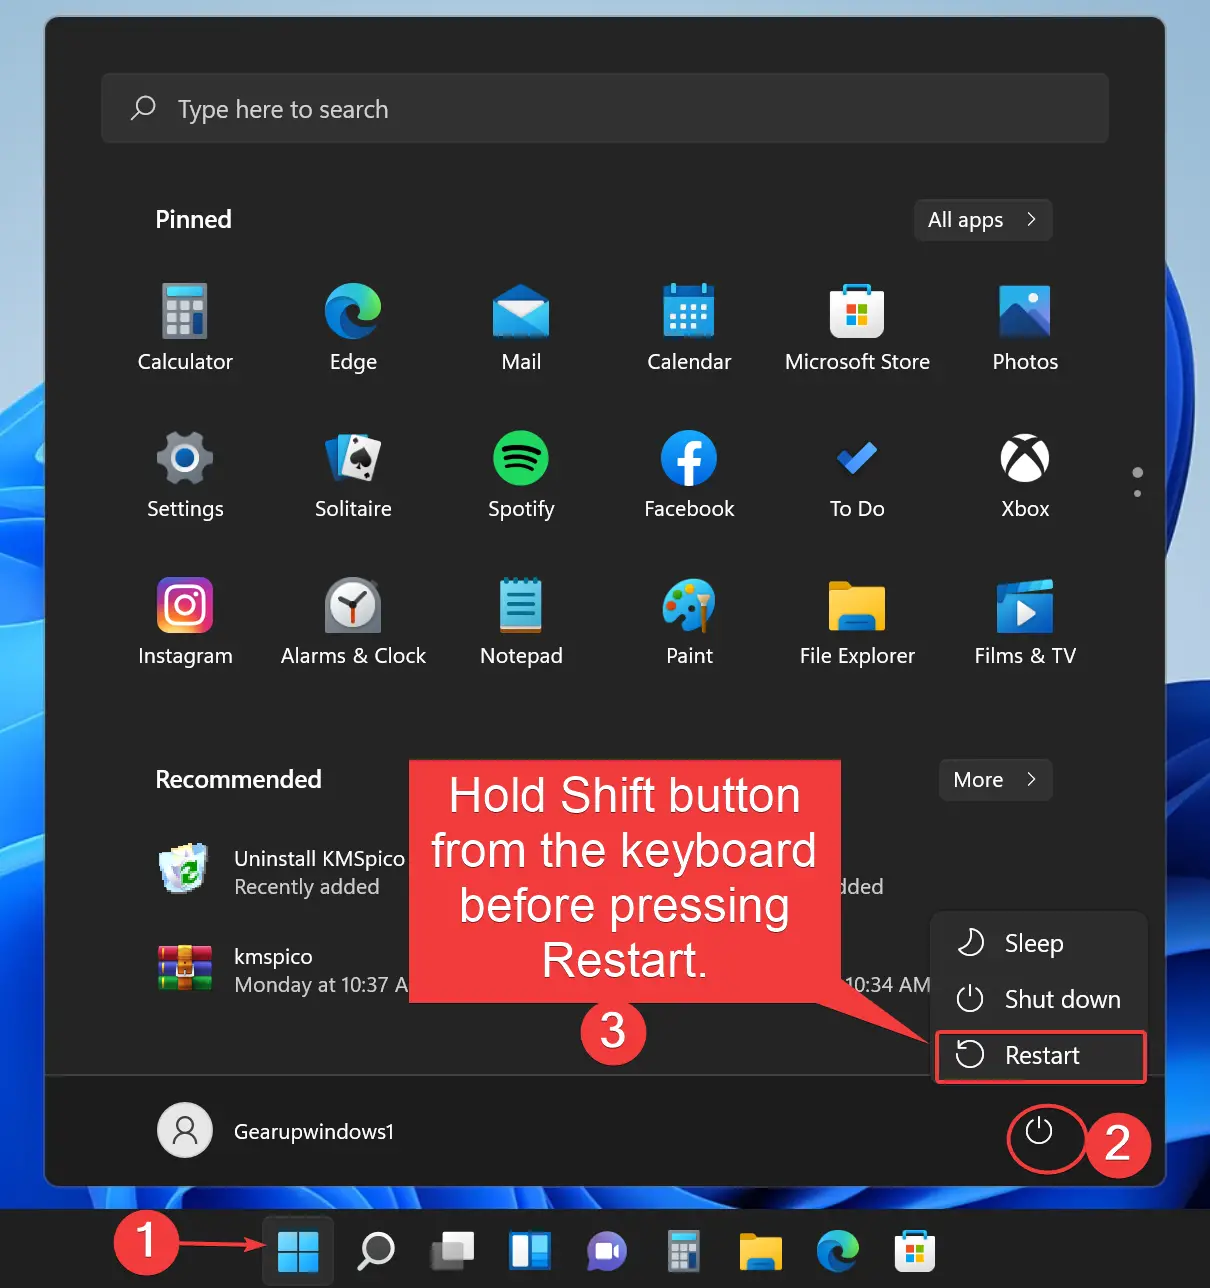
Step 1. Click the Start button, hold the Shift key, and then click the Power button in the Start menu. Choose Restart.
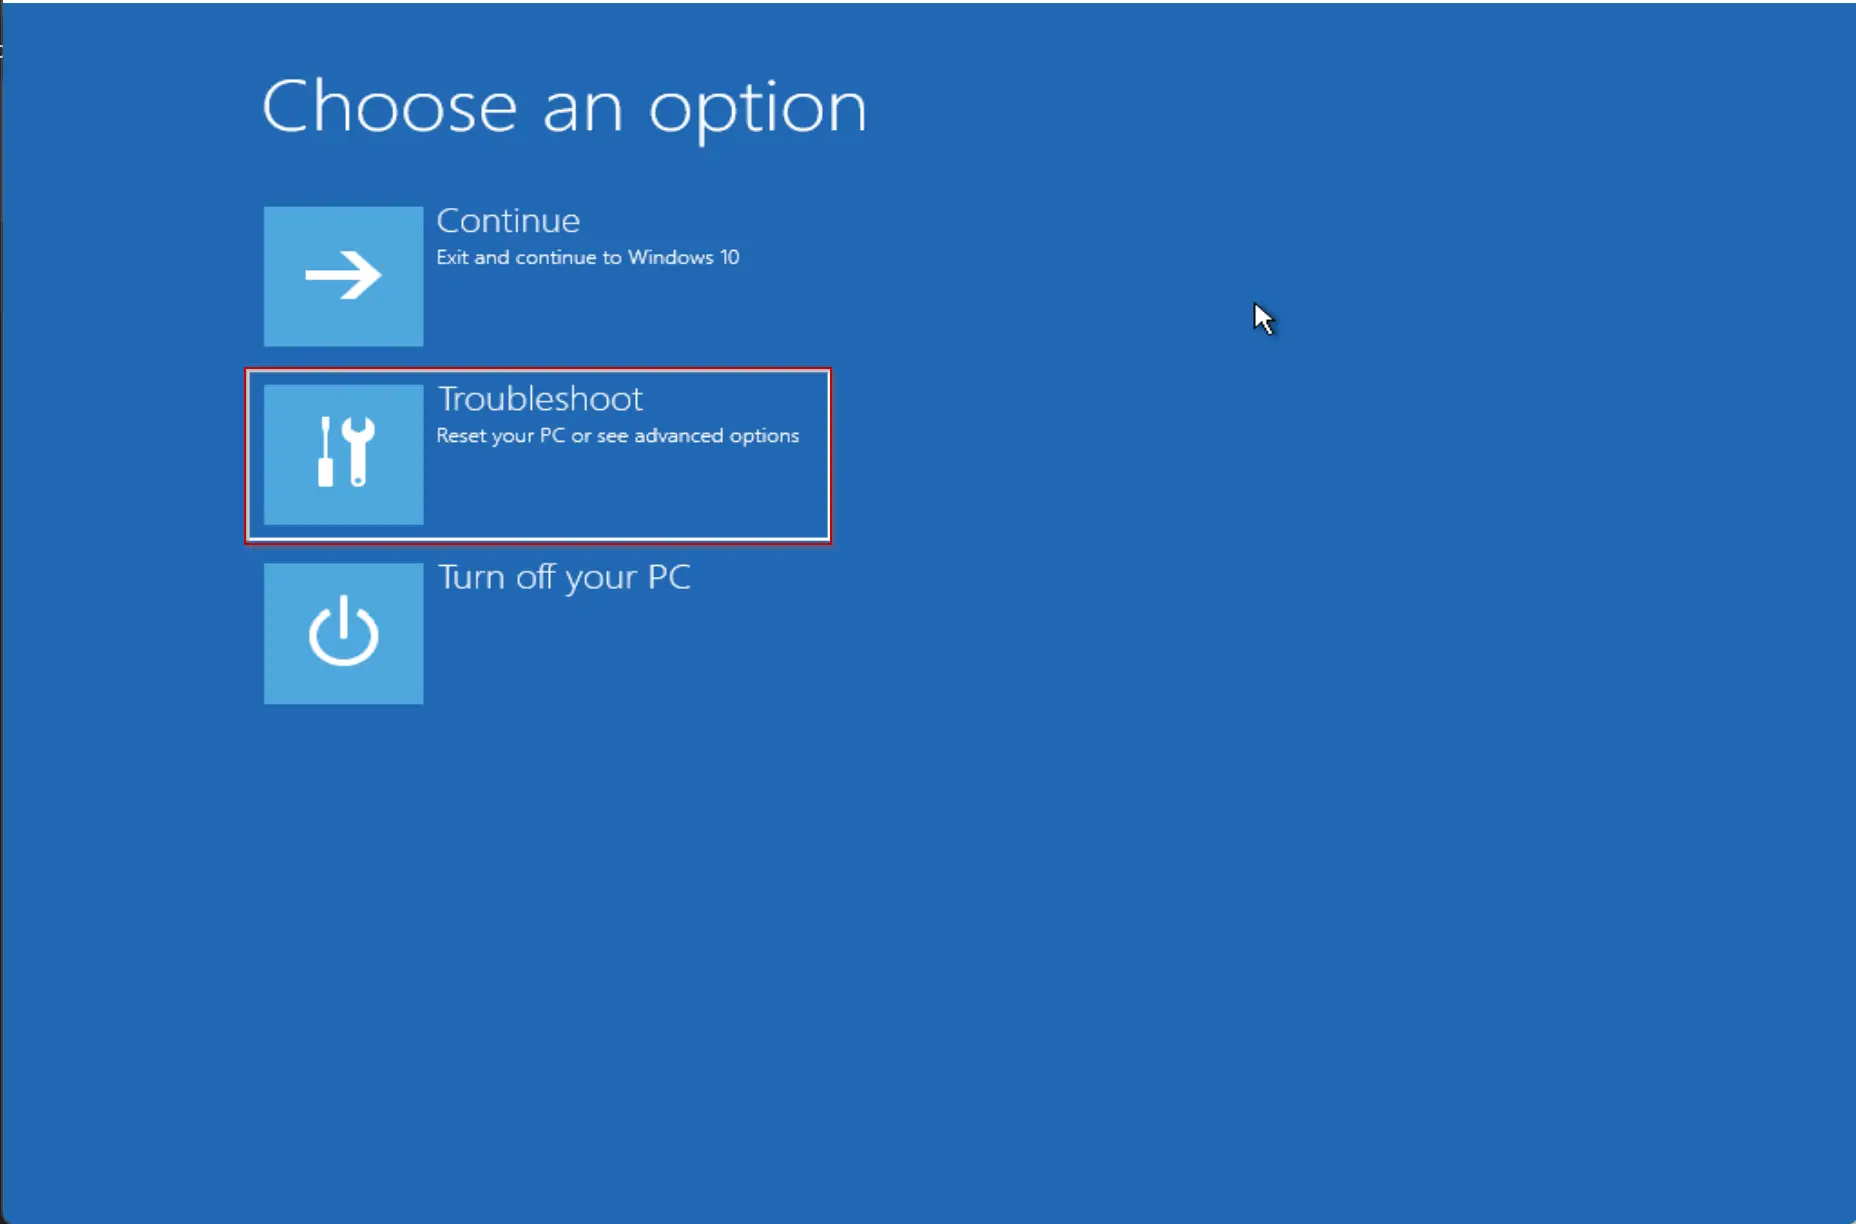
Step 2. Your PC will boot into “Advanced Options.” Click on the Troubleshoot tile.
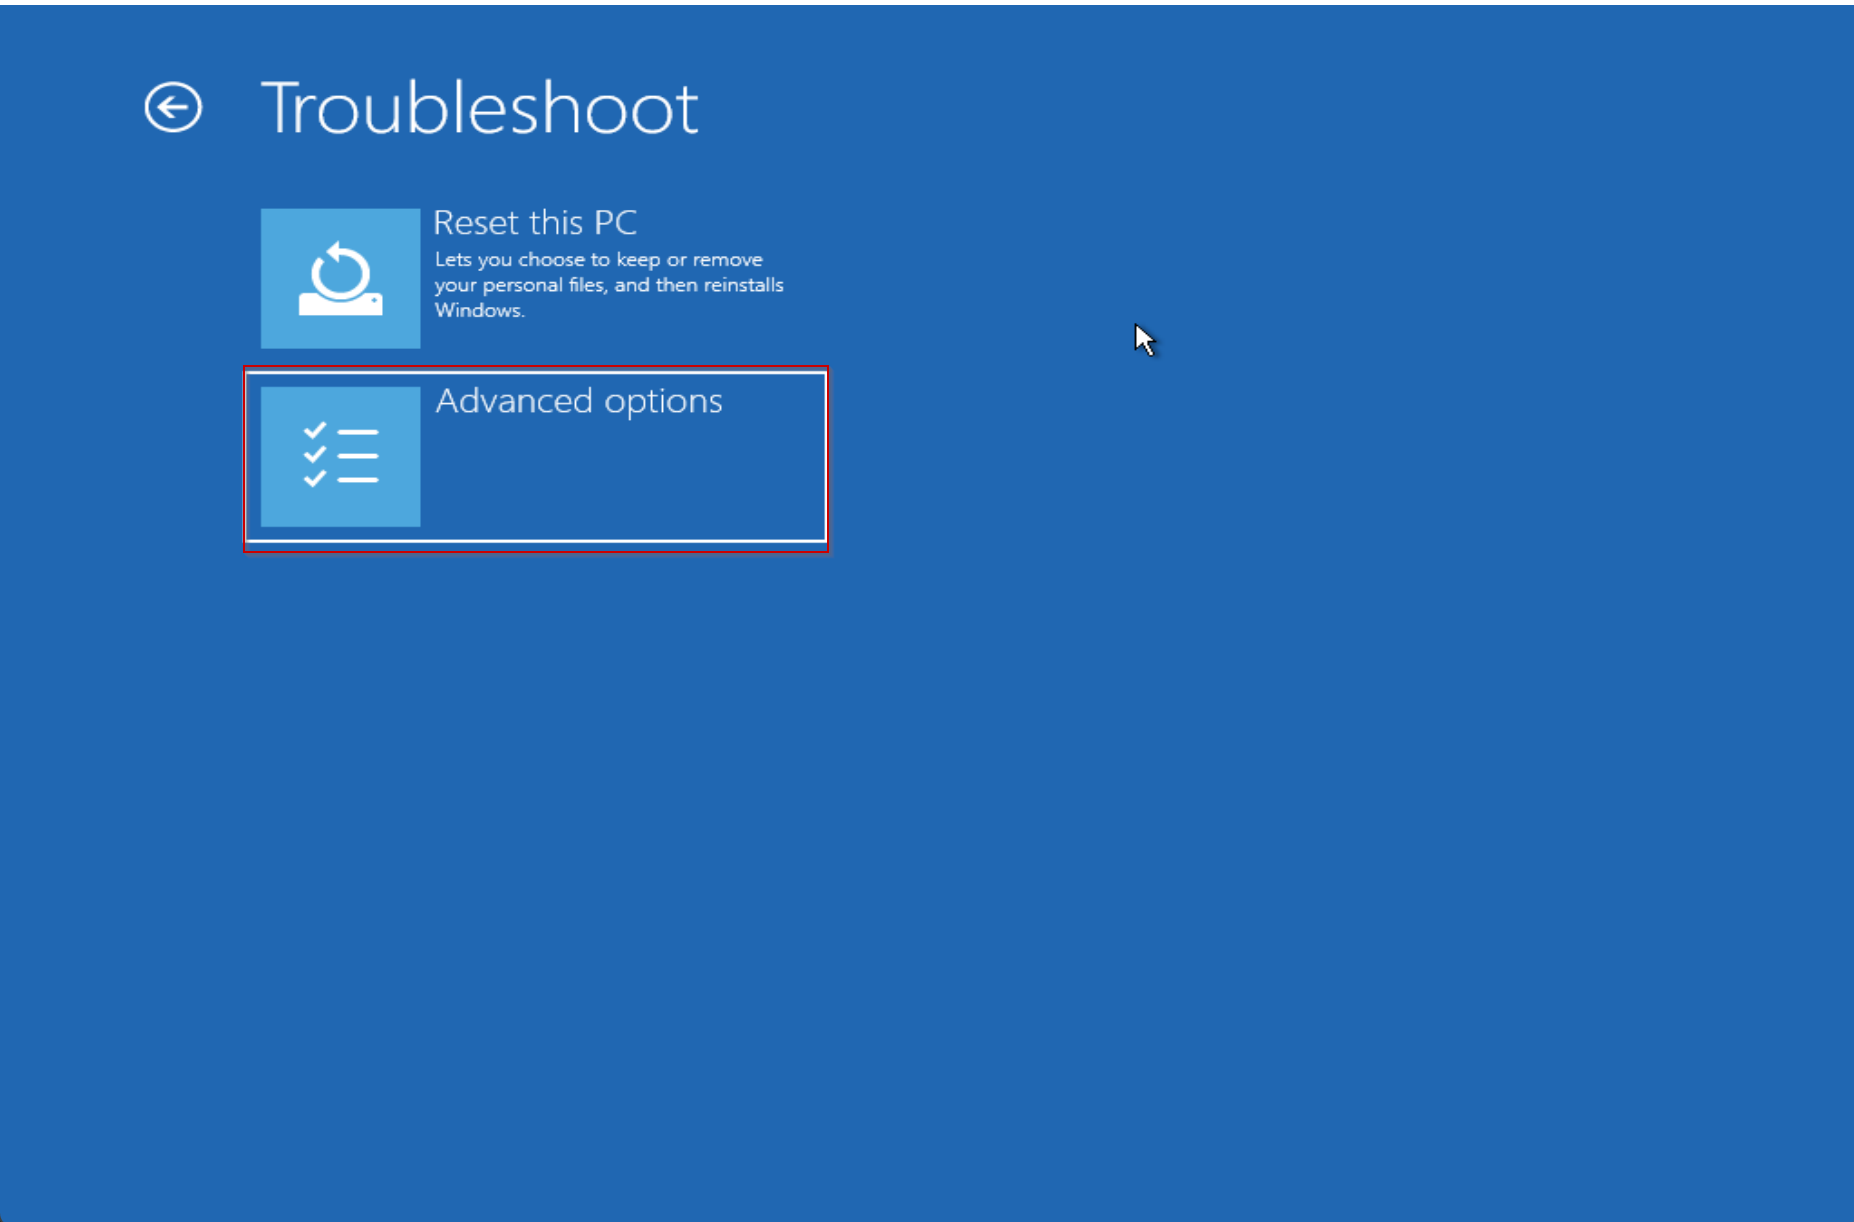
Step 3. Click Advanced Options.
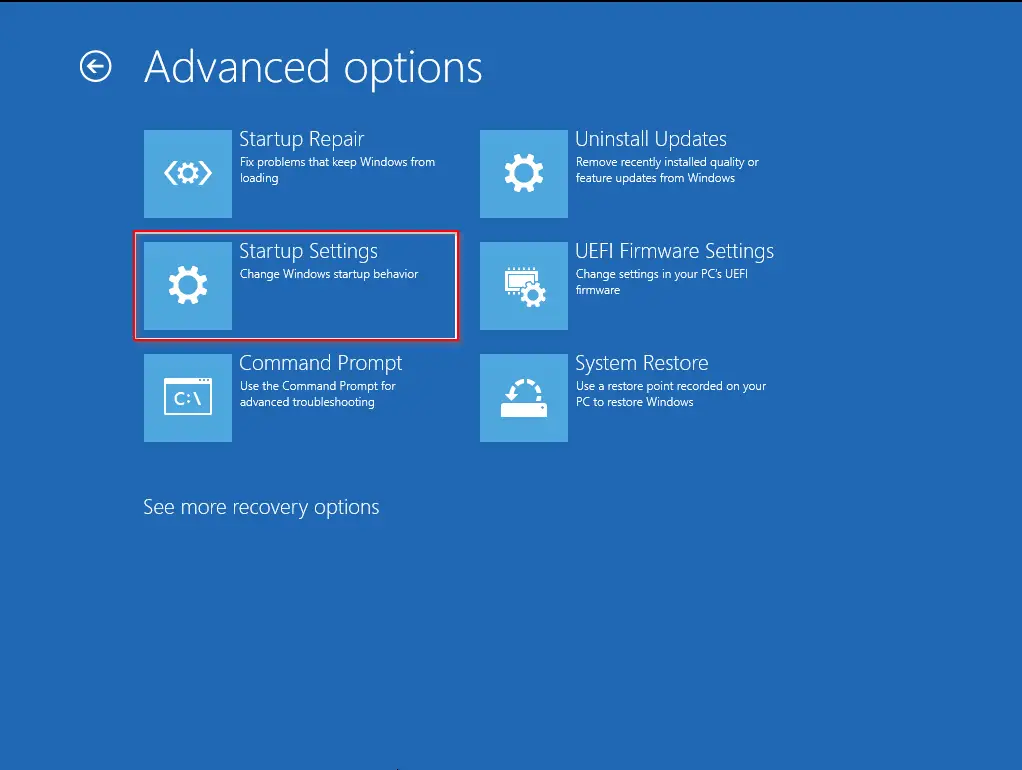
Step 4. Select Startup Settings under the Advanced Options menu.
Step 5. Click Restart to reboot your PC to the Startup Settings screen.
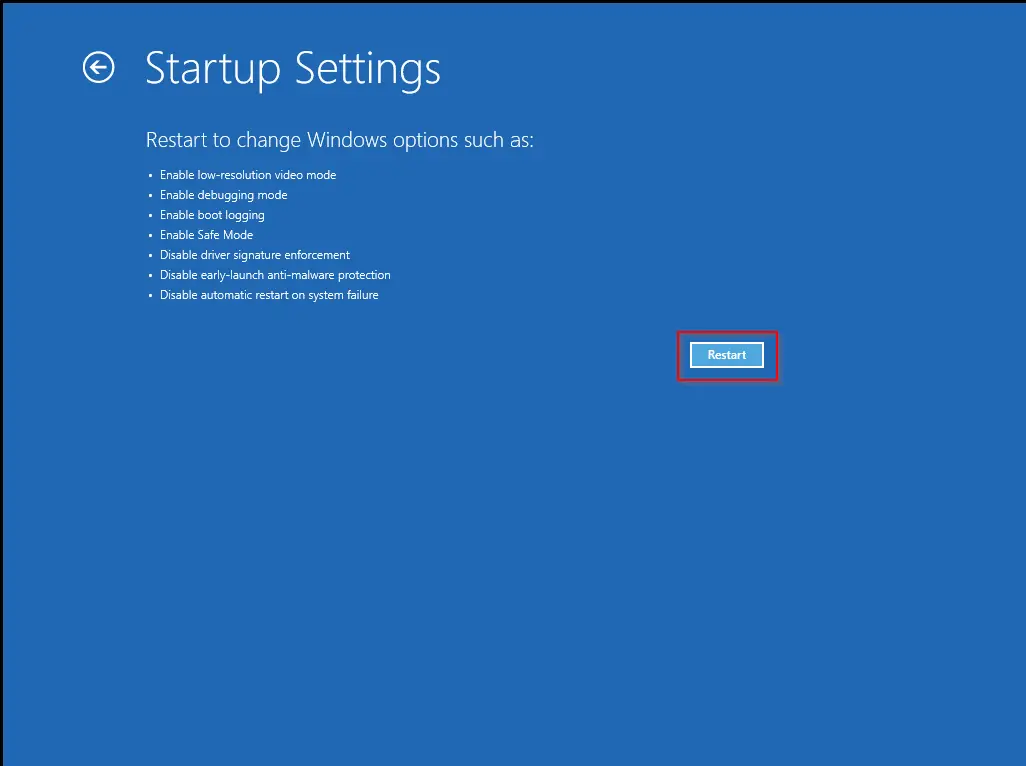
Step 6. On the Startup Settings screen, press the “7” key to select “Disable driver signature enforcement.”

Once done, your PC will reboot with Driver Signature Enforcement disabled. You can now install unsigned drivers.
How to Disable Driver Signature Enforcement on Windows 11/10 through Command Prompt?
Note: This method only works if Secure Boot is turned off in UEFI settings.
Step 1. Open an elevated Command Prompt.
Step 2. Type the following command and press Enter:
bcdedit.exe /set nointegritychecks on
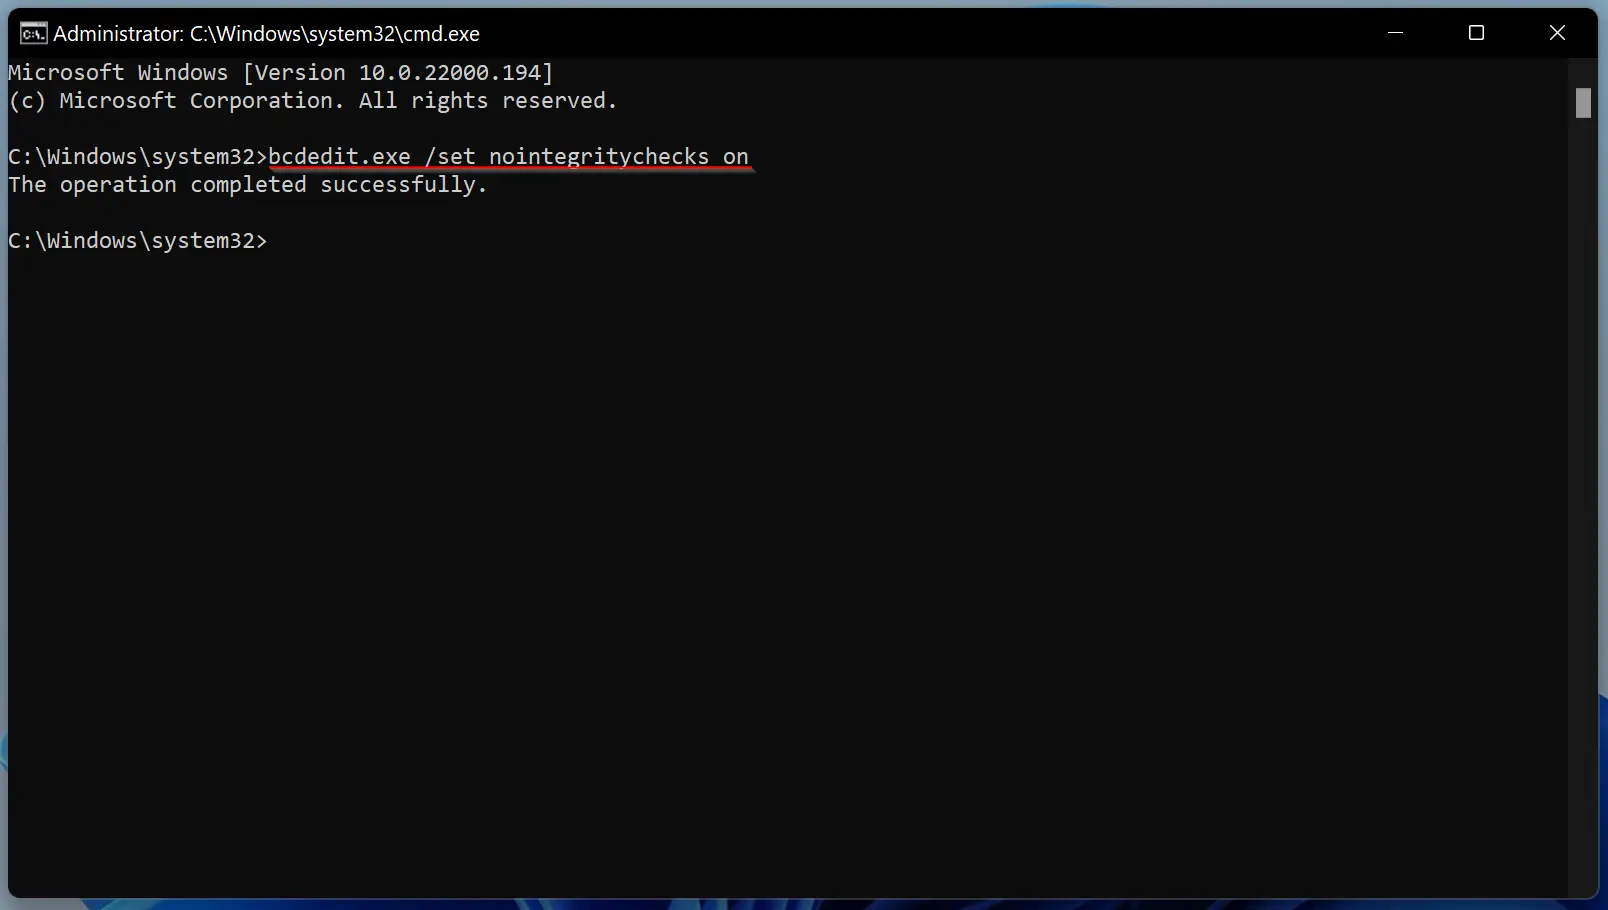
This command disables Driver Signature Enforcement immediately.
To enable it again, use this command:
bcdedit.exe /set nointegritychecks off
How to Disable Driver Signature Enforcement on Windows 11/10 by Enabling Test Signing Mode?
This method is also applicable only when Secure Boot is disabled.
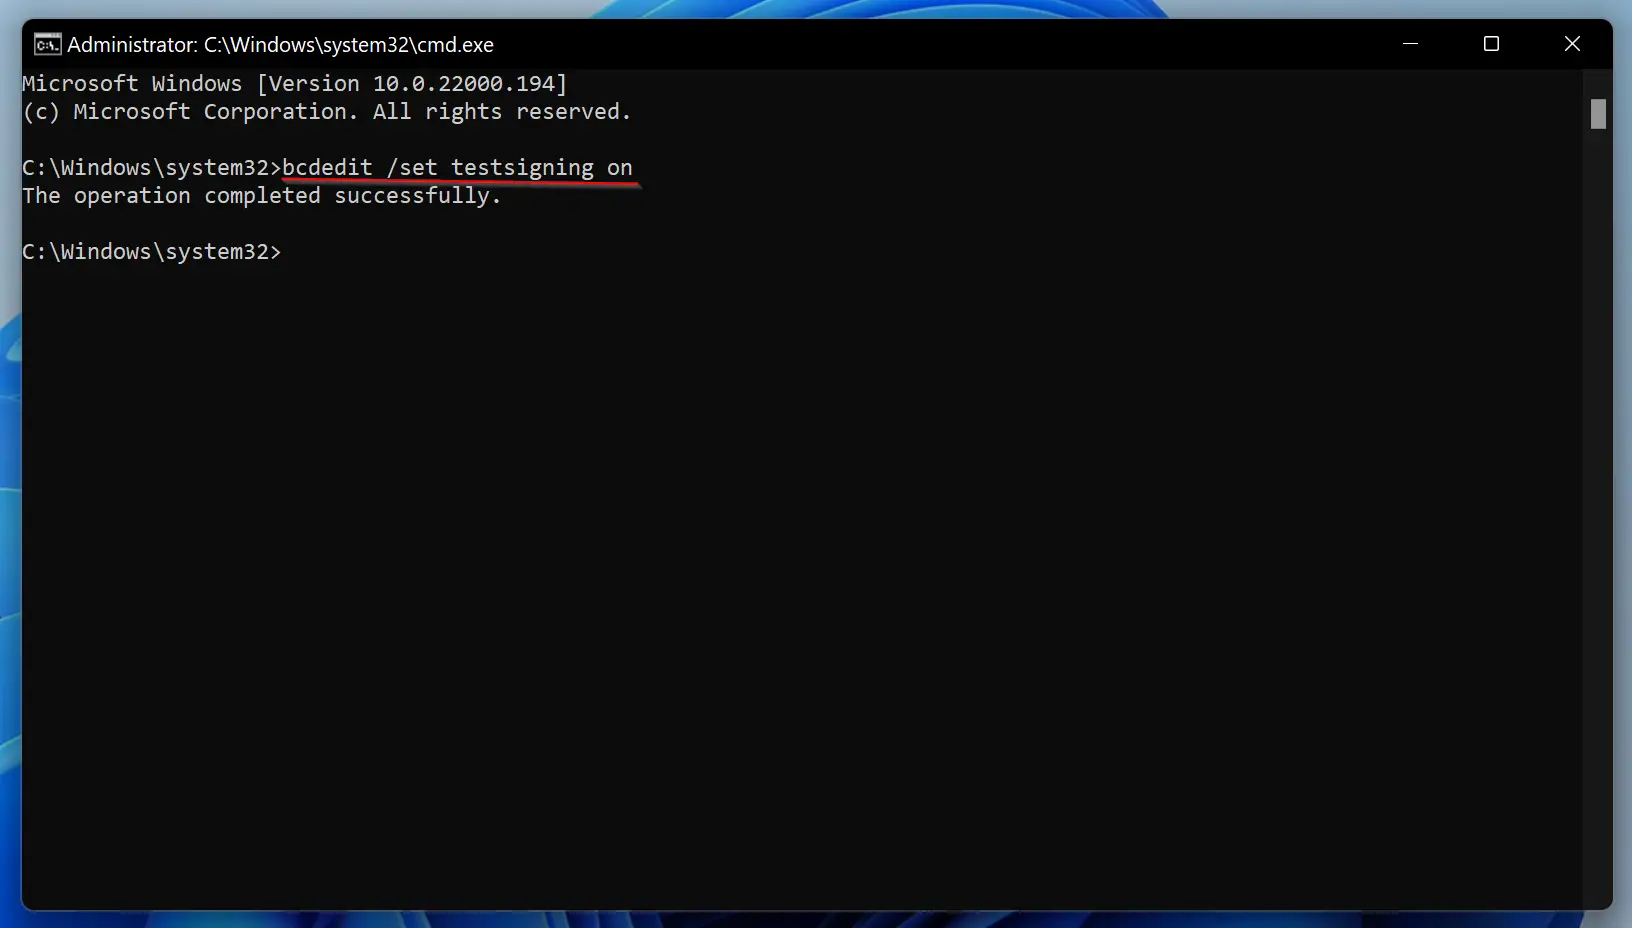
Step 1. Open a Command Prompt as administrator.
Step 2. Enter the following command and press Enter:
bcdedit /set testsigning on
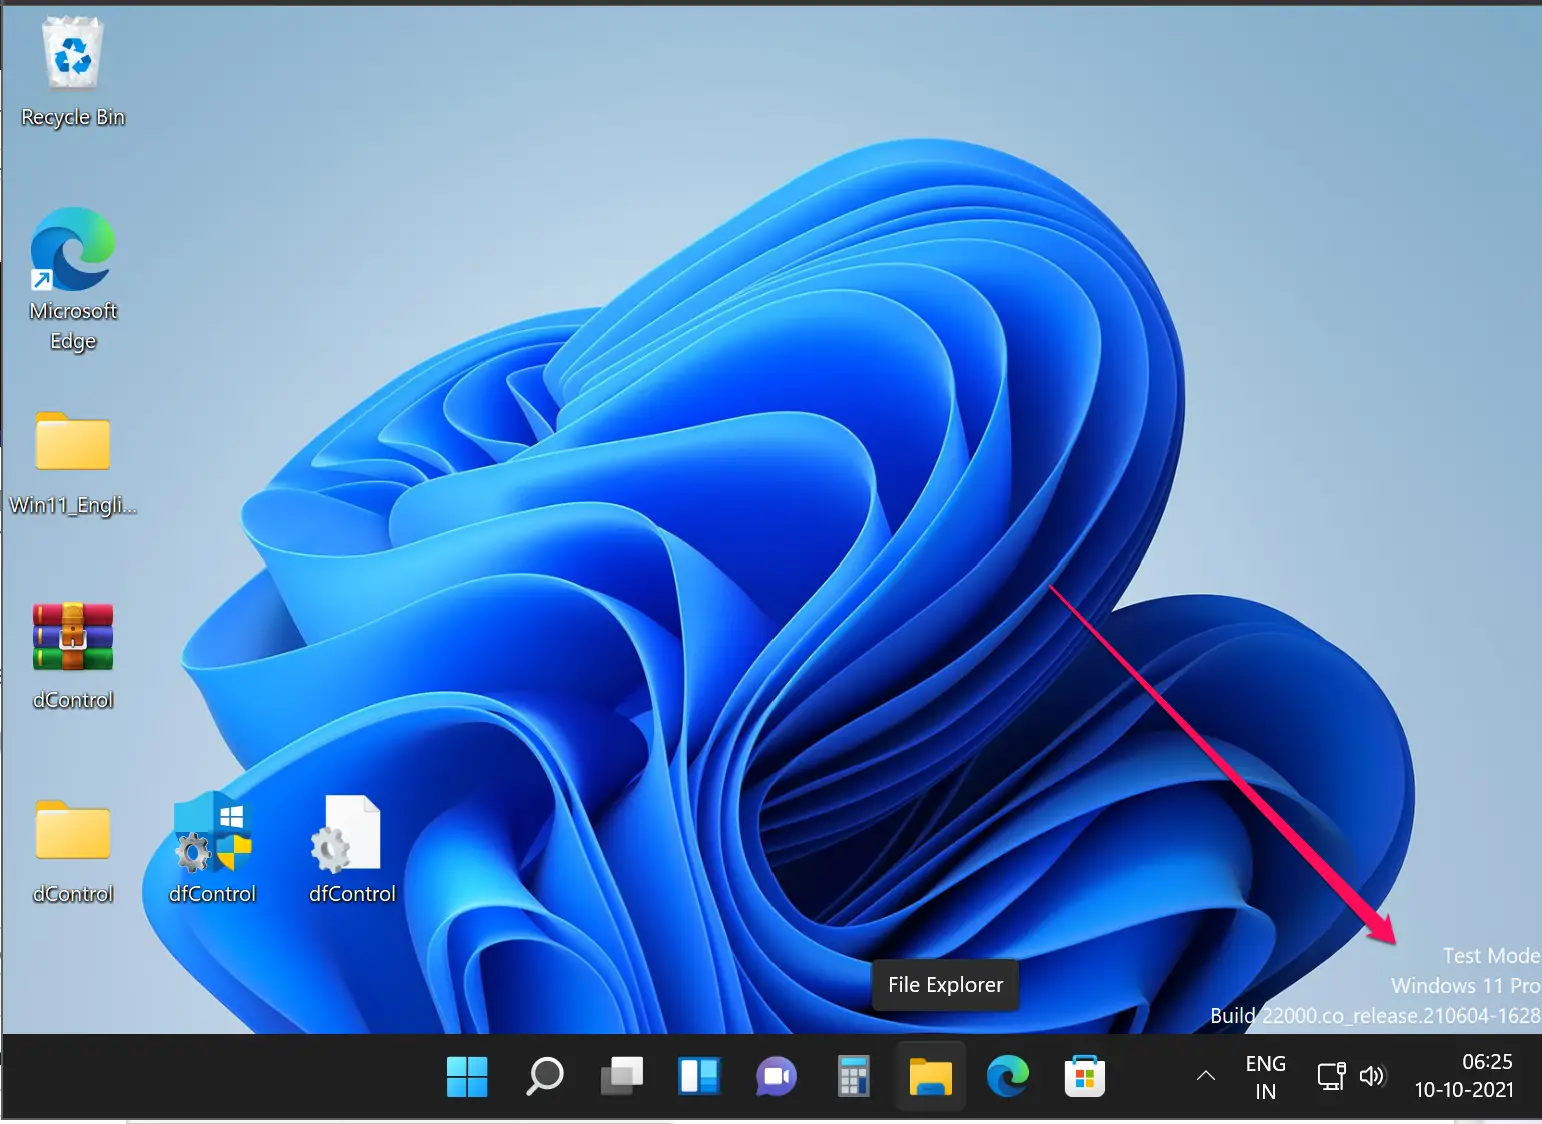
Step 3. Restart your computer. A “Test Mode” watermark will appear in the bottom-right corner of your screen, indicating that unsigned drivers can now be installed.
To exit test mode and re-enable driver signature checks, run the following command in the elevated Command Prompt:
bcdedit /set testsigning off
As mentioned earlier, Driver Signing is an important security mechanism. Once you’ve completed installing the required drivers or troubleshooting, it’s recommended to turn this feature back on.
Conclusion
In conclusion, Driver Signature Enforcement is a critical security feature that protects Windows systems from unauthorized and potentially harmful drivers. While disabling it is not generally recommended, certain situations—like installing legacy drivers—might require temporary deactivation. In this guide by GearUpWindows, we covered multiple ways to turn off Driver Signature Enforcement using the Advanced Boot Menu, Command Prompt, and Test Signing Mode. Always remember to re-enable the feature after completing the necessary tasks to maintain system security and integrity.
Does any of these methods keep the Driver Signature Enforcement disabled after reboot? is there a way to do it?