
Whether you’re using Windows 11 or Windows 10, the mouse is an essential tool for navigating and performing tasks on your desktop. However, it works best when its settings are tailored to your preferences. Some users prefer a faster cursor speed—especially in multi-monitor setups—while others opt for a slower speed to make it easier to control and track the pointer.
Regardless of your preference, Windows 11/10 offers at least three simple ways to adjust mouse speed sensitivity: through the Settings app, Control Panel, or Registry Editor. These options help ensure a more accurate and comfortable user experience.
How to Change Mouse Cursor Speed using Windows 11 Settings?
To adjust or change the mouse speed on Windows 11, use the following steps:-
Step 1. First, open the Settings app.
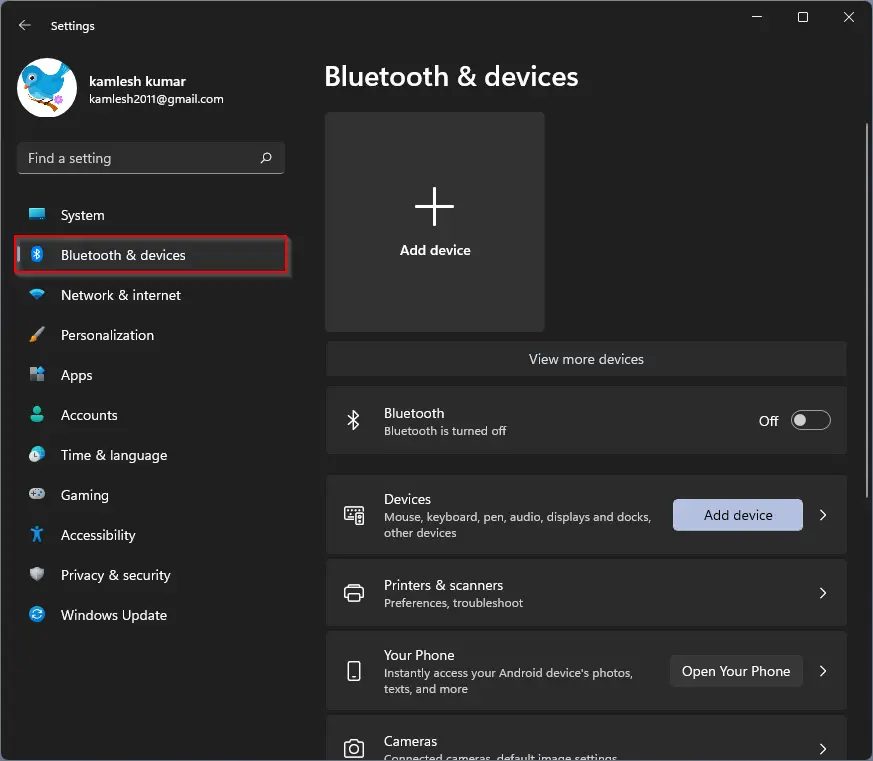
Step 2. Then, select Bluetooth & devices in the left sidebar.
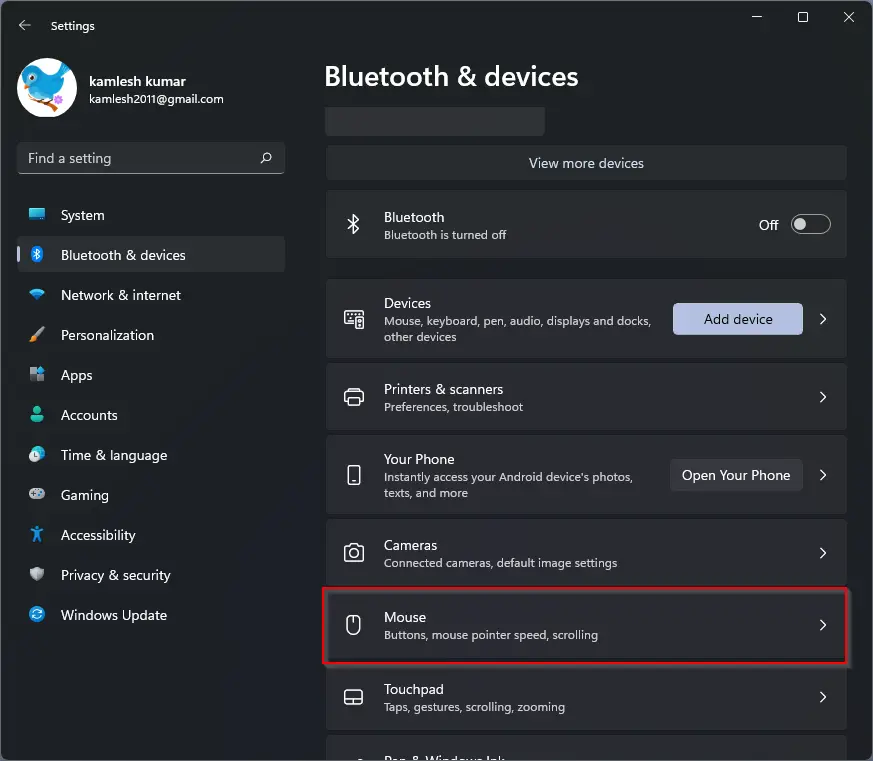
Step 3. After that, click on the Mouse tile on the right side of Bluetooth & devices.
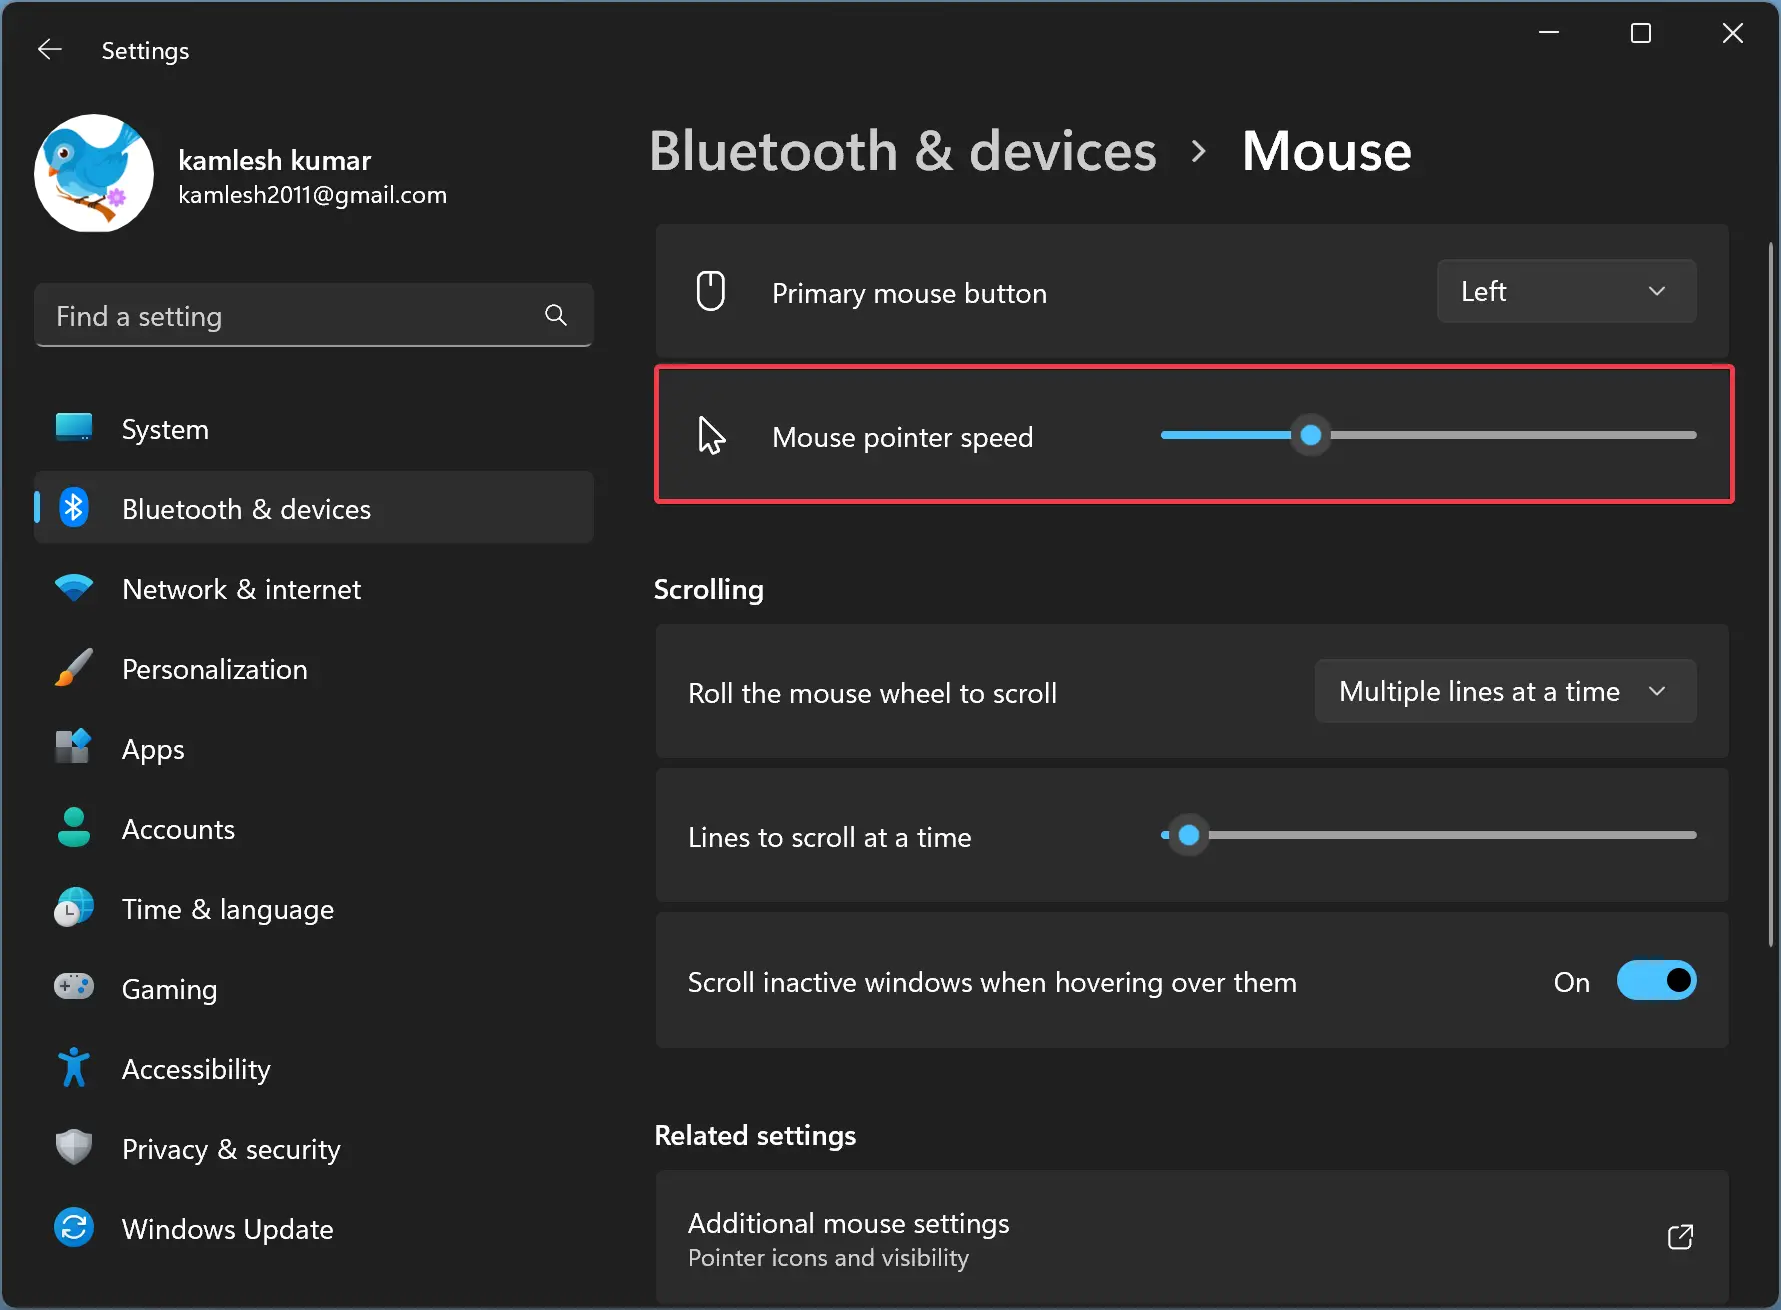
Step 4. Use the slider Mouse pointer speed to increase or decrease the mouse pointer speed on the Mouse settings page.
How to Adjust Mouse Cursor Speed or Sensitivity using Windows 10 Settings?
To change or adjust the Mouse cursor speed through Windows 10 Settings, do the following:-
Step 1. Open the Windows Settings.

Step 2. Then, click on Devices.
Step 3. After that, select Mouse in the left sidebar.
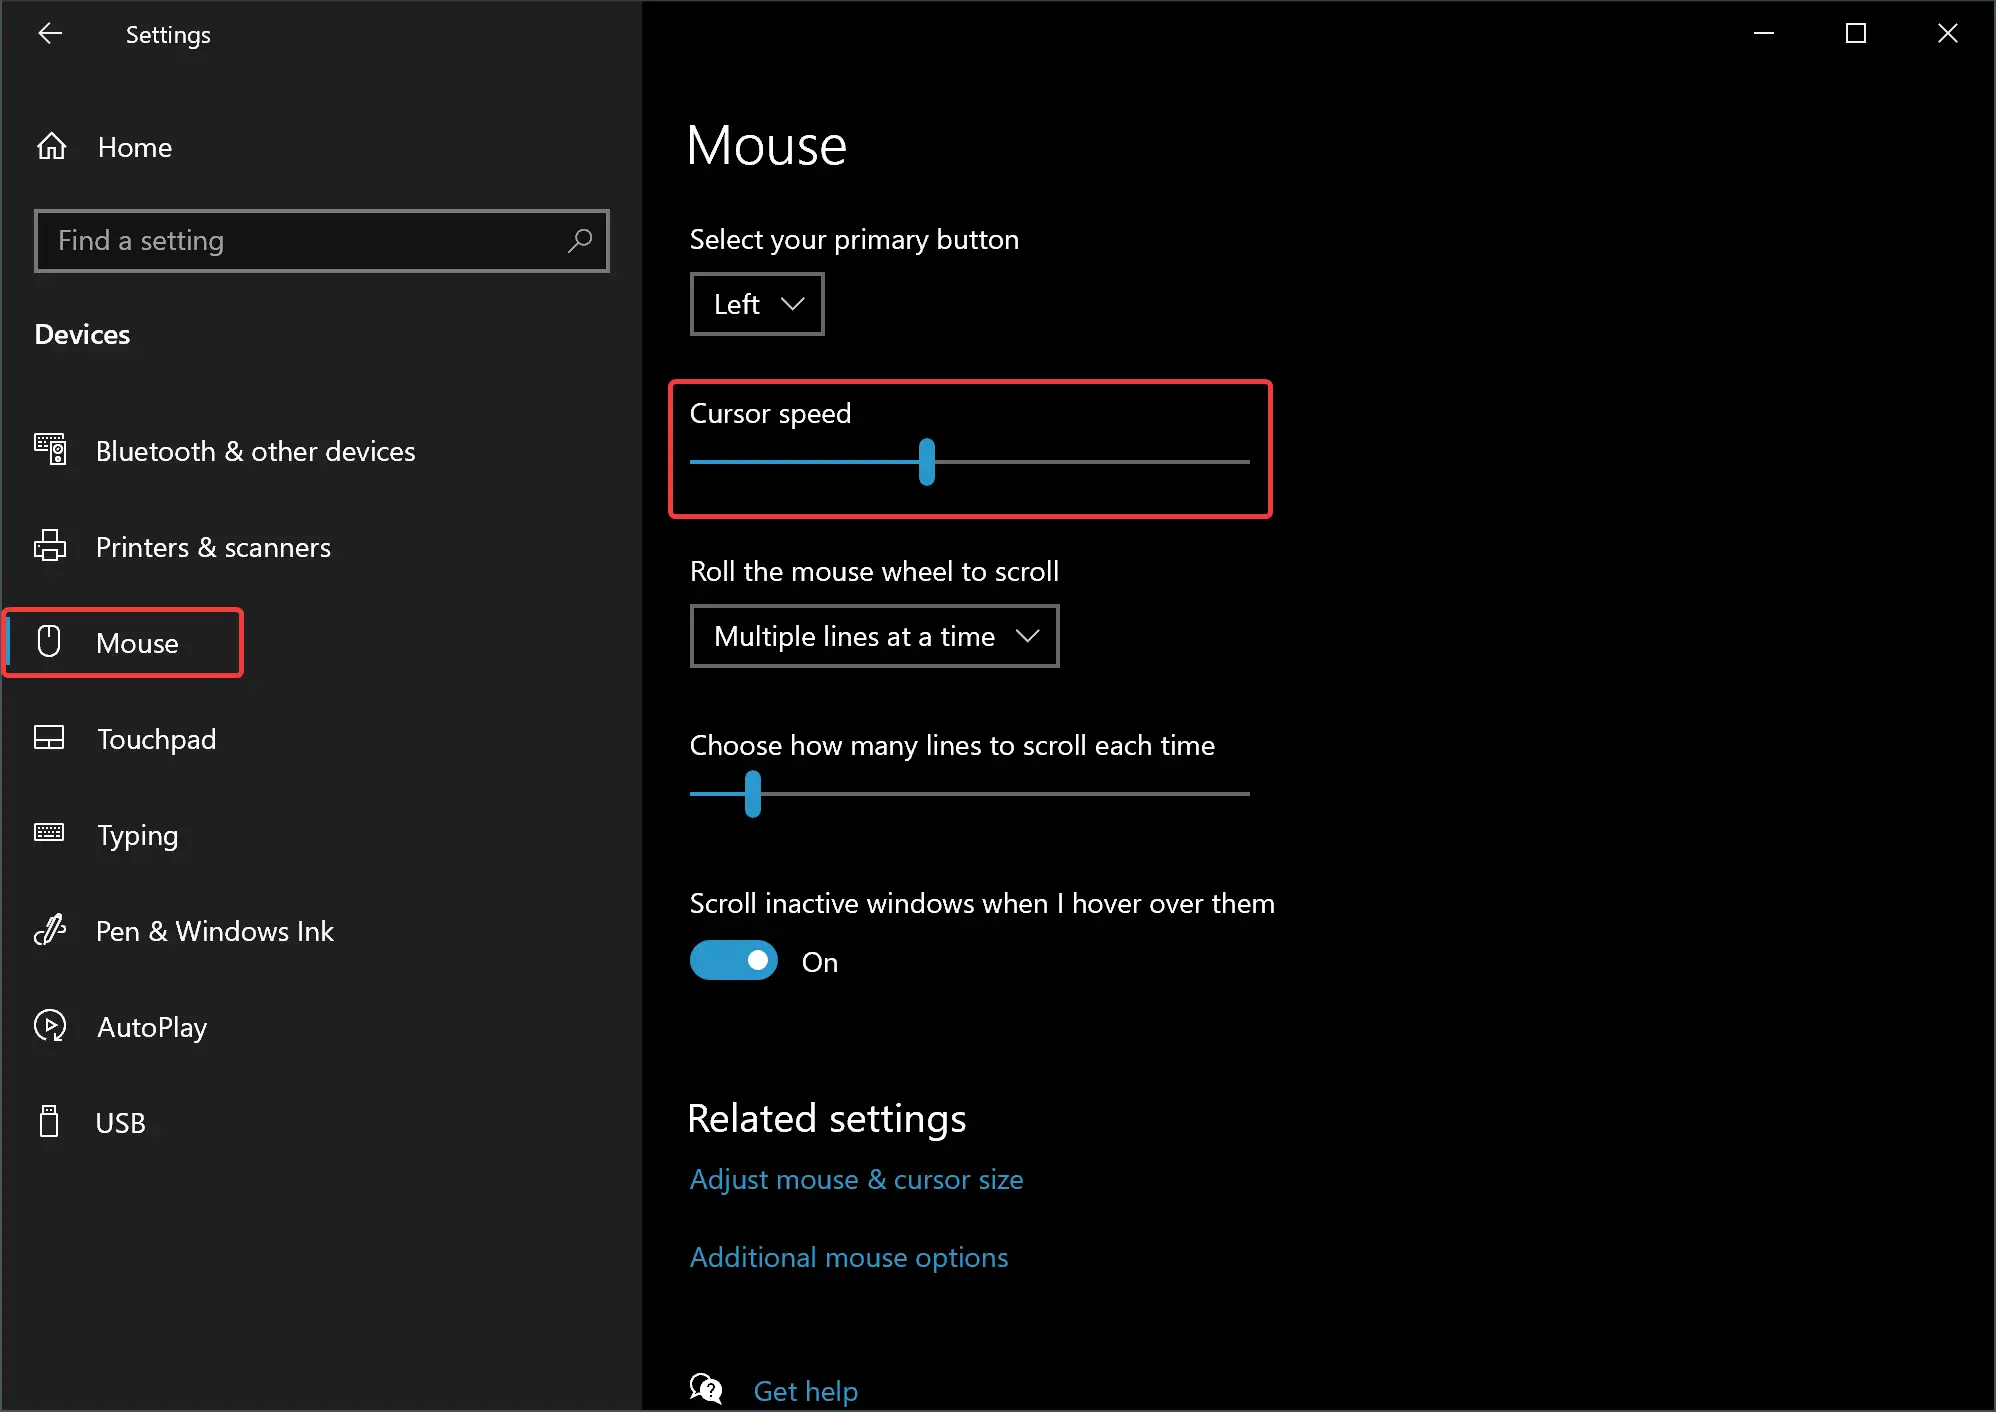
Step 4. On the right sidebar, use the Cursor speed slider to change speed (slow or fast).
How to Change Mouse Pointer Speed Using Control Panel?
The classic Control Panel is still part of Windows 11/10, which allows you to make several changes on your PC. Use the following steps to adjust Mouse Pointer Speed using the Control Panel:-
Step 1. Open the Control Panel.
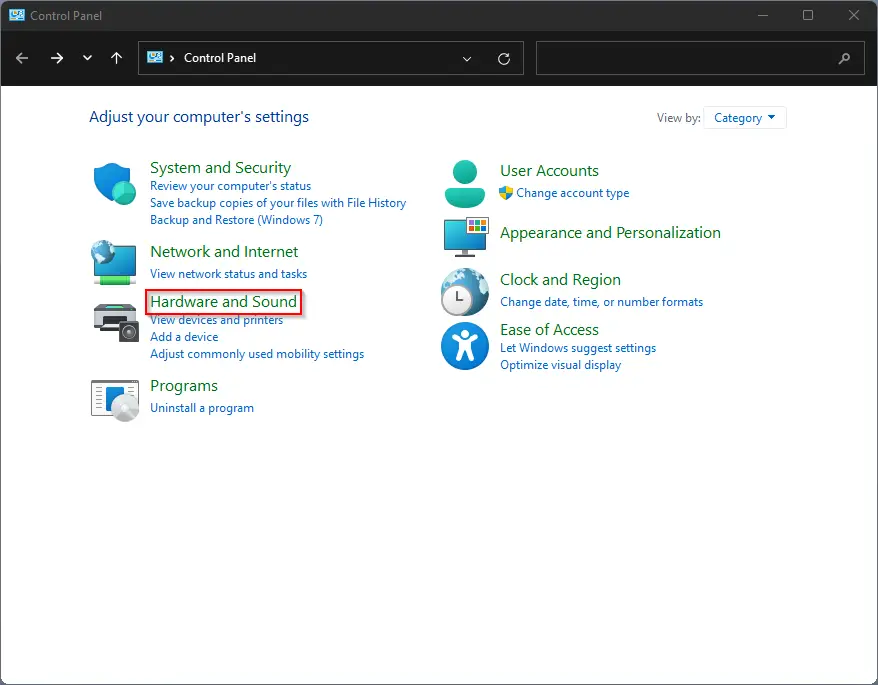
Step 2. Then, click on the Hardware and Sound category.
Step 3. After that, click on Mouse under Devices and Printers.
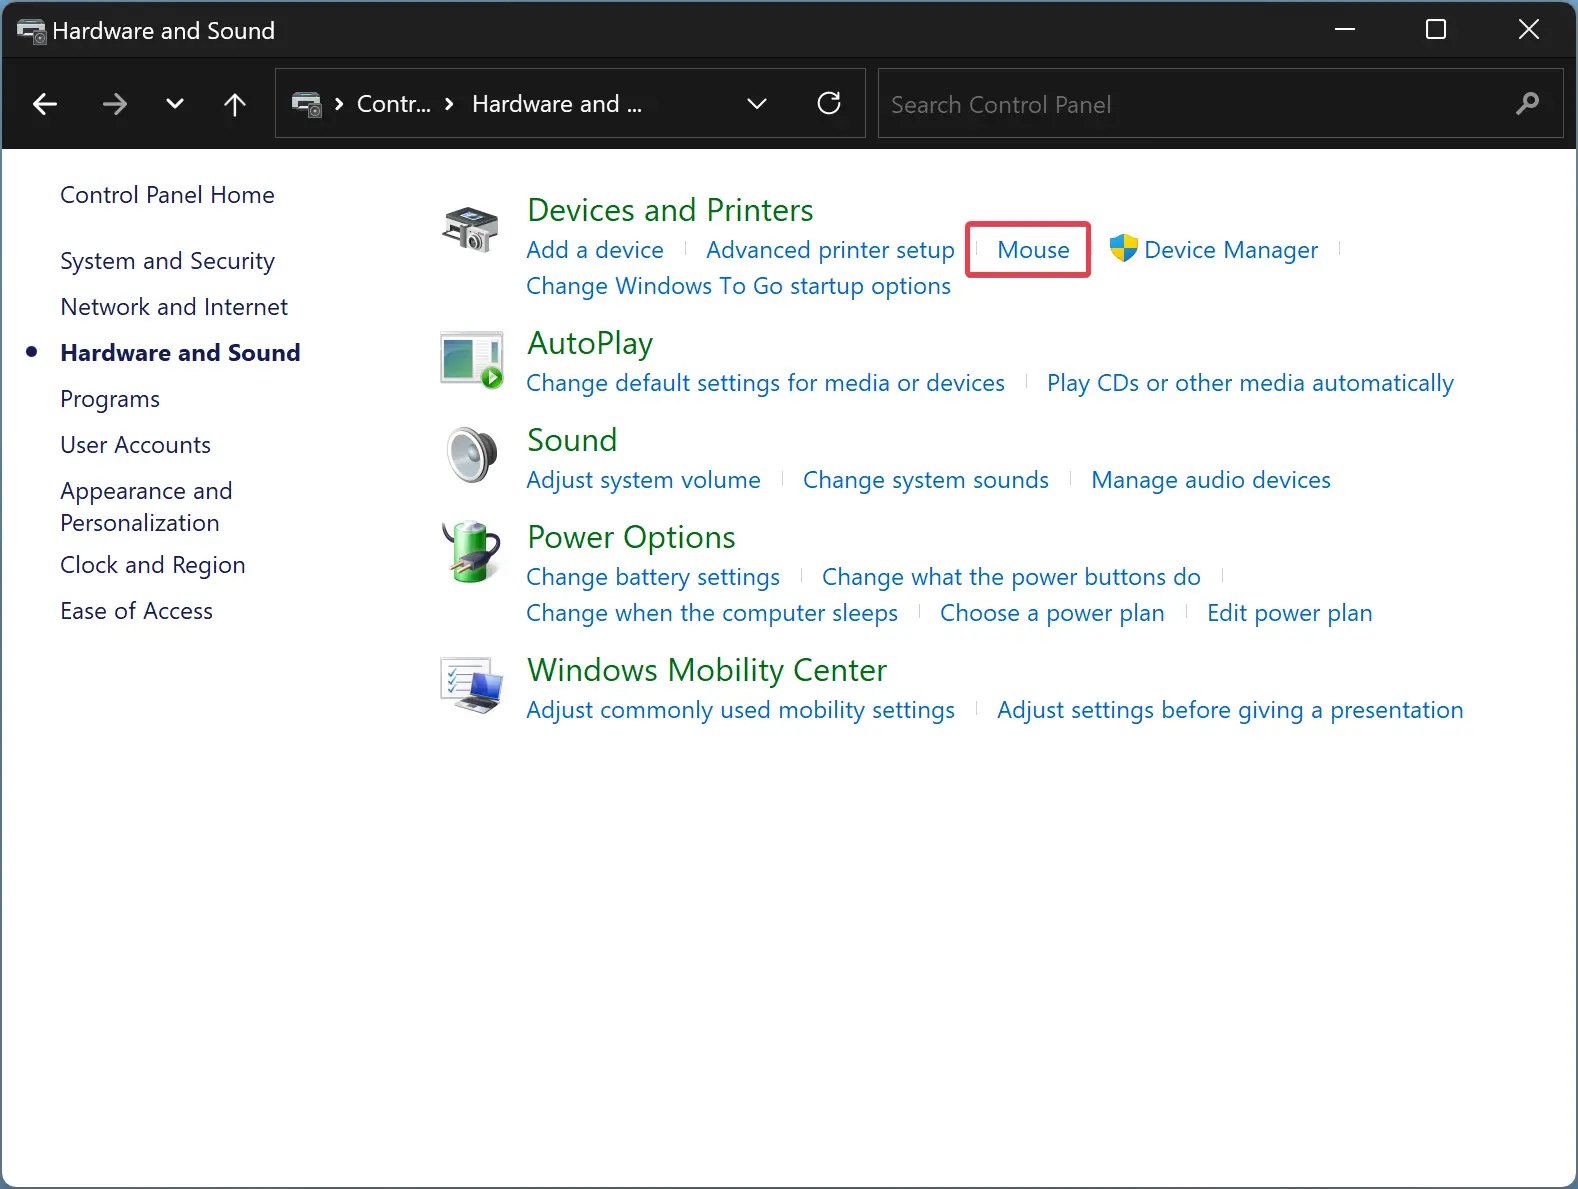
Step 4. When you’re done, the “Mouse Properties” window will appear.
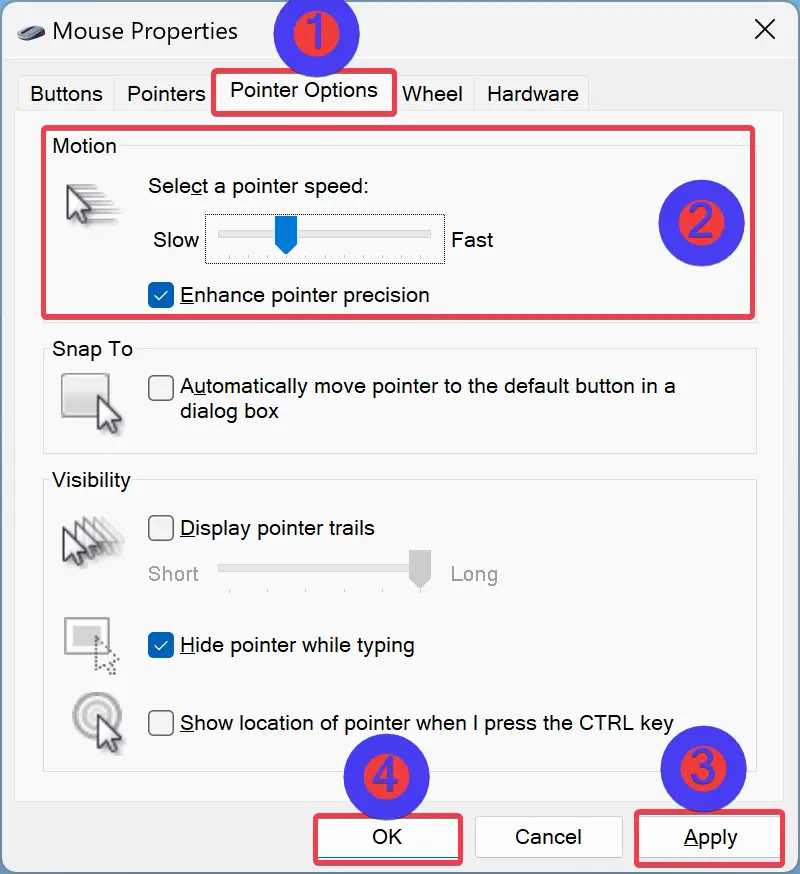
Step 5. Switch to the Pointer Options tab.
Step 6. Under the “Motion” section, use the slider to adjust the pointer speed.
Step 7. Click Apply.
Step 8. Click OK.
How to Change Mouse Pointer Speed using Registry Editor?
You can also adjust the Mouse pointer speed on Windows 11 or 10 PC using the Registry Editor. To do that, use the following steps:-
Step 1. Open the Registry Editor.
Step 2. When Registry Editor opens, navigate to the following path in the left sidebar:-
HKEY_CURRENT_USER\Control Panel\Mouse
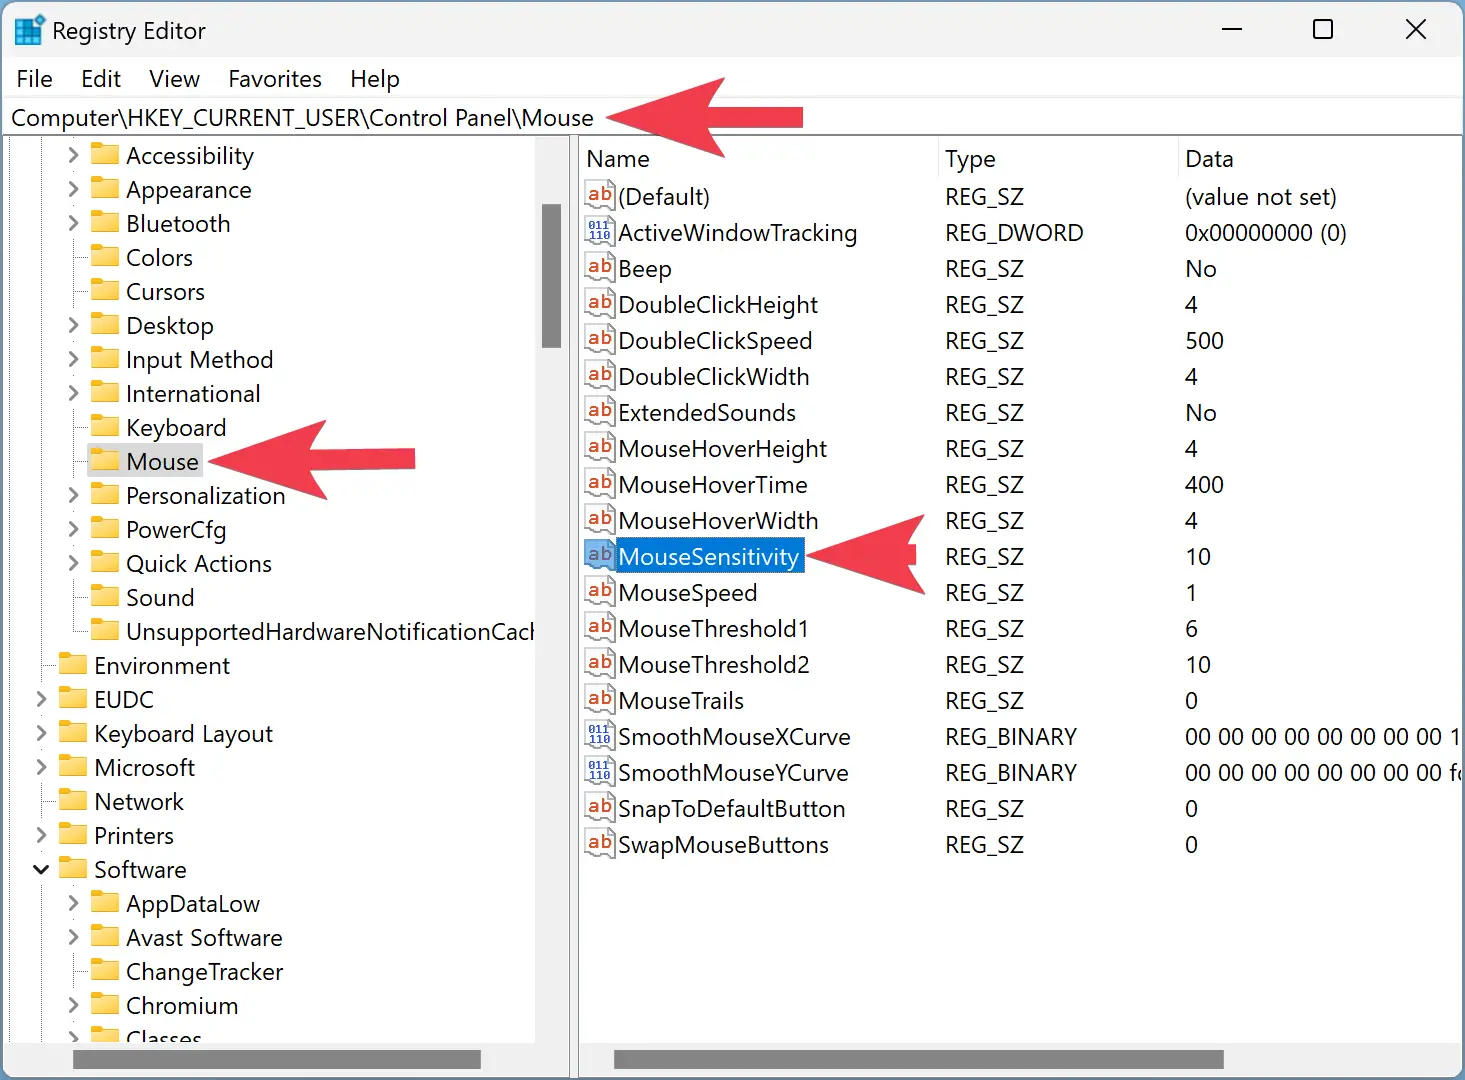
Step 3. On the right side of the Mouse folder, double-click on the MouseSensitivity REG_String.
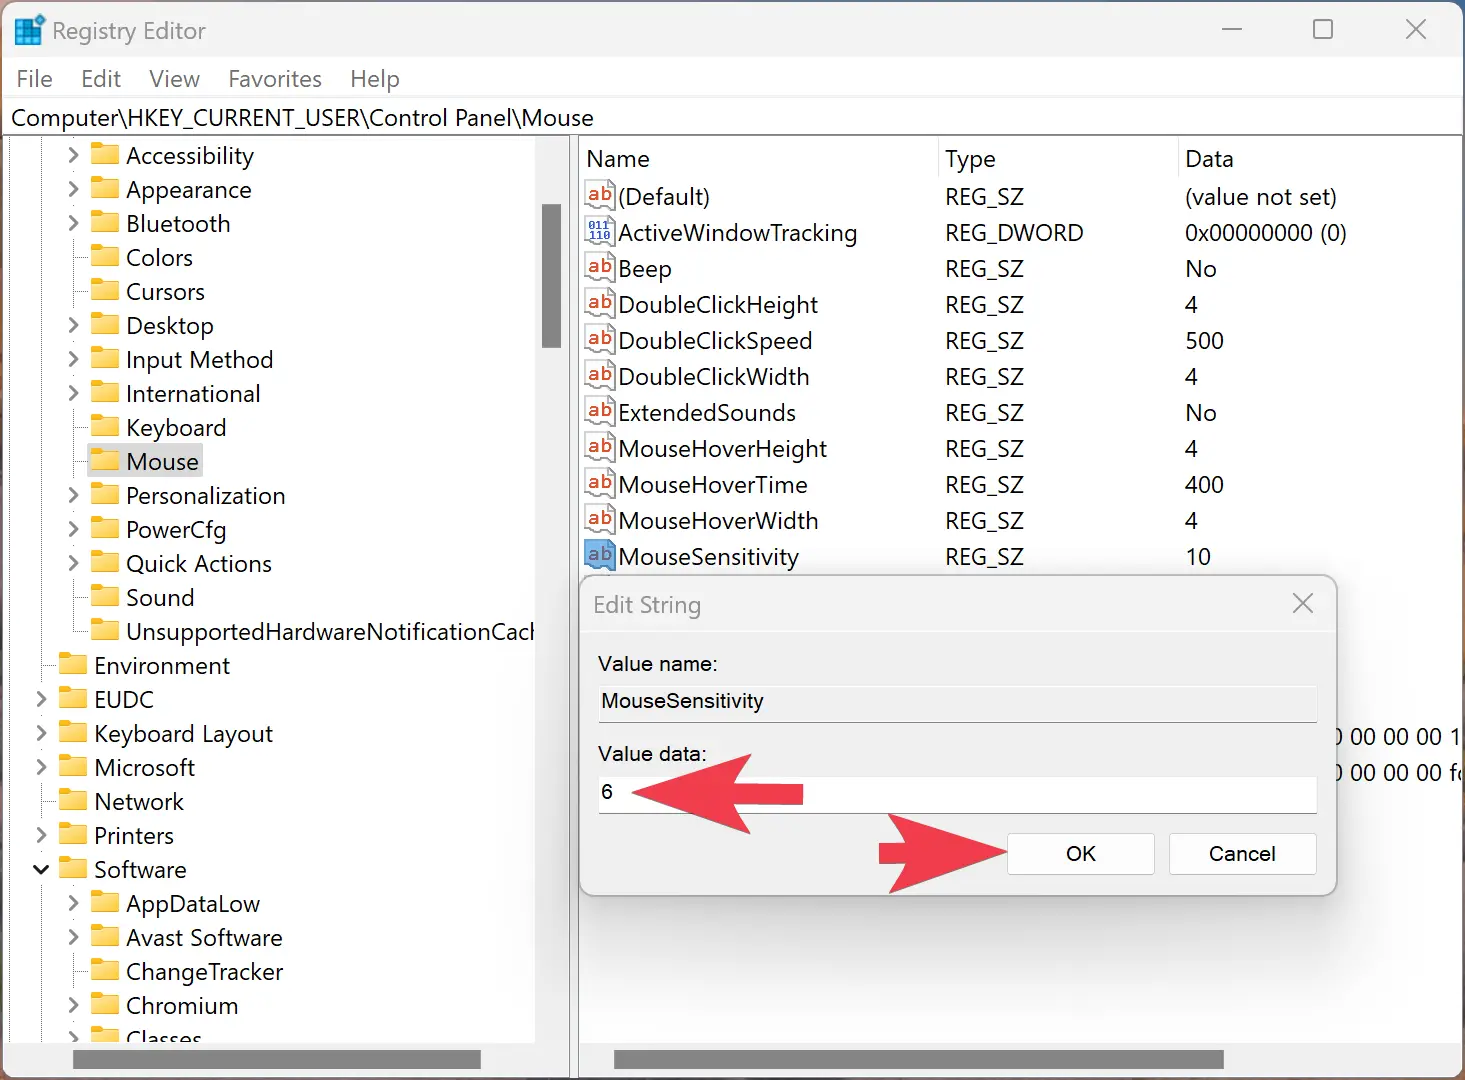
Step 4. Set the “Value data” to any number from 1 to 20 for the desired speed.
Quick Tips: The default value is 10. So, a number below 10 will make the mouse pointer slower, and a higher value than 10 will make it faster. You can set the value to 10 for the default speed.
Step 5. Click OK.
Step 6. Restart your computer.
That’s it.
Conclusion
In conclusion, the mouse is an essential component of the computer that enables users to navigate and interact with the desktop efficiently. Whether using Windows 11 or 10 operating systems, adjusting the mouse speed sensitivity is vital to ensure it meets your requirements. Windows provides users with at least three easy ways to adjust the mouse speed, including using the Settings app, Control Panel, or Registry Editor. By following the steps outlined above, you can quickly adjust the mouse speed to suit your preferences and improve your overall computing experience.