
If you’ve messed up the network adapter settings on your Windows 11 PC and need to reset or reinstall them, this gearupwindows article will guide you through the process. Windows 11 provides a simple way to reset all network adapters—including WiFi and Ethernet—to their default settings. After performing the reset, you’ll need to reconfigure your network adapters from scratch.
Windows 11 offers two quick and effective methods to reset or reinstall all network adapters at once:
- Using the Settings app
- Via Command Prompt
Note: When you reset network adapters using either method, all existing configurations and saved Wi‑Fi passwords will be deleted. You must set up your network again afterward.
How to Reset or Reinstall Wi‑Fi & Ethernet Network Adapters Using the Settings App?
To reset or reinstall network adapters through the Settings app, follow these steps:
Step 1. Open the Settings app.
Step 2. Select the Network & Internet category from Windows Settings.
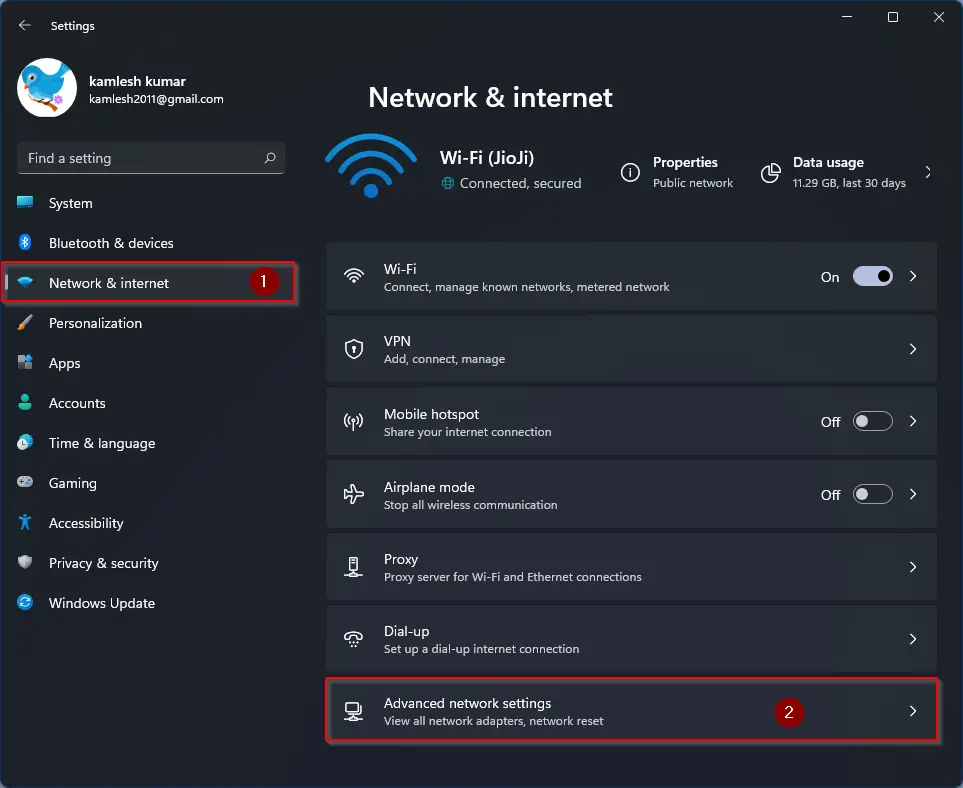
Step 3. On the right side of Network & Internet, click Advanced network settings.
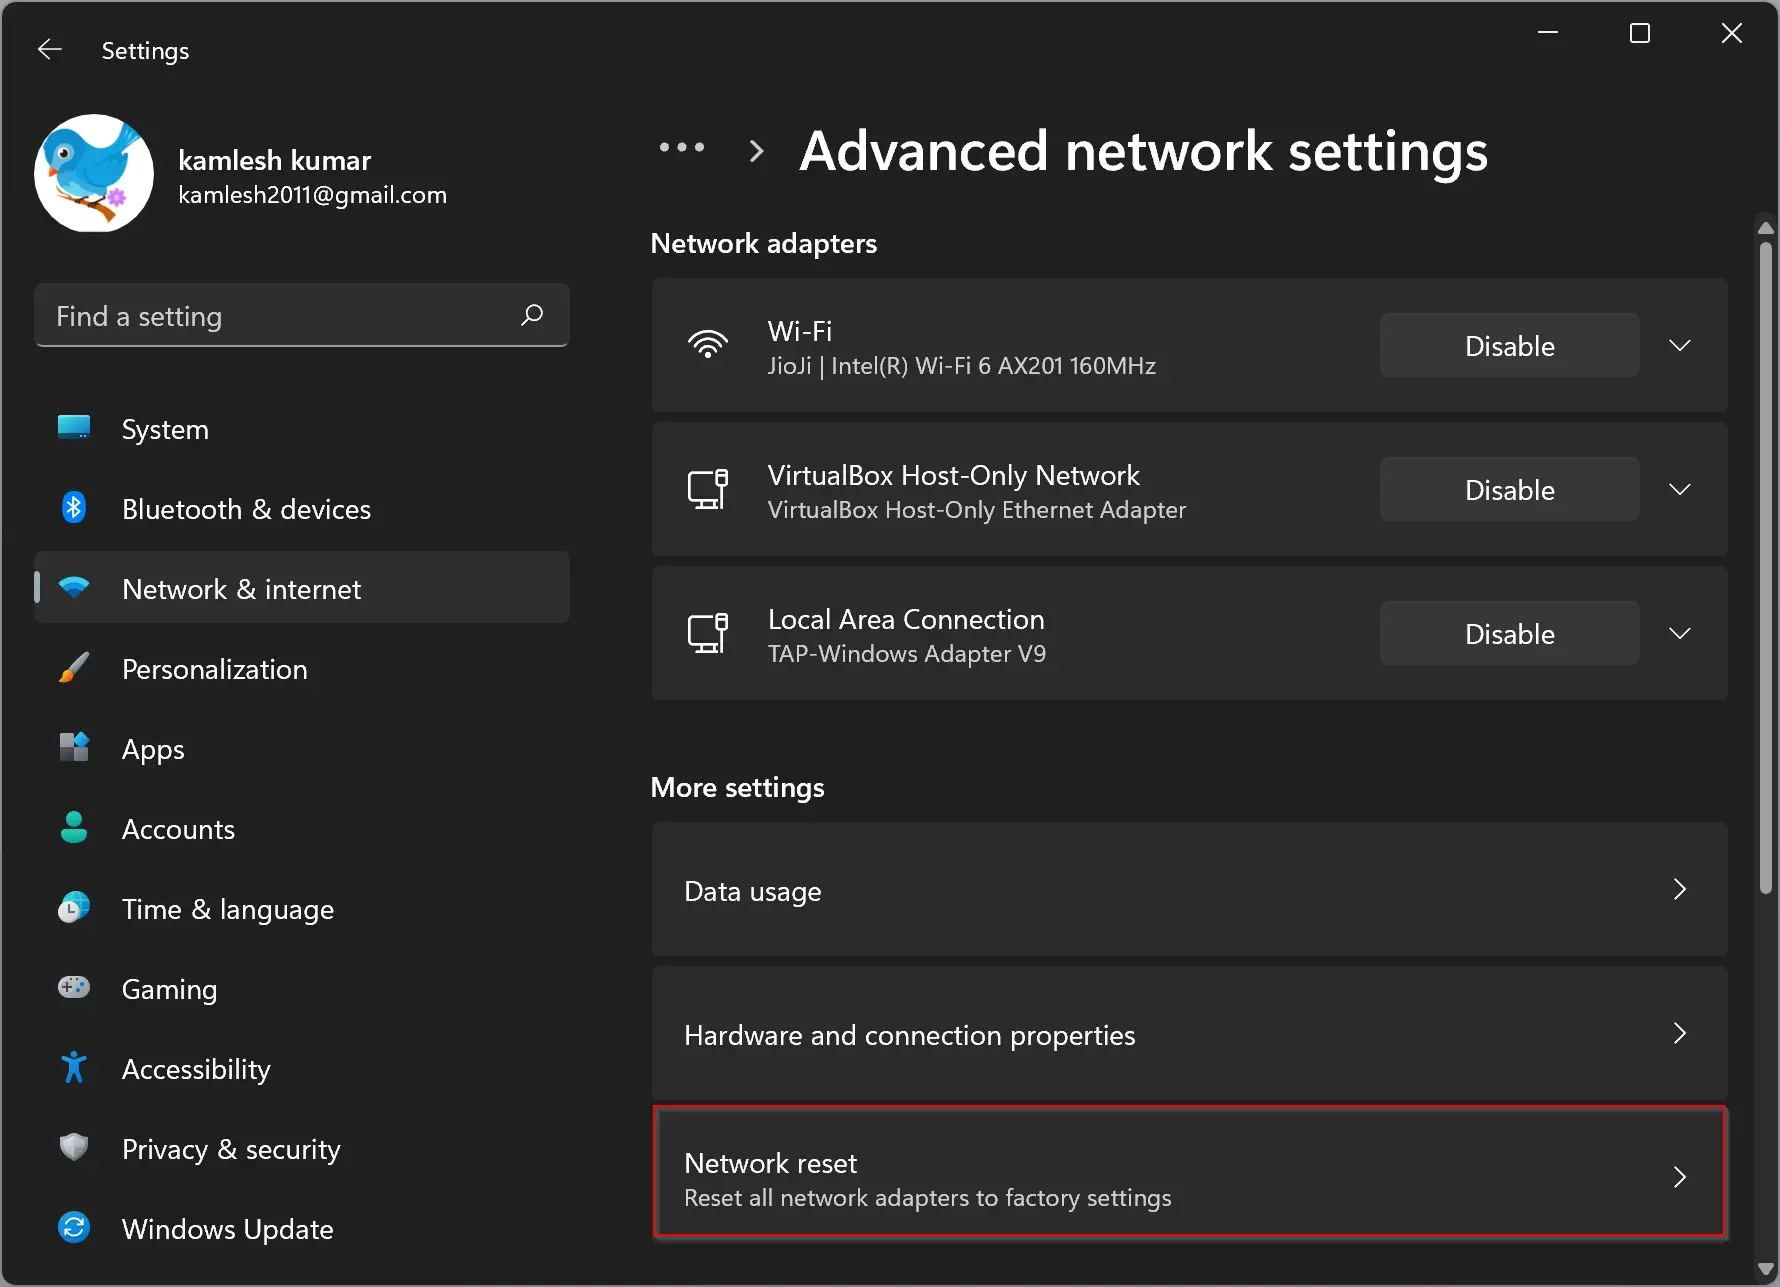
Step 4. Under More settings, select the Network reset option.
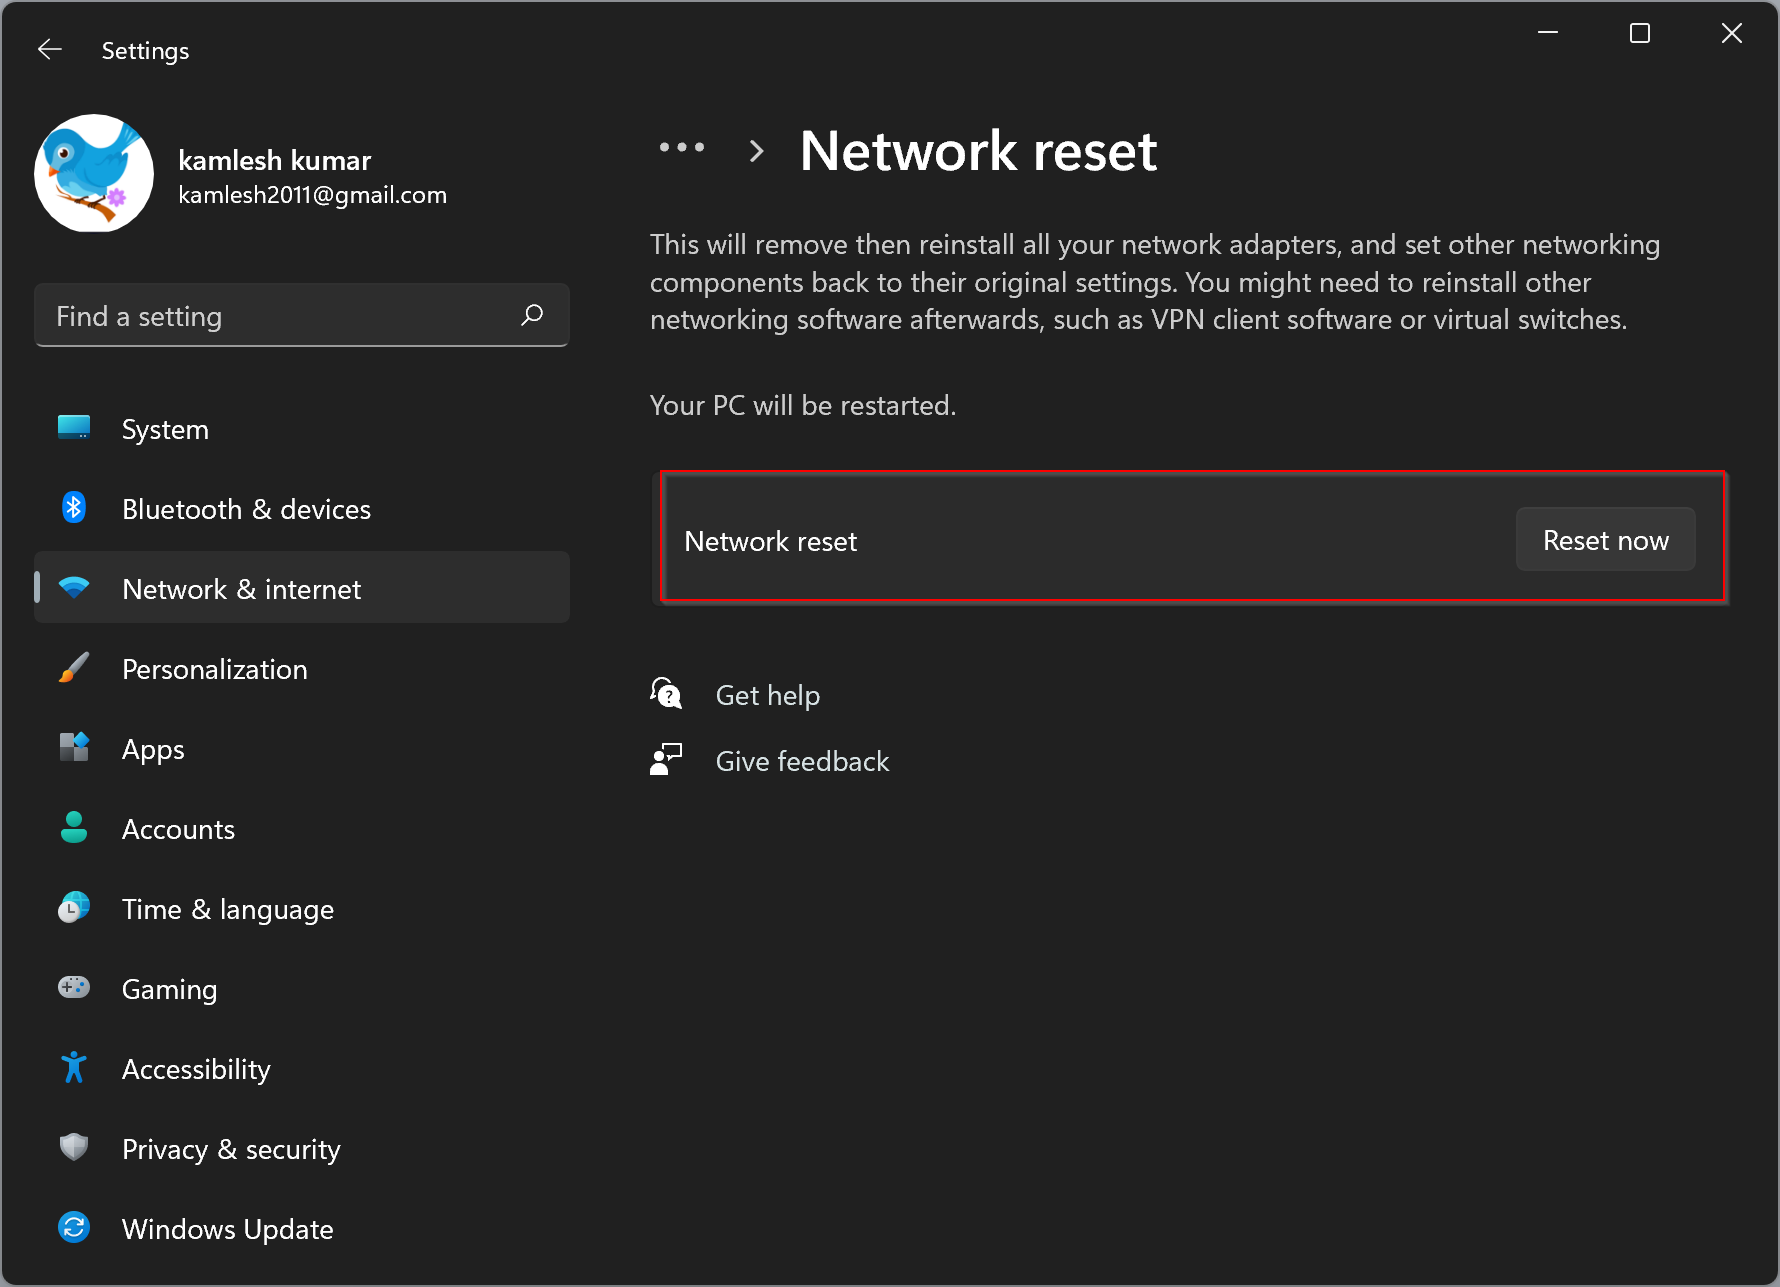
Step 5. Click the Reset now button next to the Network reset section.
Step 6. In the pop-up window, click Yes.
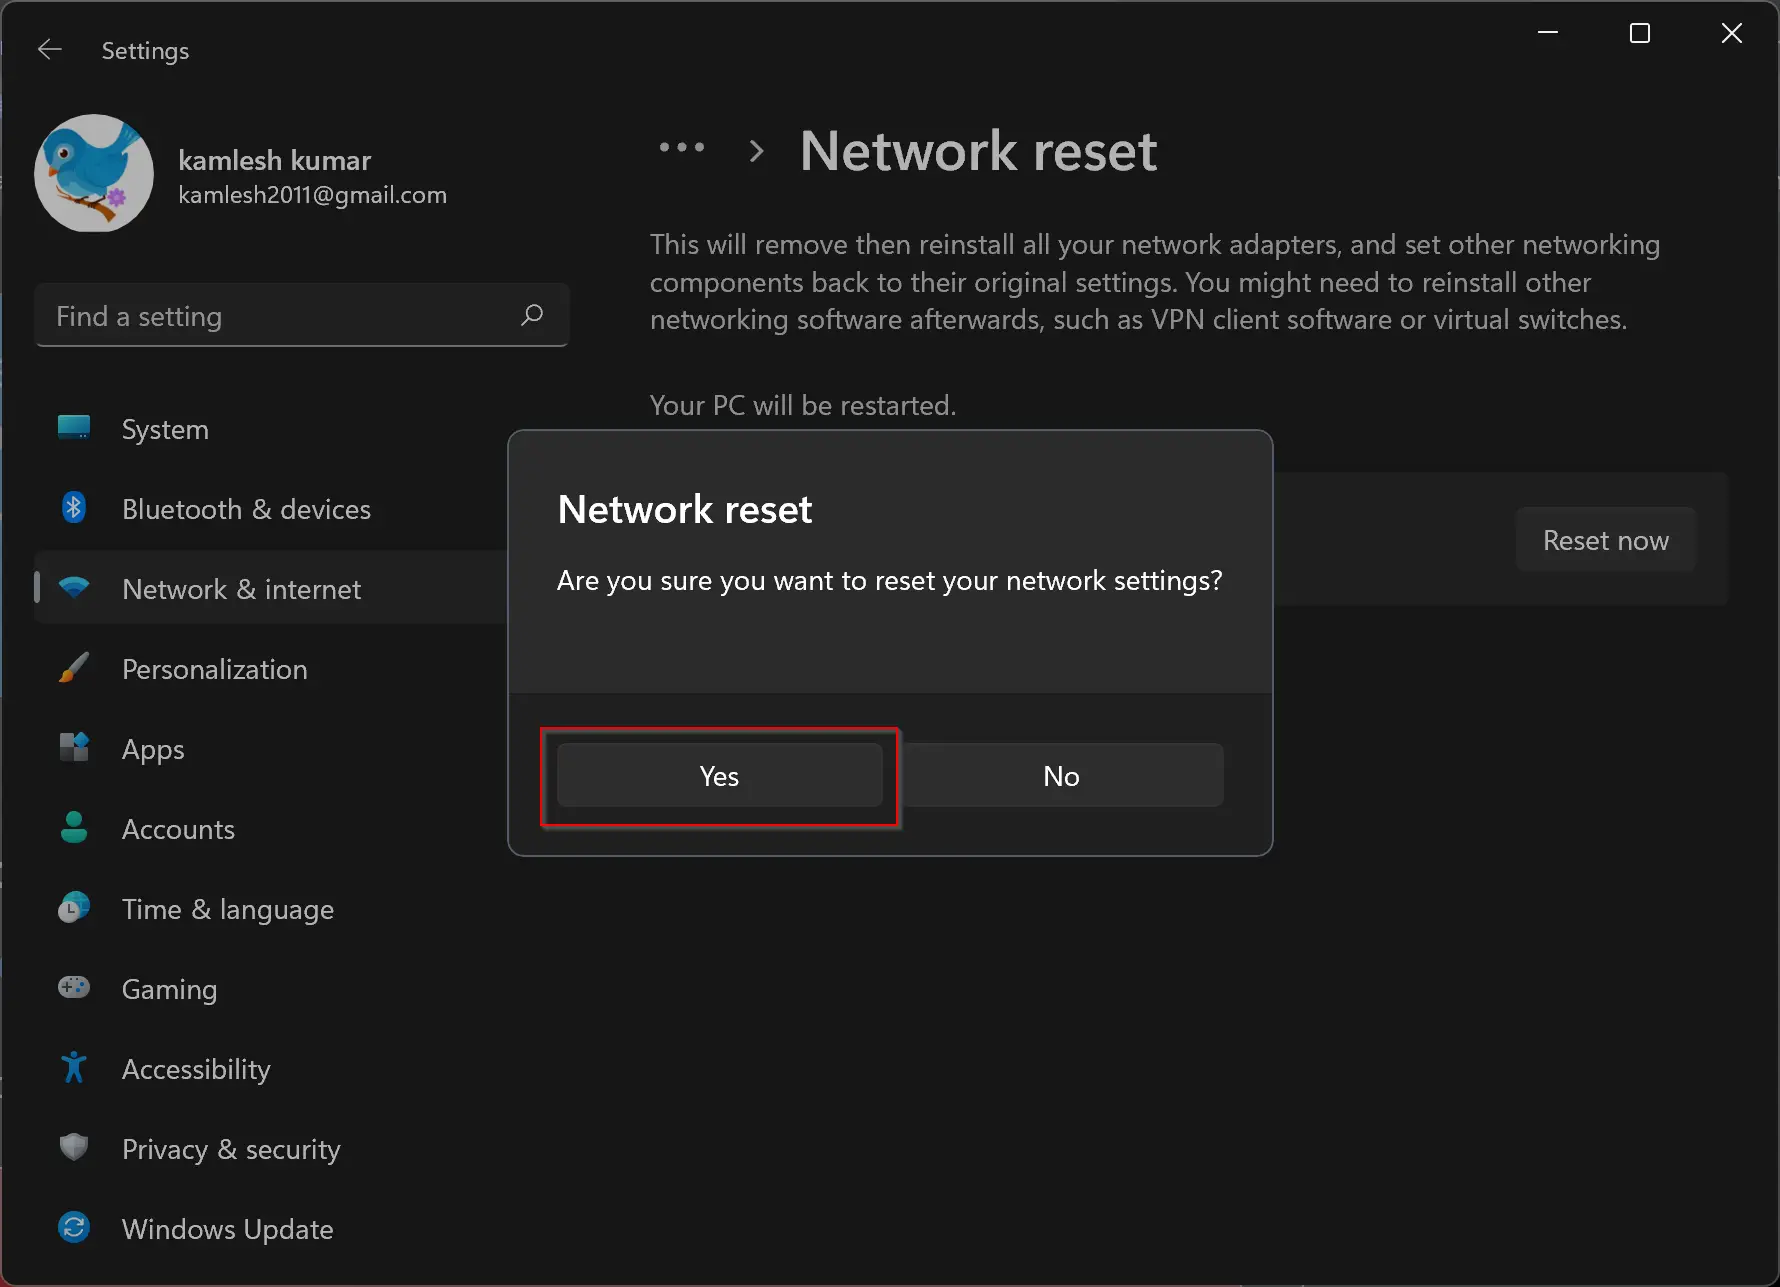
After this, your PC will restart and begin resetting the Wi‑Fi and Ethernet network adapters.
How to Reset or Reinstall Network Adapter in Windows 11 Through Command Prompt?
To reset or reinstall network adapters using Command Prompt, follow these steps:
Step 1. Open the elevated Command Prompt.
Step 2. At the prompt, type the following command and press Enter:
netcfg -d
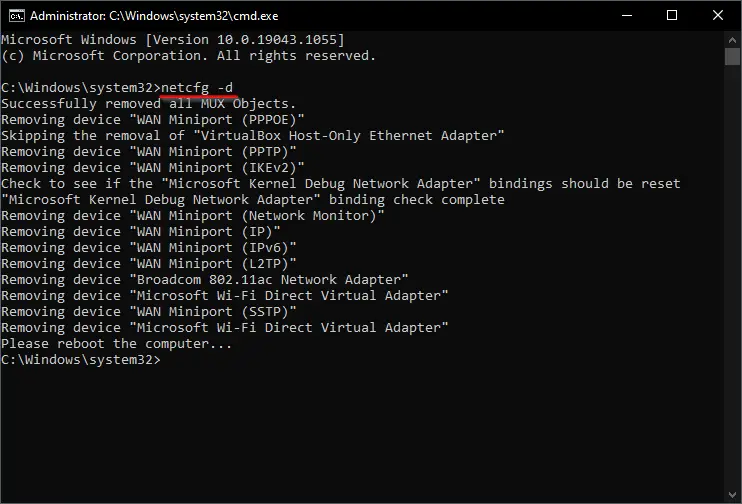
This command removes all network adapters, including Wi‑Fi, Ethernet, and any virtual adapters.
Step 3. Restart your computer.
Windows 11 will automatically reinstall the default drivers for your network adapters. If that doesn’t happen, consider using a tool like IObit Driver Booster to update drivers manually, or visit your device manufacturer’s website.
Need to Re‑enable or Disable Specific Network Adapters?
If you only need to enable or disable a specific adapter, check this guide: How to Enable or Disable Wi‑Fi or Ethernet Adapter on Windows 11.
Need to Set a Static IP After Reset?
Learn how to assign a static IP address in this detailed tutorial: How to Set a Static IP Address on Windows 11.
Conclusion
Resetting or reinstalling network adapters in Windows 11 is a reliable way to fix connectivity issues. While it deletes saved Wi‑Fi passwords and custom settings, it restores adapters to their default state. You can use either the Settings app or Command Prompt method. Afterward, remember to:
- Reconfigure your network manually
- Install any missing drivers (via manufacturer or driver tools)
- Re-enable or disable specific adapters if needed
- Optionally assign a static IP address using our guide above
Good luck, and feel free to explore our other networking articles for more help!