
Taking a screenshot of Windows 10 is an entirely easy process. You can use the Prt Sc (Print Screen) keyboard button or the Snipping Tool application to take a screenshot of the desired area. The latest version of Microsoft Word also comes with a built-in option that helps you take a screenshot. Those who are already working on a Word document and want to add a screenshot may find this feature useful.
How to use Microsoft Word’s built-in Screenshot tool?
Step 1. Open up a Microsoft Word document on which you want to insert a screenshot.
Step 2. Click the Insert tab on the ribbon and then select the Screenshot button.
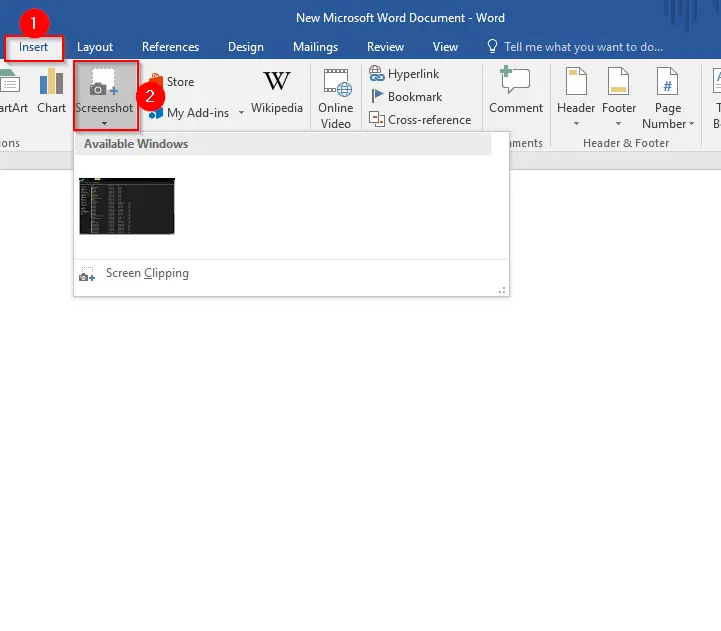
Step 3. You will see a thumbnail image of every Window you have open at the moment. You can click one of the thumbnails to take a screenshot and automatically insert it into your Word document.

Step 4. If you would like to capture a specific reason or area on the screen instead of an active window, click the Screen Clipping command instead of a thumbnail on that Screenshot drop-down menu.
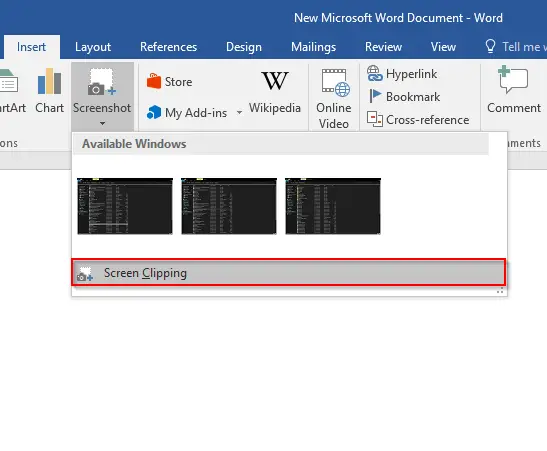
Step 5. Now, the entire screen will dim, and you can draw a rectangle to capture the portion you want to insert in a Microsoft Word document.
Conclusion
Taking a screenshot in Windows 10 is a simple and straightforward process. You can use the Prt Sc (Print Screen) keyboard key or the built-in Snipping Tool to capture any part of your screen quickly. Additionally, Microsoft Word includes its own screenshot feature, allowing you to capture and insert images directly into your document without leaving the app. This integrated tool is especially handy for users who are already editing or creating a document and need to add visual references instantly.
Also Read: