
BitLocker is a handy feature of Windows 11 Pro and Enterprise Edition, but it is not a part of Windows 11 Home. But if you need to, you can still protect your drive using “Device Encryption” technology.
Device encryption helps protect your data, and it’s available on a wide range of Windows devices. If you turn on device encryption, the data on your device can only be accessed by people who’ve been authorized.
Typically, when you need to access your data, you need to log in to your Windows 11. That means your necessary data is protected behind a login screen. But if somebody wants to bypass those Windows protections, they could open the computer case and remove the physical hard drive. Then, by adding your hard drive as a second drive on a machine, they control it. In such a situation, they may be able to access your data without needing your credentials.
In this gearupwindows article, we will guide you in enabling and disabling device encryption on Windows 11.
What are the Requirements for Device Encryption?
To be able to use the Device Encryption feature on Windows 11, the following hardware is required:-
- Trusted Platform Module (TPM) version 2.0 with support for Modern Standby.
- TPM must be enabled on UEFI.
- Unified Extensible Firmware Interface (UEFI) firmware.
How to Check if My Device Supports Device Encryption?
To know if your laptop or desktop meets the requirements for device encryption, use these steps:-
Step 1. Click the Search button on the taskbar and type System Information.

Step 2. Right-click the System Information app and select the Run as administrator option.
Step 3. Select the System Summary branch from the left sidebar when the System Information window opens.
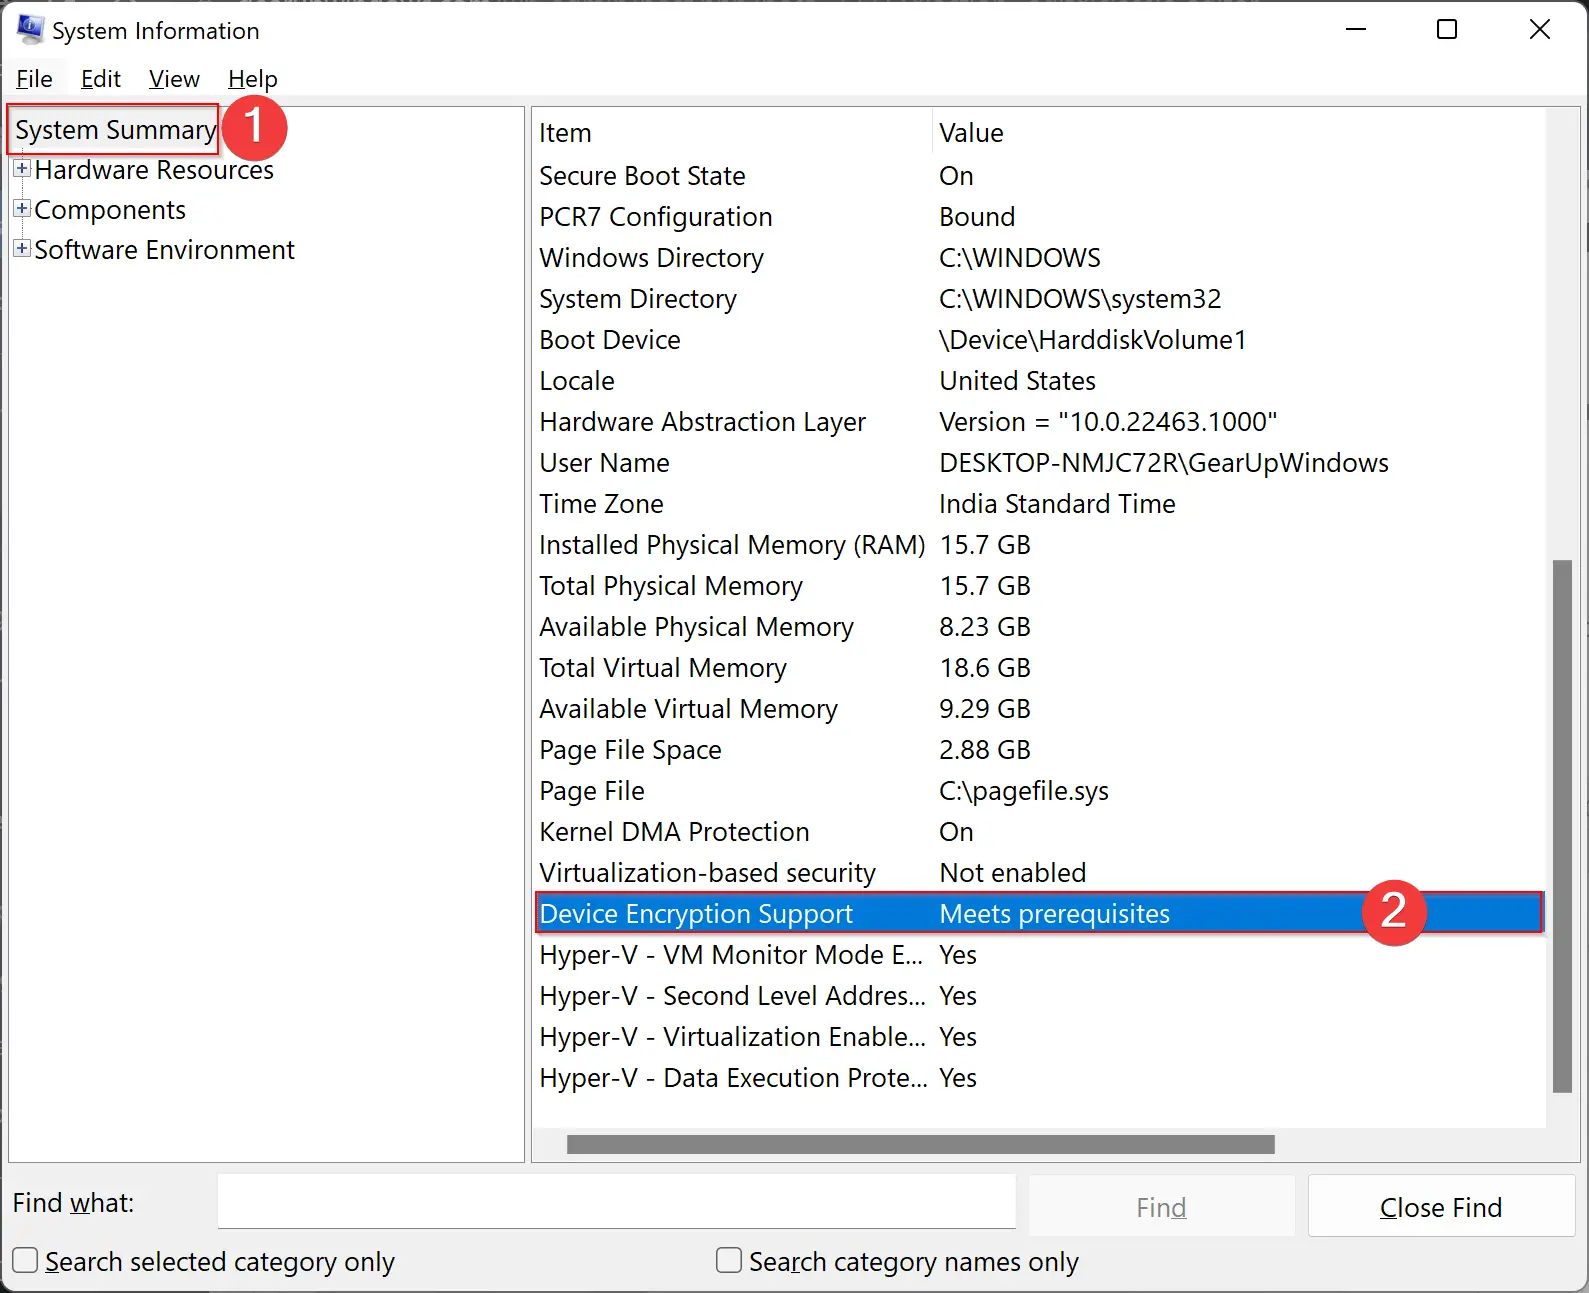
Step 4. Then scroll down to the right side pane and look for the “Device Encryption Support” entry. If it reads “Meets prerequisites,” then your computer supports Device Encryption.
How to Turn On or Off Device Encryption on Windows 11 Settings?
Follow these steps to enable or disable Device Encryption on Windows 11:-
Step 1. Open the Settings app by pressing the Windows + I keys on the keyboard.
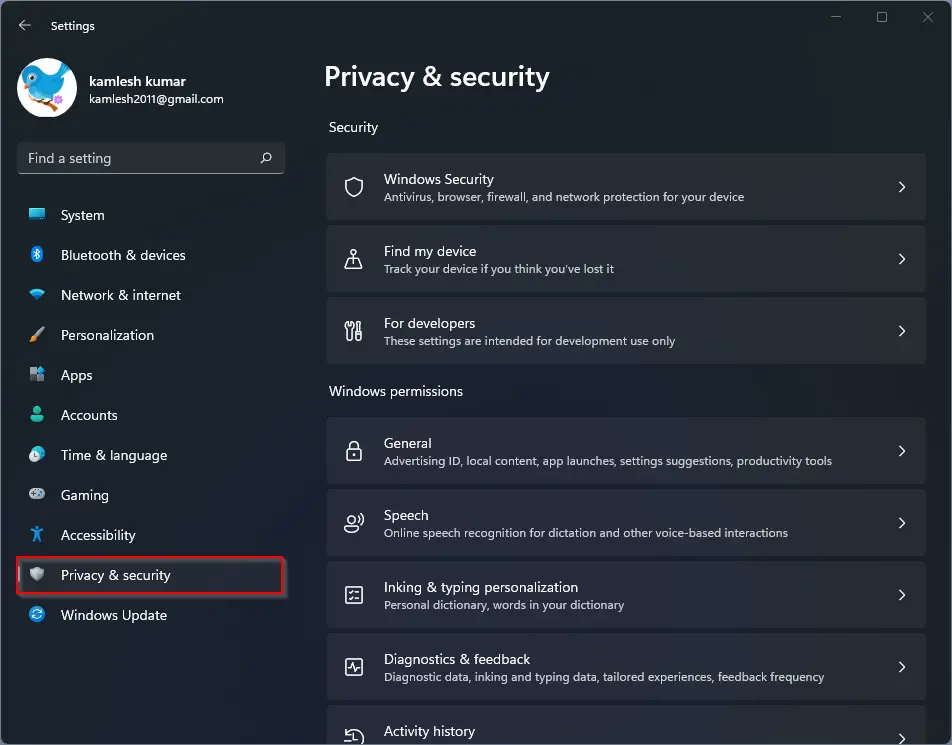
Step 2. When Windows Settings opens, select Privacy & Security from the left sidebar.
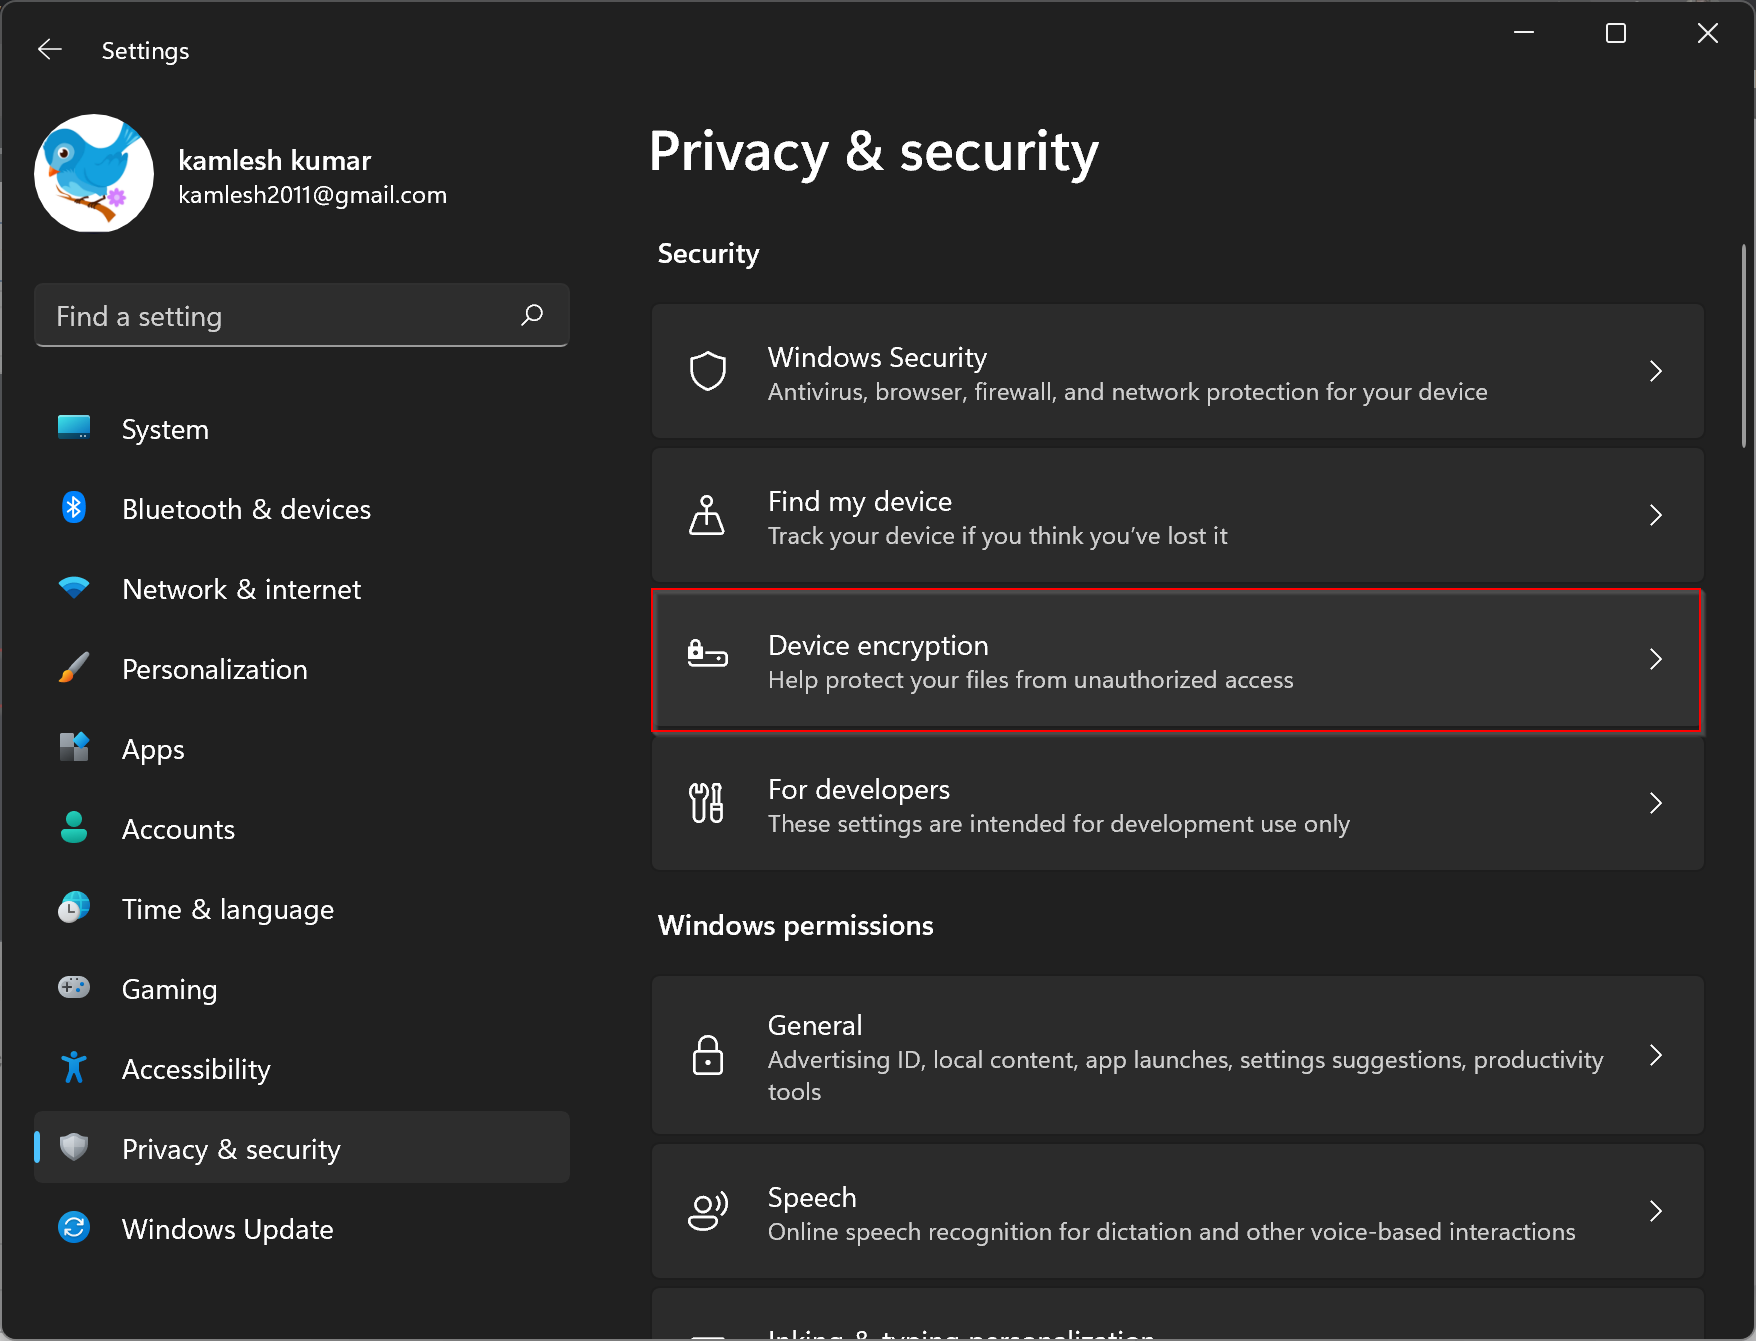
Step 3. On the right sidebar, click Device encryption.
Step 4. In the Device encryption settings page, turn on the toggle switch beside Device encryption.
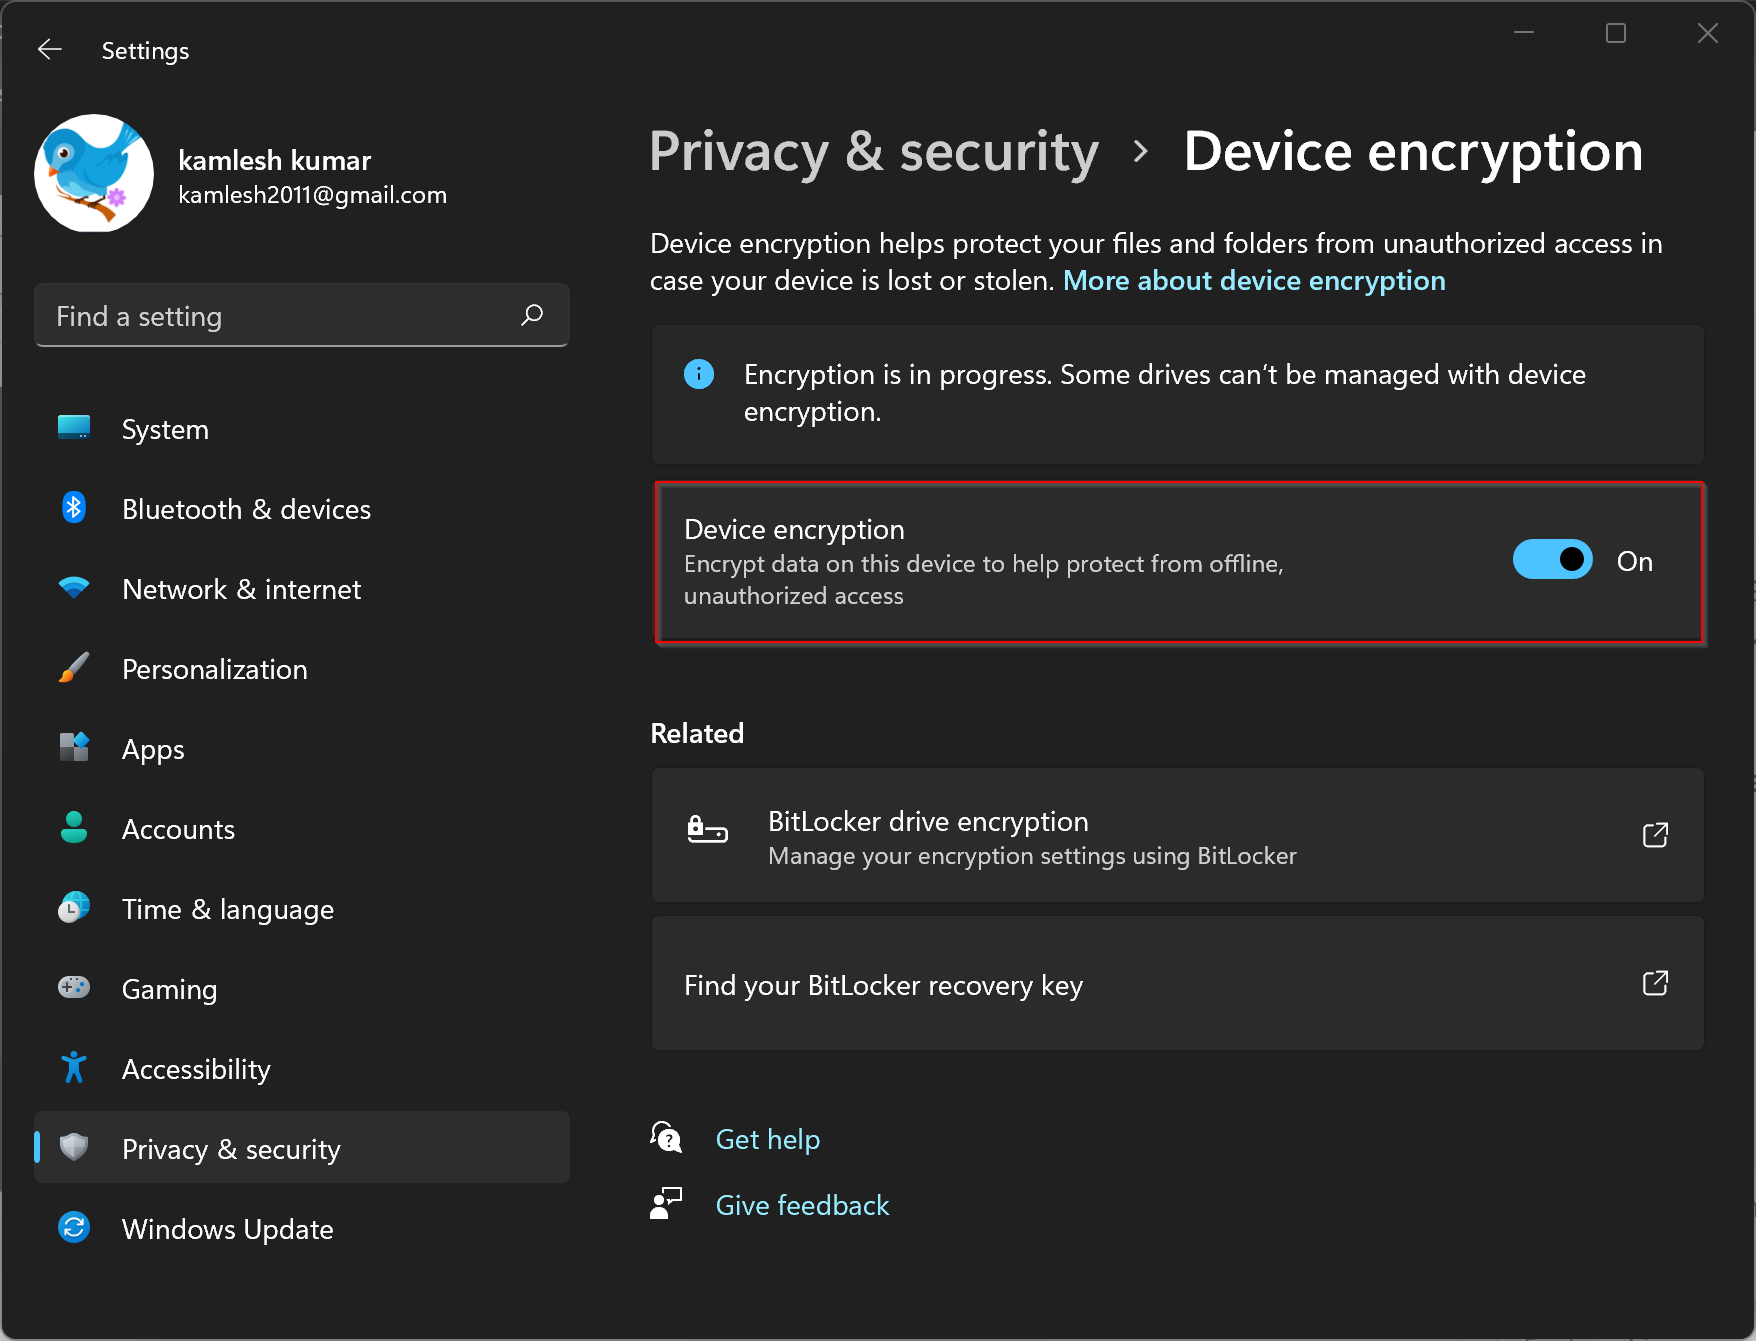
Once you complete the above steps, Windows 11 will turn on encryption for all the files stored on your computer.
In the future, if you want to turn off the device encryption on your computer, in step 4 above, turn off the toggle switch beside the Device encryption option.
Conclusion
In conclusion, device encryption is a crucial feature that helps secure your data on Windows 11 Pro and Enterprise Edition. However, it is not available on Windows 11 Home. If you want to ensure that only authorized persons can access your data, you can turn on device encryption, provided your computer meets the requirements for it. This article has provided step-by-step instructions on how to check if your device supports device encryption and how to turn on or turn off the feature on Windows 11. With this knowledge, you can protect your data from unauthorized access and keep it safe.
So where is the key and how do I find it if my system fails?
Dear Gil,
You need to setup BitLocker https://gearupwindows.com/how-to-password-protect-usb-thumb-drives-in-windows-11/